WHR
Aberglaslyn to Nantmor
area page
V4.8 updated 2/7/07
New images on this page updated 28/6/07
Click here for start of new images
Click here for Laurence Armstrong's latest WHR Middle map
Click here for JC Sreeves latest Aberglaslyn Tunnels Map
Click here for Steve Harris' Phase 4 gradient profiles
Click here for Steve Harris' Phase 4 TWA maps
Click here for Chainages and OS Map References
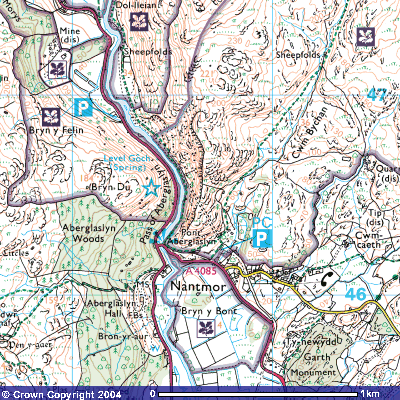
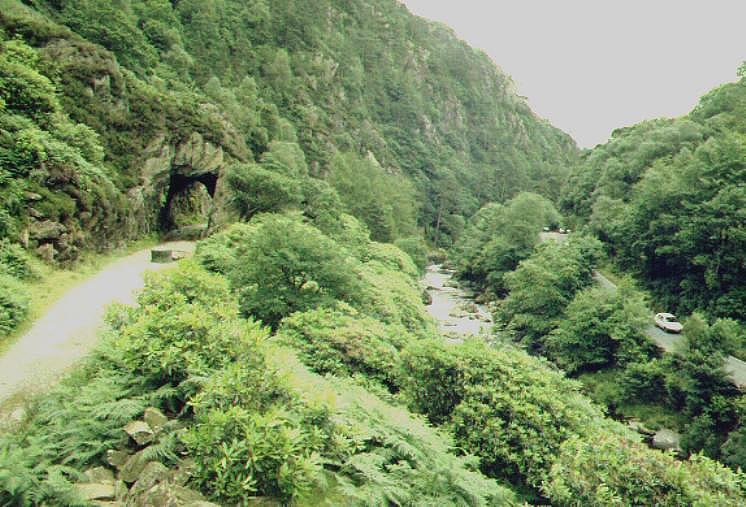
Map of Aberglaslyn Pass
The above OS map (largest scale available) shows the route through the Aberglaslyn Pass from Bryn-y-felin bridge to south of Nantmor. Click on the image to enlarge. Image produced from the Ordnance Survey Get-a-map service. Image reproduced with kind permission of Ordnance Survey and Ordnance Survey of Northern Ireland.
Click here to use the free OS Get-a-map service
Aberglaslyn Pass Works 2000-2001
The Aberglaslyn Works were required by a special clause added at the last minute to the T&W Order that permits the railway to be rebuilt. Before any works could take place in the Snowdonia National Park south of Betws Garmon (Bryn Gloch Caravan site), the WHLR had to complete the work through the three tunnels. The necessity for the preliminary work was brought about by objectors claiming that the rock face above the railway posed a danger. However, there have been no recorded major rock falls in the history of the line.
John Prescott (in his role as Minister of Transport and the Regions) judged that the expense of the work might jeopardise the completion of the railway and, as a permanent terminus would not be allowed in the National Park, the WHLR had to complete these works first.
Advance Works completed
With work essentially finished at the end of February 2001, the WHLR signed off the work in the first week March and asked the Snowdonia National Park Authority to examine the works and give permission for work within the park to begin.
Although the SNPA planned a site meeting on 7/3/01, this was called off by the emergence of Foot & Mouth Disease (F&M) restrictions following the outbreak in early 2001. The meeting was rescheduled for 4/4/01, when approval was received for the Aberglaslyn Works and detailed permission for the works between Bryn Gloch (the SNP boundary) and Rhyd Ddu. However, the WHLR announced on the same day that it would not proceed south of Bryn Gloch until it was clear there was no risk of spreading F&M to the Gwyrfai valley.
Work subsequently started between Rhosclogwyn Incline and Rhyd Ddu Station North in the last week of May 2001.
Aberglaslyn Tunnel Numbering
Tunnels are numbered from No. 1 (Goat Tunnel in Beddgelert) to No. 4 (long tunnel between Aberglaslyn Pass and Cwm Bychan). There are two short tunnels (Nos. 2/3) north of the long tunnel in the Pass itself.
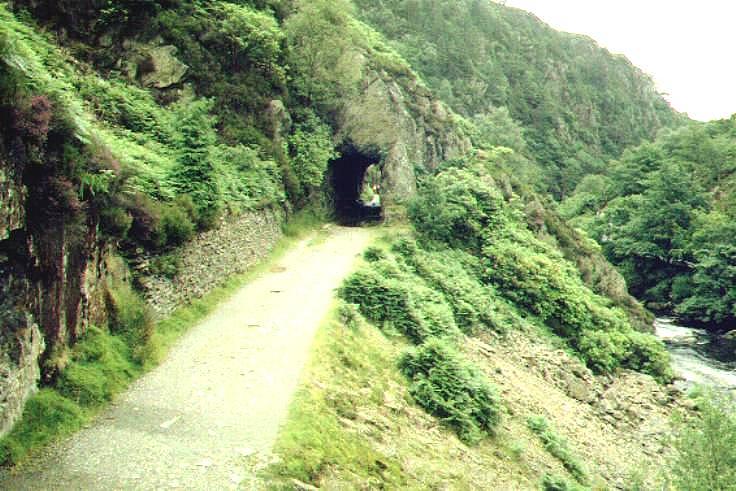
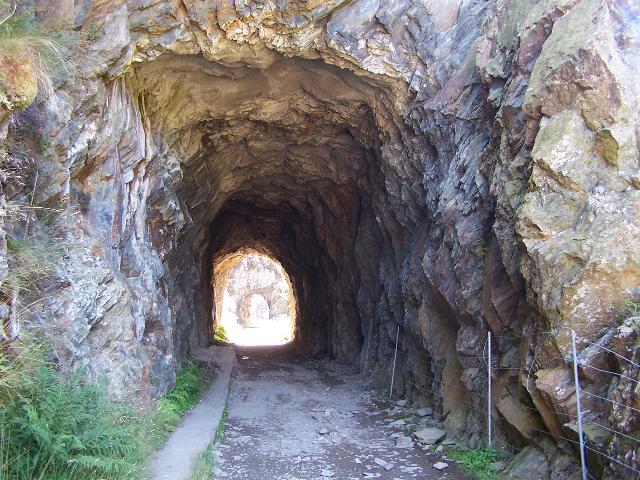
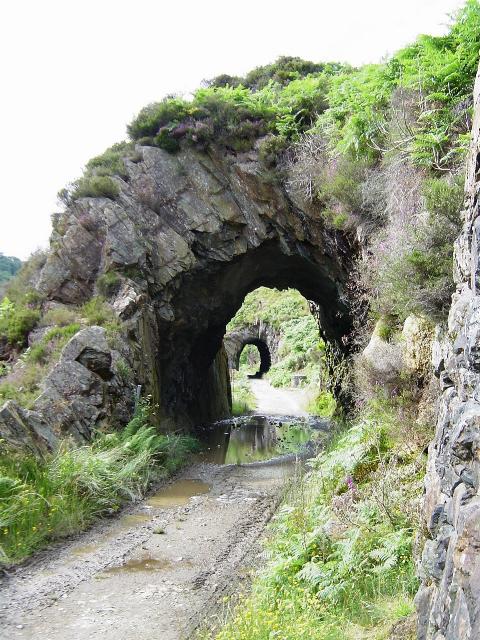
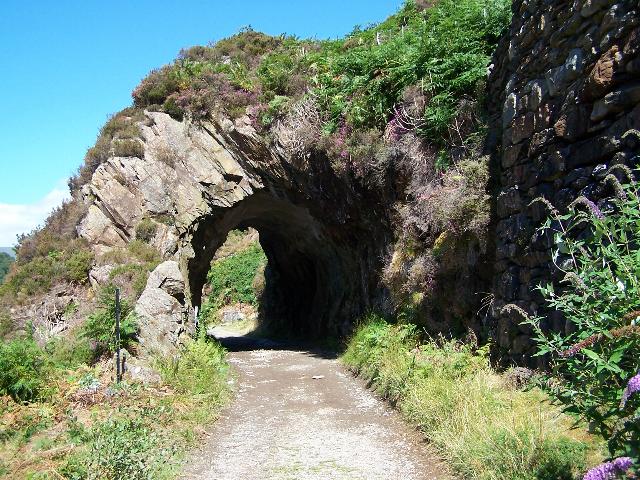
This view (3/7/99) through No. 2 tunnel was taken before the tunnels were fenced off. Local residents had warned against rock falls when opposing the rebuilding and the FR took them at their word, having regard to insurance matters now that the trackbed is in FR hands. There is an alternative footpath along the riverbank though it is difficult in places. Click on the image to enlarge. This image is copyright B.W.Hughes. Slide scan technology utilised is Olympus ES10 & iPhoto Plus4. Slide scanned at 200dpi.
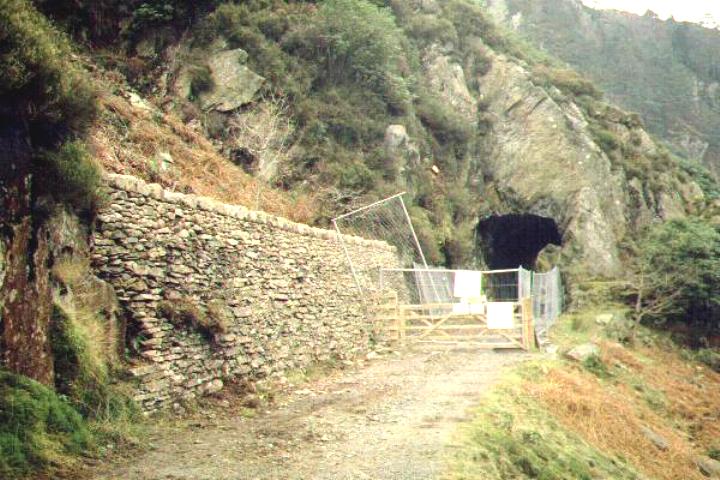
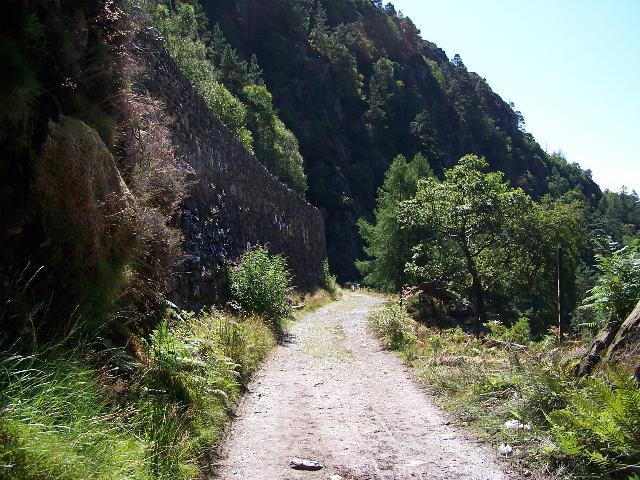
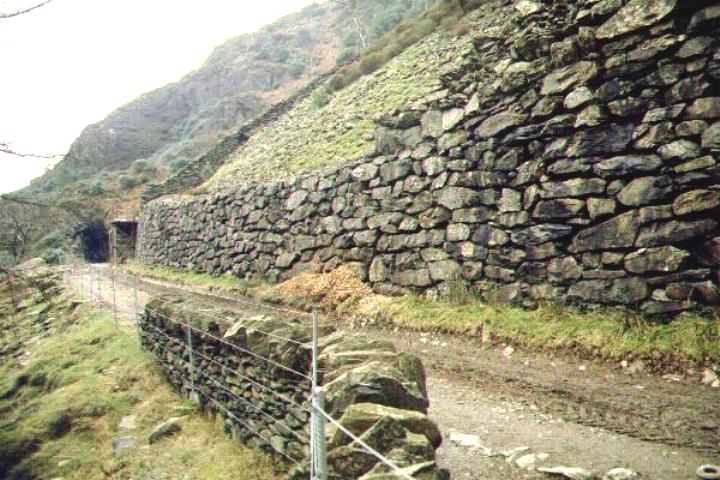
This southerly view (30/12/00) shows the same No.2 tunnel, now fenced off. The contractors have completed the re-pointing of this retaining wall and the top 50 cm looks new but will soon blend in. Click on the image to enlarge. This image is copyright B.W.Hughes. Slide scan technology utilised is Olympus ES10 & iPhoto Plus4. Slide scanned at 200dpi.
Work entailed
Examination of the rock faces and screes high above the railway revealed the basic stability of the rocks and remedial works were approved by engineers for the DoE and Snowdonia National Park. The retaining wall between No. 3 and No. 4 (long) tunnel was to be extended upwards by 2 m and a catch fence installed above that.
When the area was examined, it was found that a substantial mass concrete wall lies behind the local rock facia. The main area of concern between the long tunnel (No.4) and No. 3 tunnel is split roughly in two by a boundary wall that goes up the slope. To the south of this wall, the scree was originally managed to create a stable area. The new work to raise the wall is for the full length between the two tunnels.
Contract
Rock Engineering of Porthmadog was awarded the contract and was on site from 1/11/00 to complete works in January. The contract for £250,000 also covered remedial shotcreting in the tunnels, rockbolting of loose slabs and minor repointing of the retaining walls above the tunnels (north of No. 2 tunnel and between No. 2 and No. 3 tunnels).
Locations
This section covers the railway trackbed from Bryn-y-Felin bridge through the three tunnels in the Aberglaslyn Pass and the approaches from Nantmor station. The section from the three tunnels to Nantmor was used as a plant access road during the 2000/2001 works. The railway runs on a ledge on the east side of the Afon Glaslyn, climbing higher above the Glaslyn as the river falls steeply towards the gorge.
From north to south there are three tunnels. No. 2 and No. 3 cut through rocky spurs while No. 4 is 292 metres long (according to Boyd) and cuts the corner of the Pass to emerge in Cwm Bychan, crossed by a substantial embankment over two bridges. From Cwm Bychan, the railway falls through deep vertical sided cuttings on the hillside above the main road to Nantmor level crossing and Halt, situated in the middle of a small village which appears to be mostly summer occupancy second homes.
Public Access
The main Porthmadog-Beddgelert road, the A498, runs parallel to the railway on the west side of the Afon Glaslyn within 100 metres of the formation. There is a public footpath (the Fisherman's Path) on the east side of the river from the footbridge in the centre of Beddgelert to the Afon Glaslyn bridge at the south end of the pass. Be warned this path is very difficult adjacent to No. 2 tunnel handholds have been inserted to help walkers along a ledge above the torrent.
At the South end of the long No.4 tunnel the trackbed crosses Cwm Bychan where a National Trust Car Park and toilets allows access to walks crossing the line. At Nantmor station, a public road crosses the alignment.
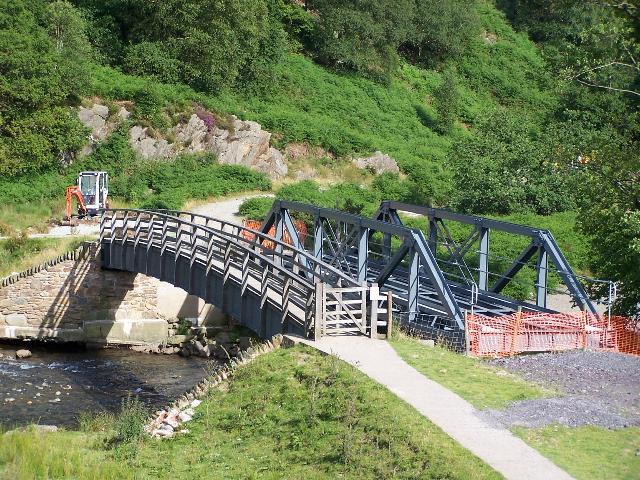
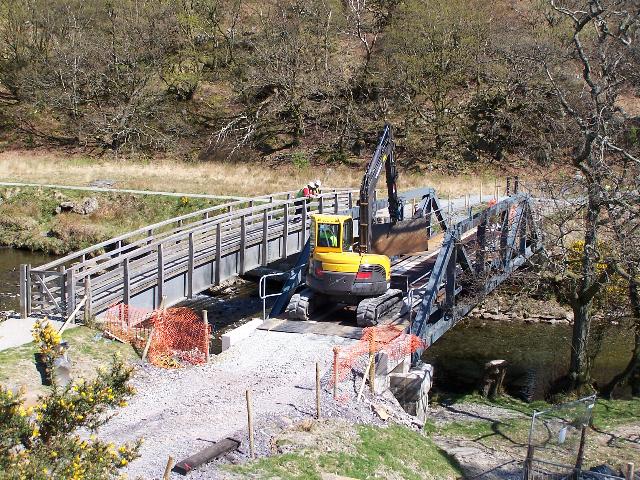
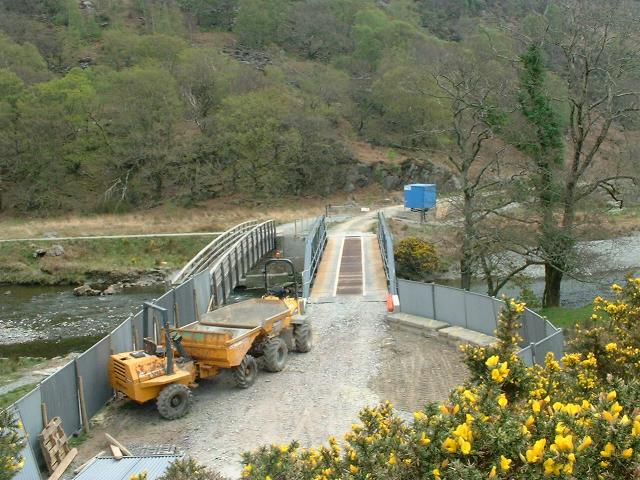
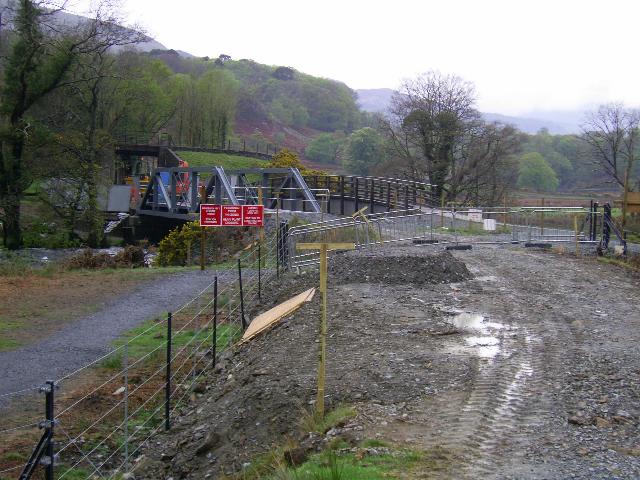
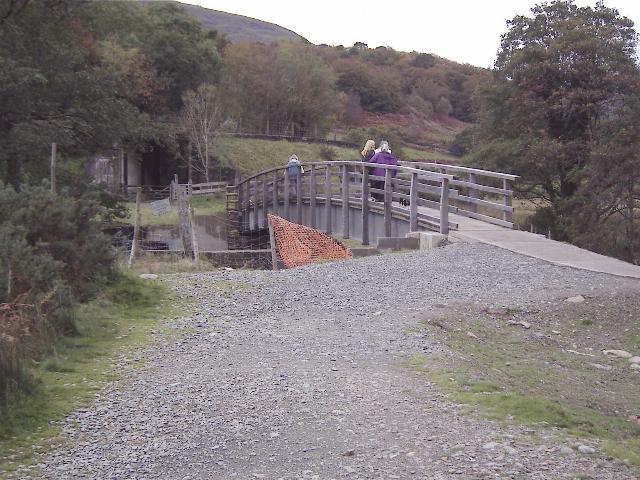
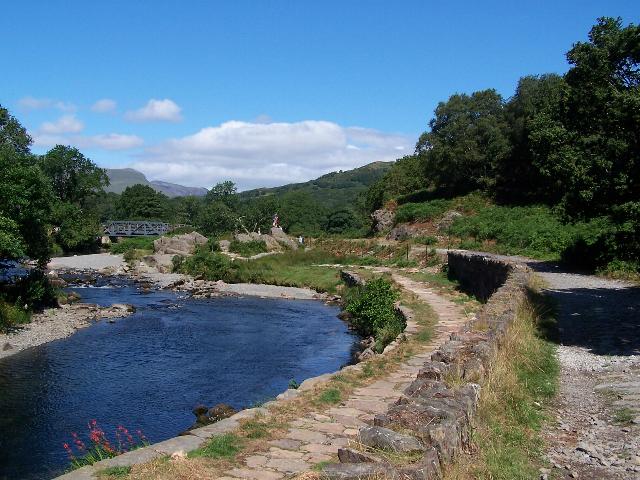
A new footbridge just north of the site of the Bryn-y-felin railway bridge was installed for the Easter 2003, making a circular walk of about 2 miles from the Cwm Bychan car park possible, out via the Fisherman's Path and back via the footpath on the west side of the Afon Glaslyn and the main road. A longer walk of about 5 miles is possible, keeping to the east bank along the recently completed concrete track, via the footbridge at the centre of Beddgelert and following the footpath to Gelert's Grave on the west bank of the Afon Glaslyn.
Contracts had been let for the work with a local subcontractor by the end of 2001 and work was completed in 2002-3 with the bridge opening on 18/4/2003, although concrete wheelchair/footpath connections were not completed until the end of July 2004.
Gradients
From the Bryn-y-felin bridge over the Afon Glaslyn Ch. 23400 approx, the route falls at 1 in 350 on a relatively straight alignment until it reaches the pinch point of the Aberglaslyn Pass itself. The trackbed then rises at 1 in 60 and runs level into the short No. 2 Tunnel to cut through a spur of the hillside. The alignment then falls through No. 3 tunnel at 1 in 100, cutting through another spur.
In the Aberglaslyn Pass itself, these rising and level gradients allow the trackbed to climb high on a rocky ledge above the steeply descending river. Just before No. 4 (long) tunnel, the railway begins a rapid descent at 1 in 40, which continues through the tunnel to Nantmor station and beyond.
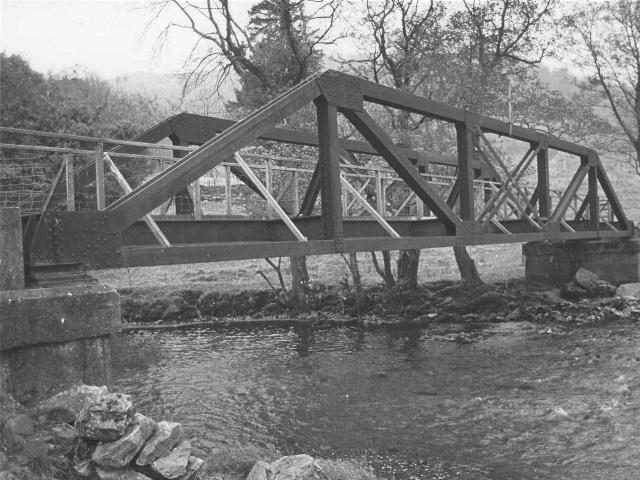
Bryn-y-felin Bridge
This bridge was demolished shortly after the FR took possession of the route in 1996 as it was in danger of collapse having never been painted in its 80 year life.

This southerly view (7/11/87) shows the Bryn-y-felin bridge over the Afon Glaslyn as seen from the Beddgelert main road overbridge. Click on the image to enlarge. This image is courtesy/ copyright David Allan. Image taken on a Concord 3340z 3.1Megapixel digital camera. Image post processed using iPhoto Plus4 and displayed at 96dpi.
This westerly view (7/11/87) shows the abutments of the Bryn-y-felin bridge. GCC had built a new wooden footbridge on the deck. The Beddgelert main road overbridge is visible behind. This footbridge was closed in the early 1990s. Click on the image to enlarge. This image is courtesy/copyright David Allan. Image taken on a Concord 3340z 3.1Megapixel digital camera. Image post processed using iPhoto Plus4 and displayed at 96dpi.

This easterly view (7/11/87) shows the abutments of the Bryn-y-felin bridge. Click on the image to enlarge. This image is courtesy/copyright David Allan. Image taken on a Concord 3340z 3.1Megapixel digital camera. Image post processed using iPhoto Plus4 and displayed at 96dpi.

This westerly view (7/11/87) across the Bryn-y-felin bridge shows the new wooden footbridge on the deck. The Beddgelert main road overbridge is visible behind. The main I beams can be seen to have collected a lot of water/spoil. This contributed, along with lack of paint, to rapid rusting which left the bridge unsafe. Insurers required its demolition when the FR took over in 1996. This image is courtesy/copyright David Allan. Image taken on a Concord 3340z 3.1Megapixel digital camera. Image post processed using iPhoto Plus4 and displayed at 96dpi.
Bryn-y-felin to the tunnels
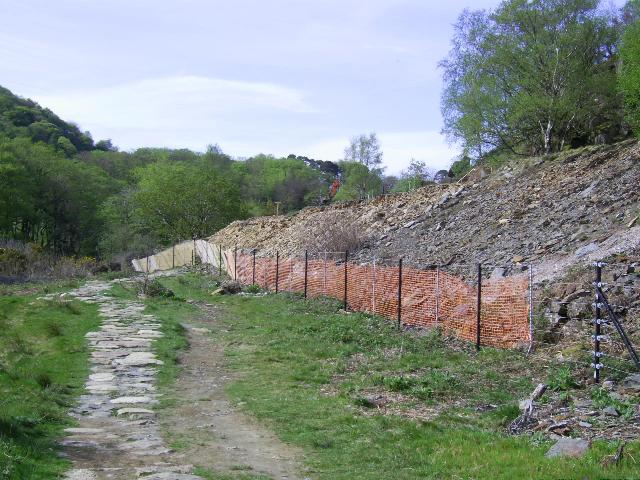
Work restarted on the Fisherman's Path in summer 2006 and new sympathetic black painted steel fencing was being erected as contractors were expected to be rebuilding the trackbed in Spring 2007. Work on the fencing stopped over the school holidays.
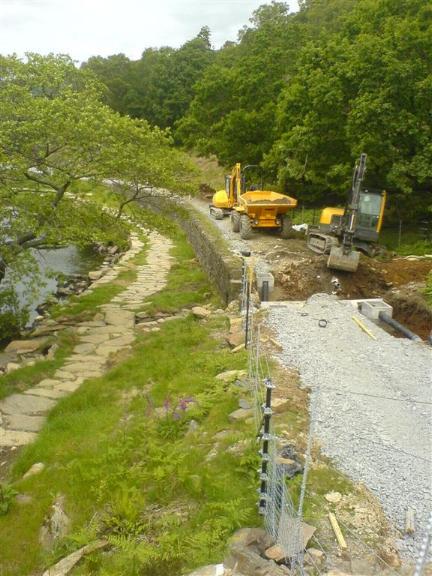
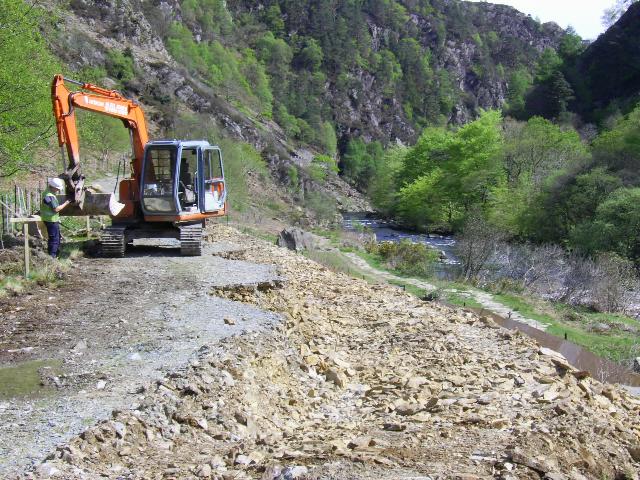
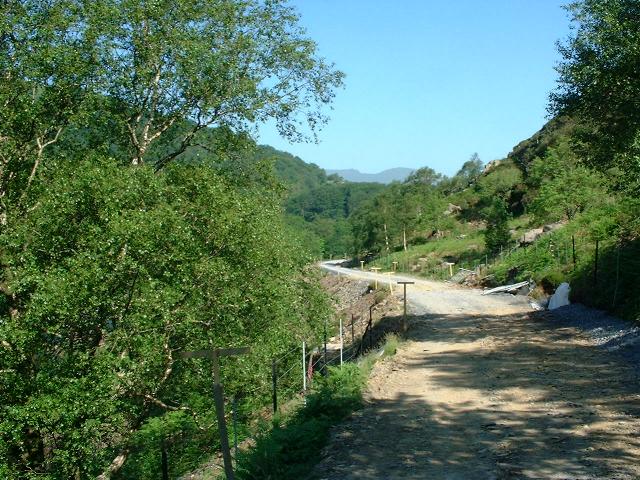
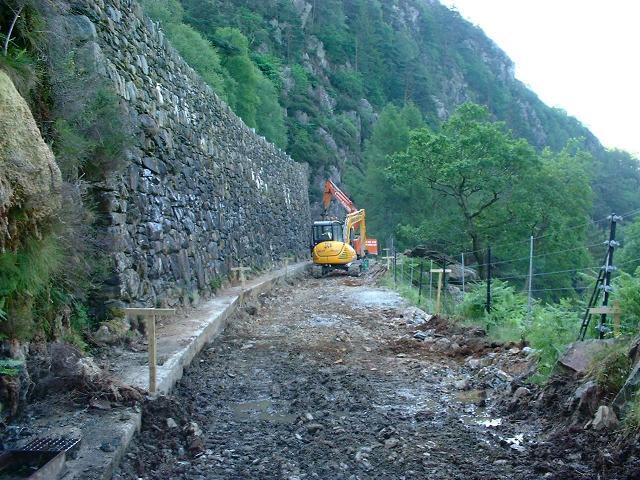
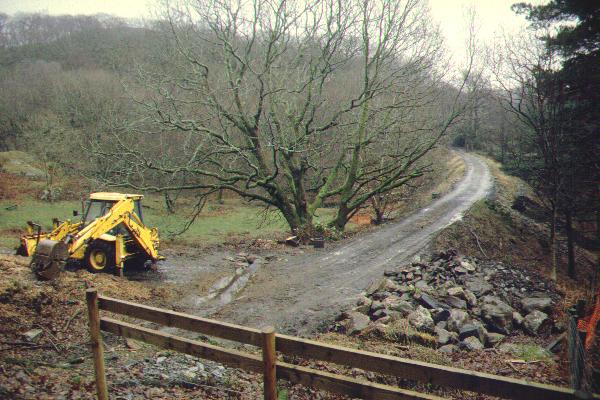
This easterly image (16/7/06) shows contractors at work improving the footpath close to Bryn-y-felin bridge. More contractors vehicles are visible on the curve behind the trees. Click on the image to enlarge. This image is copyright B.W.Hughes and was taken on a Kodak DX6490 digital camera. Image post processed using iPhoto Plus4 and displayed at 96dpi.
This easterly view (18/4/07) shows the completion of plating on the deck of Bryn-y-felin bridge. Click on the image to enlarge. This image is copyright B.W.Hughes and was taken on a Kodak DX6490 digital camera. Image post processed using iPhoto Plus4 and displayed at 96dpi.

These southerly and northerly views respectively (both 21/4/07) show the new James Cyf. compound between the road and river bridge at Bryn-y-felin. The screens are to reduce the impact on the views in the Aberglaslyn Pass. The second view shows the trackbed emerging from the now plated Bryn-y-felin bridge. Click on the images to enlarge. These images are courtesy/copyright John Ewing and were taken on a digital camera. Images post processed using iPhoto Plus4 and displayed at 96dpi.

This southerly view (25/4/07) shows the temporary plating on Bryn-y-felin bridge allowing dumpers to pass over the bridge. Click on the image to enlarge. This image is courtesy/copyright John Ewing and was taken on a digital camera. Image post processed using iPhoto Plus4 and displayed at 96dpi.

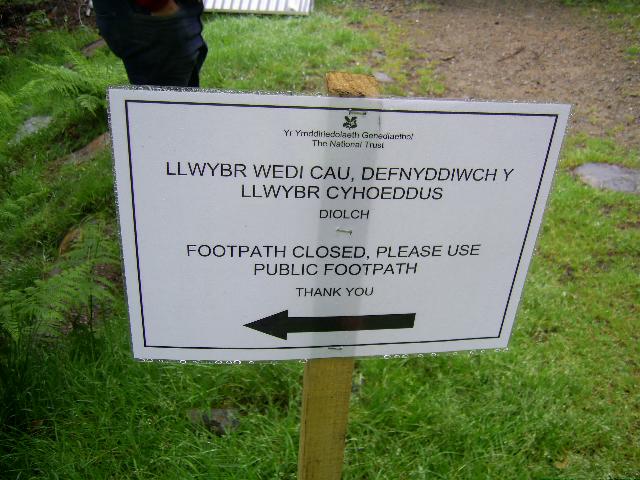
This southerly view (24/4/07) shows signage at LC90, just south of Bryn-y-felin bridge. Even at Easter people were walking on the trackbed rather than the Fisherman's Path! Click on the image to enlarge. This image is courtesy Alasdair Stewart (WHRCL) and was taken on a digital camera. Image post processed using iPhoto Plus4 and displayed at 96dpi.
This northerly view (24/4/07) shows the widening work at LC90 with Bryn-y-felin bridge in the background. Click on the image to enlarge. This image is courtesy Alasdair Stewart (WHRCL) and was taken on a digital camera. Image post processed using iPhoto Plus4 and displayed at 96dpi.
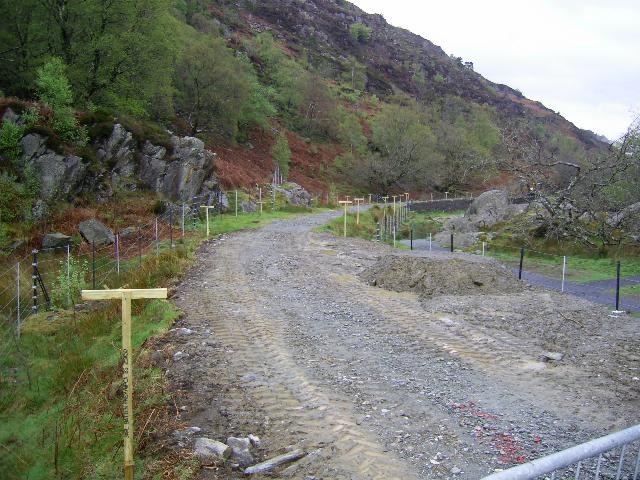
This southerly view (24/4/07) shows the widening work south of LC90 with level markers placed every 10m. Click on the image to enlarge. This image is courtesy Alasdair Stewart (WHRCL) and was taken on a digital camera. Image post processed using iPhoto Plus4 and displayed at 96dpi.
This easterly view (28/6/07) shows the finishing of UB174A immediately east of Bryn-y-felin bridge. Click on the image to enlarge. This image is courtesy Alasdair Stewart (WHRCL) and was taken on a digital camera. Image post processed using iPhoto Plus4 and displayed at 96dpi.
This westerly view (19/10/04) shows the abutments of the Bryn-y-felin bridge. The new footbridge is visible to the right and the Beddgelert main road overbridge behind. Click on the image to enlarge. This image is copyright B.W.Hughes. Image taken on a Concord 3340z 3.1Megapixel digital camera. Image post processed using iPhoto Plus4 and displayed at 96dpi.
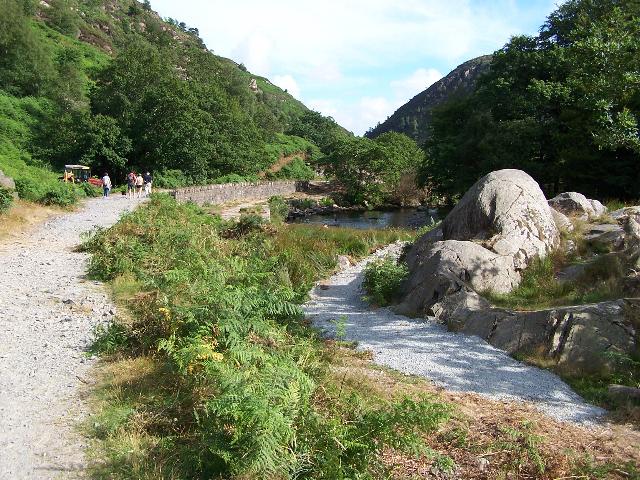
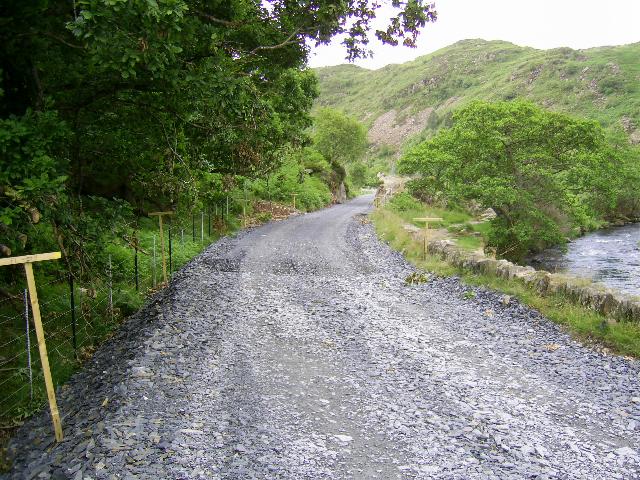
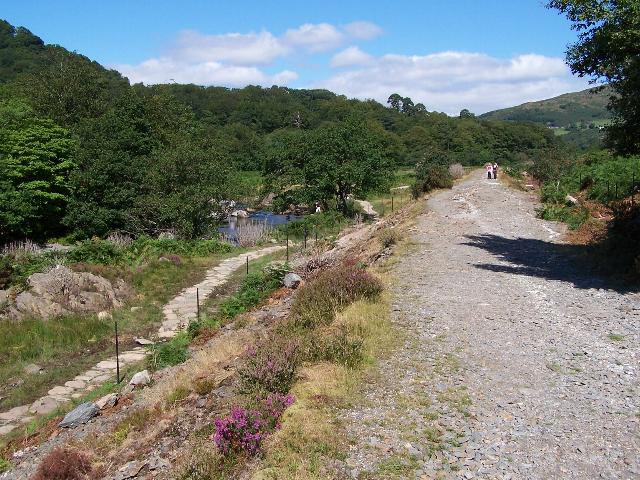
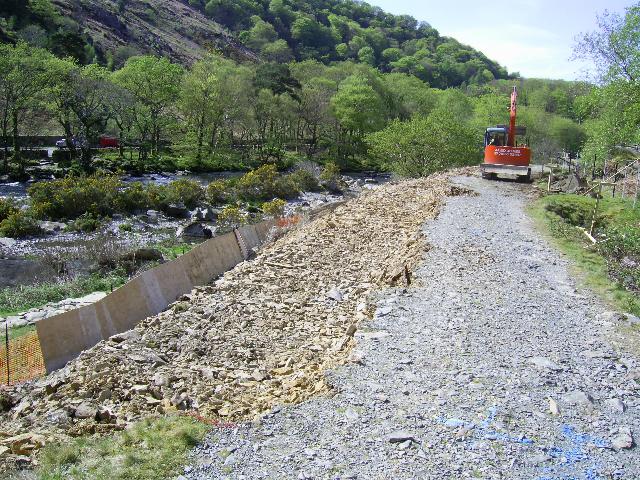
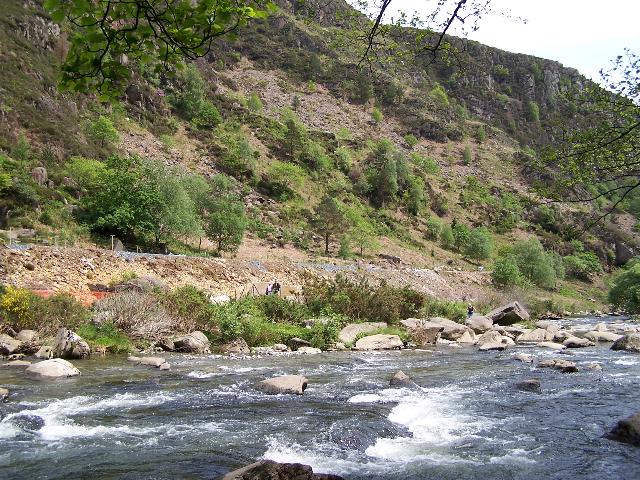
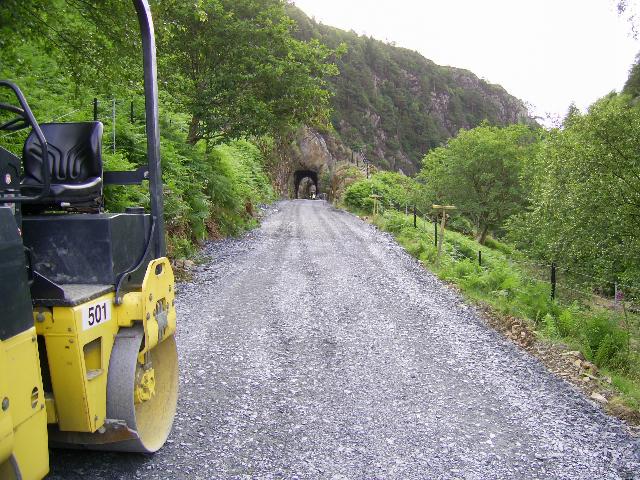
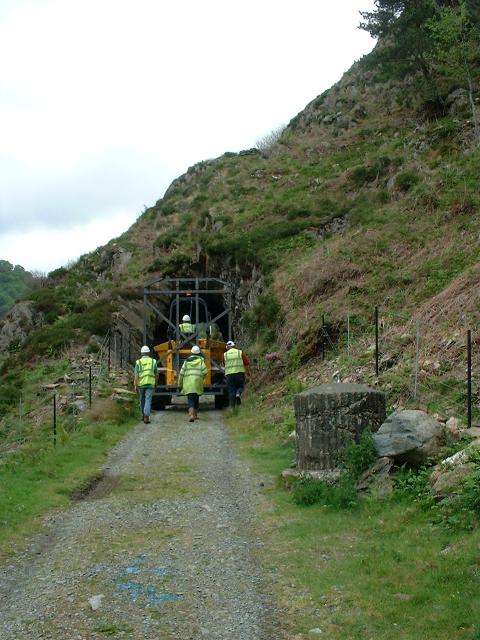
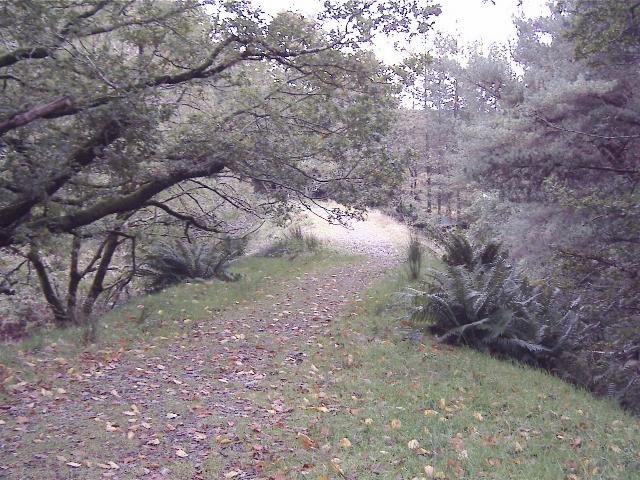
This southerly view (23/7/06) shows people are still walking on the trackbed in the Aberglaslyn Pass. Work on the parallel Fisherman's Path has been completed and the gravel path can be seen to the right. Contractor's vehicles can be seen on the left where fencing is being erected. Click on the image to enlarge. This image is copyright B.W.Hughes and was taken on a Kodak DX6490 digital camera. Image post processed using iPhoto Plus4 and displayed at 96dpi.
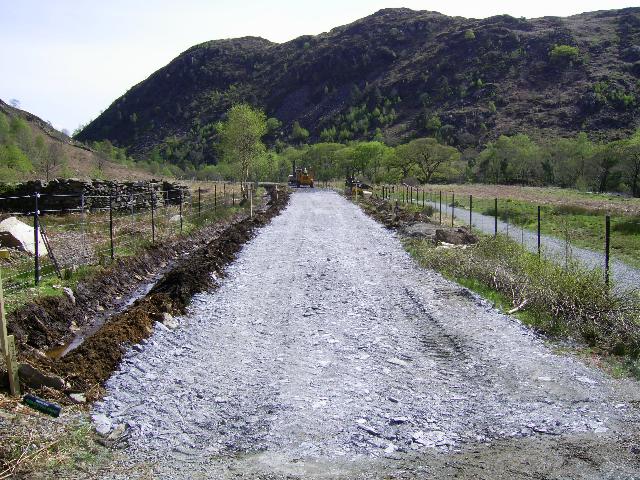
This southerly view (28/6/07) shows the finished trackbed south from Ch.23500. Sub base has been rolled as far as this point. Click on the image to enlarge. This image is courtesy Alasdair Stewart (WHRCL) and was taken on a digital camera. Image post processed using iPhoto Plus4 and displayed at 96dpi.
An unobtrusive type of black metal post fencing has been adopted for the pass produced locally by Williams of Caernarfon, who is also constructing the three large river bridges and the Nantmor road bridge. Work began in May 2006 and the posts were largely in place by July. Work was halted during the main tourist season. Erection of the wires was completed in the Autumn.

This easterly view (21/10/04) shows the retaining wall south of the Bryn-y-felin bridge. The Afon Glaslyn is in spate after days of rain. The public footpath, known locally as the 'Fisherman's Path, runs between the railway and the river. Click on the image to enlarge. This image is copyright B.W.Hughes. Image taken on a Concord 3340z 3.1Megapixel digital camera. Image post processed using iPhoto Plus4 and displayed at 96dpi.
This northerly view (19/10/04) shows the retaining wall that leads from Bryn-y-felin bridge. The Afon Glaslyn is visible to the left. Click on the image to enlarge. This image is copyright B.W.Hughes. Image taken on a Concord 3340z 3.1Megapixel digital camera. Image post processed using iPhoto Plus4 and displayed at 96dpi.
This northerly view (7/8/06) shows the fence posts approaching Bryn-y-felin bridge from the south on one of the few sunny days in early August. Click on the image to enlarge. This image is copyright B.W.Hughes and was taken on a Kodak DX6490 digital camera. Image post processed using iPhoto Plus4 and displayed at 96dpi.

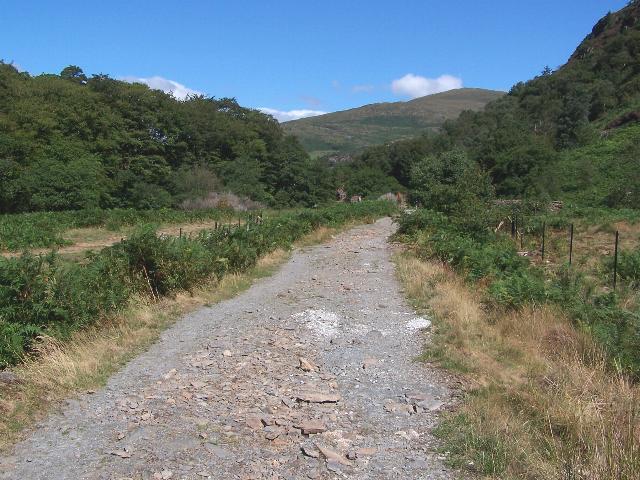
These southerly views (19/10/04 and 28/6/07) show the trackbed on the long straight that leads from Bryn-y-felin bridge alongside river pastures. The Afon Glaslyn is visible to the right. The second view shows finished trackbed south from Ch.23600. Click on the images to enlarge. The first image is copyright B.W.Hughes. Image taken on a Concord 3340z 3.1Megapixel digital camera. The second image is courtesy Alasdair Stewart (WHRCL) and was taken on a digital camera. Images post processed using iPhoto Plus4 and displayed at 96dpi.
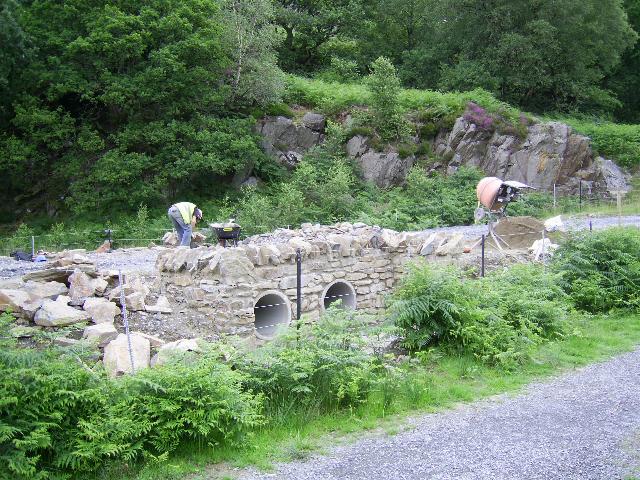
These northerly and southerly views (both 2/6/07) show the area around Ch.23550. The first view shows the construction of UB174A, the final culvert and the second view shows the formation ready for ballasting south of this point. Click on the images to enlarge. These images are courtesy/copyright Rob Bradley. Both were taken on a digital camera. Images post processed using iPhoto Plus4 and displayed at 96dpi.
This northerly view (19/10/04) shows the view back along the long straight that leads from Bryn-y-felin bridge. Click on the image to enlarge. This image is copyright B.W.Hughes. Image taken on a Concord 3340z 3.1Megapixel digital camera. Image post processed using iPhoto Plus4 and displayed at 96dpi.
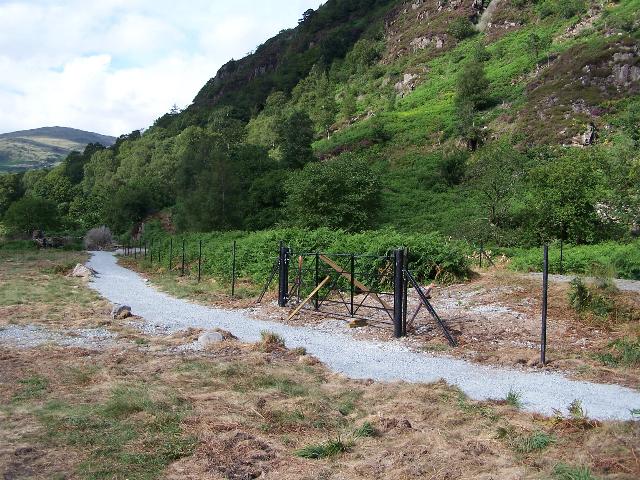
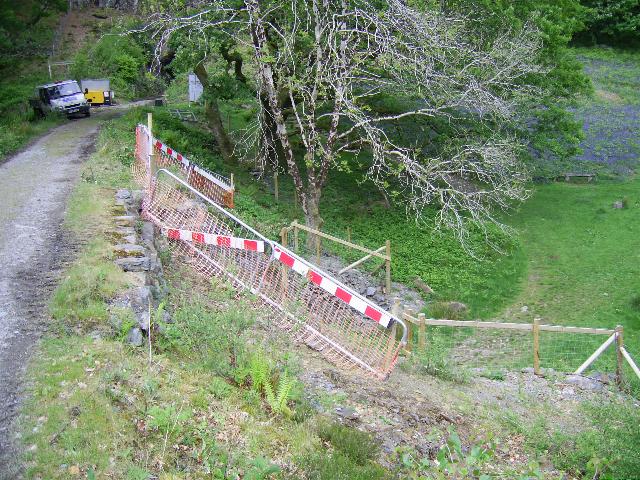
This northerly image (23/7/06) shows the new metal fencing and gates just south of Bryn-y-felin bridge at LC91, one of the two level crossings in the Aberglaslyn Pass (the other, LC90, is adjacent to the Bryn-y-felin bridge). Click on the image to enlarge. This image is copyright B.W.Hughes and was taken on a Kodak DX6490 digital camera. Image post processed using iPhoto Plus4 and displayed at 96dpi.

These southerly views at TWA Ch.23600 and Ch.23650 respectively (both 26/4/07) show stages in improving the formation in the meadows at the north end of the Aberglaslyn Pass. Side ditches have been constructed and a level slate waste top has been made. Click on the images to enlarge. These images are courtesy Alasdair Stewart (WHRCL) and were taken on a digital camera. Images post processed using iPhoto Plus4 and displayed at 96dpi.
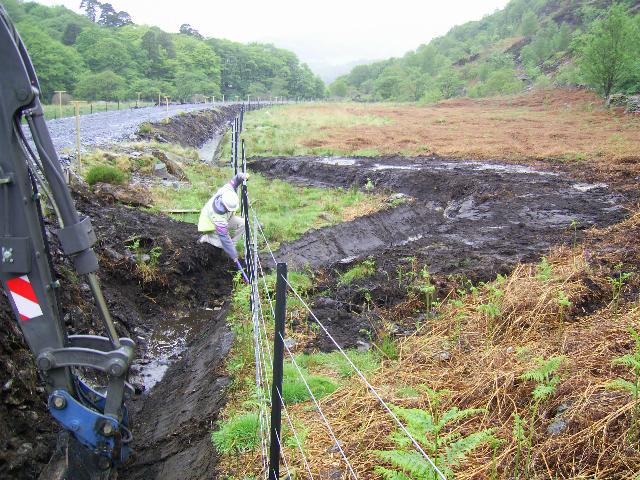
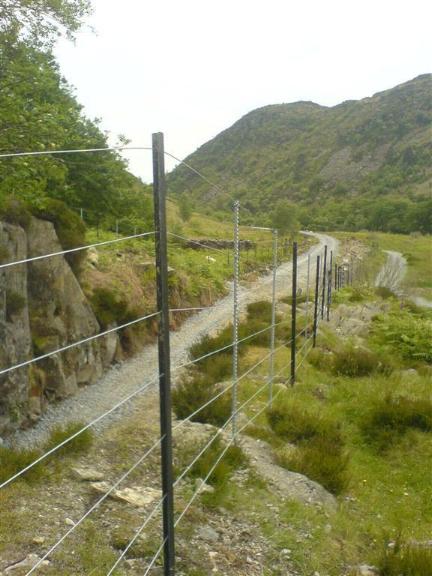
These northerly views (7/8/06 and 15/5/07) show the fence posts at Ch.23700 on one of the few sunny days in early August. The second view shows the contractor providing a substantial ditch along the east side of the trackbed. The ditch chicane is to avoid a rock outcrop. Click on the images to enlarge. The first image is copyright B.W.Hughes and was taken on a Kodak DX6490 digital camera. The second image is courtesy Alasdair Stewart (WHRCL) and was taken on a digital camera. Image post processed using iPhoto Plus4 and displayed at 96dpi. Images post processed using iPhoto Plus4 and displayed at 96dpi.
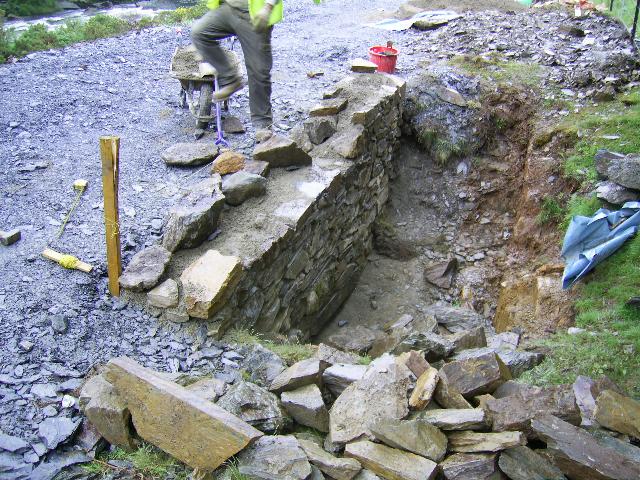
This northerly view (15/5/07) shows the masonry contractor providing a local stone cladding to the culvert headwalls, as the WHRCL has promised the SNPA/NT not to use sawn slate in this area. This is believed to be UB175. Click on the image to enlarge. This image is courtesy Alasdair Stewart (WHRCL) and was taken on a digital camera. Image post processed using iPhoto Plus4 and displayed at 96dpi.
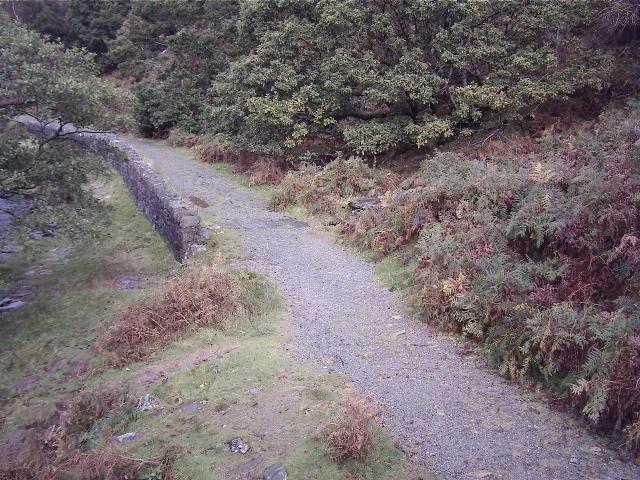
This southerly view (7/8/06) shows the fence posts at Ch.23700 with the new footpath to the right. Click on the image to enlarge. This image is copyright B.W.Hughes and was taken on a Kodak DX6490 digital camera. Image post processed using iPhoto Plus4 and displayed at 96dpi.

This northerly view (7/6/07) shows preparations to cast the new deck of UB175 at Ch.23850. The deck was cast later that day. Click on the image to enlarge. This image is courtesy/copyright John Ewing and was taken on a Fuji Finepix 1400 digital camera. Image post processed using iPhoto Plus4 and displayed at 96dpi.
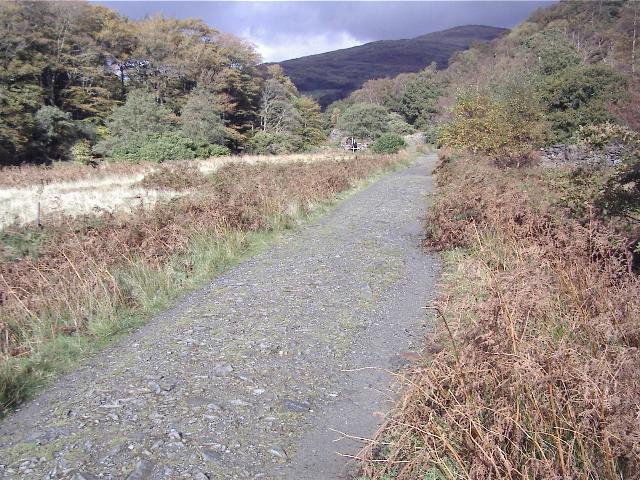
This northerly view (7/8/06) shows the fence posts and new footpath at Ch.23950, here random slabs rather than gravel. Click on the image to enlarge. This image is copyright B.W.Hughes and was taken on a Kodak DX6490 digital camera. Image post processed using iPhoto Plus4 and displayed at 96dpi.
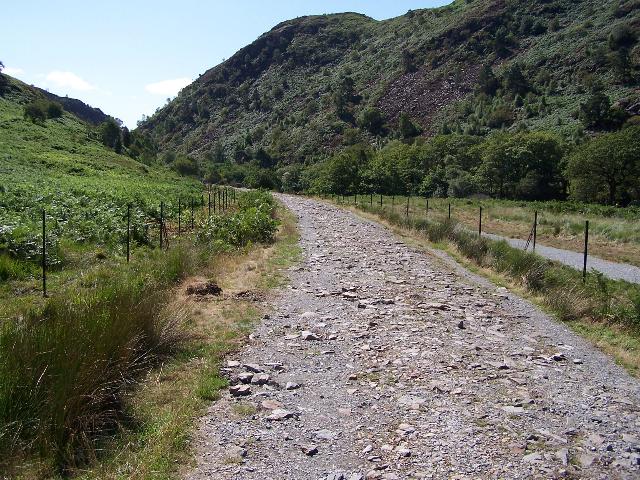
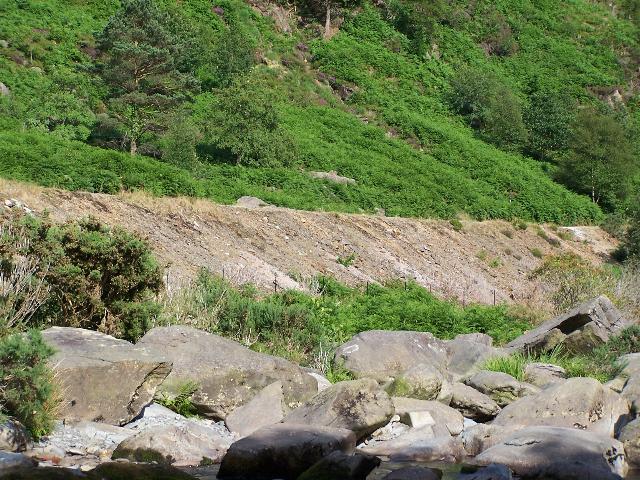
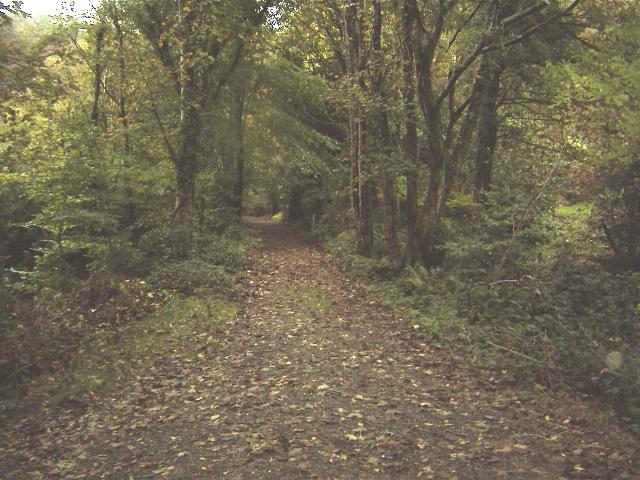
This northerly view (19/10/04) shows the trackbed climbing high above the Afon Glaslyn as the river begins to drop steeply into the Aberglaslyn Pass. The rock shelf, bare since its 1906 PBSSR construction, shows evidence of the heavy metal contamination of local rocks as very little vegetation will grow on it. Some shredding of bushes has taken place during the Bryn-y-felin footpath works and the waste has been added to the embankments to encourage growth. Click on the image to enlarge. This image is copyright B.W.Hughes. Image taken on a Concord 3340z 3.1Megapixel digital camera. Image post processed using iPhoto Plus4 and displayed at 96dpi.
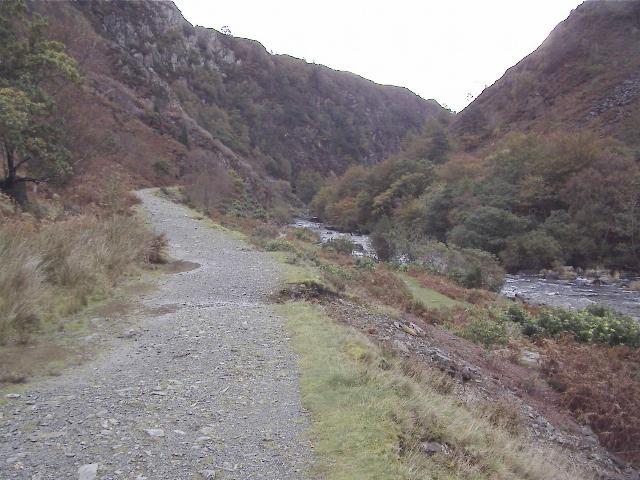
This southerly view (19/10/04) at Ch.23900 shows the series of sharp curves and tunnels that lead to the long No.4 tunnel visible in the distance. The Afon Glaslyn is visible to the right with the main road on the far bank. Click on the image to enlarge. This image is copyright B.W.Hughes. Image taken on a Concord 3340z 3.1Megapixel digital camera. Image post processed using iPhoto Plus4 and displayed at 96dpi.

This southerly view (7/8/06) shows the fence posts at Ch.23950 and new riverside footpath. Click on the image to enlarge. This image is copyright B.W.Hughes and was taken on a Kodak DX6490 digital camera. Image post processed using iPhoto Plus4 and displayed at 96dpi.

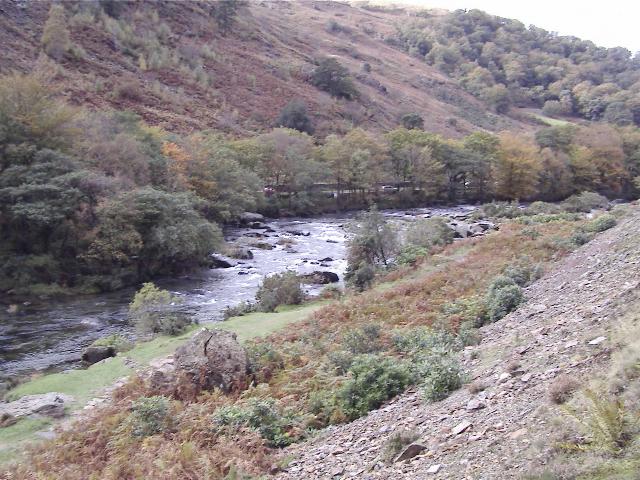
This northerly view (19/10/04) from the same location as above shows the Afon Glaslyn is now far below to the left. Click on the image to enlarge. This image is copyright B.W.Hughes. Image taken on a Concord 3340z 3.1Megapixel digital camera. Image post processed using iPhoto Plus4 and displayed at 96dpi.

These northerly views (7/8/06 and 26/4/07) show the fence posts at Ch.24050 on one of the few sunny days in early August. The second view shows embankment is being widened slightly and the boards at the foot of the embankment prevent rock spilling onto the Fisherman's Path. Click on the images to enlarge. The first image is copyright B.W.Hughes and was taken on a Kodak DX6490 digital camera. The second image is courtesy Alasdair Stewart (WHRCL) and was taken on a digital camera. Image post processed using iPhoto Plus4 and displayed at 96dpi. Images post processed using iPhoto Plus4 and displayed at 96dpi.
This southerly view (24/4/07) shows progress at Ch.24000 with the rocky defile of the southern end of the Aberglaslyn Pass visible in the distance. Click on the image to enlarge. This image is courtesy Alasdair Stewart (WHRCL) and was taken on a digital camera. Image post processed using iPhoto Plus4 and displayed at 96dpi.
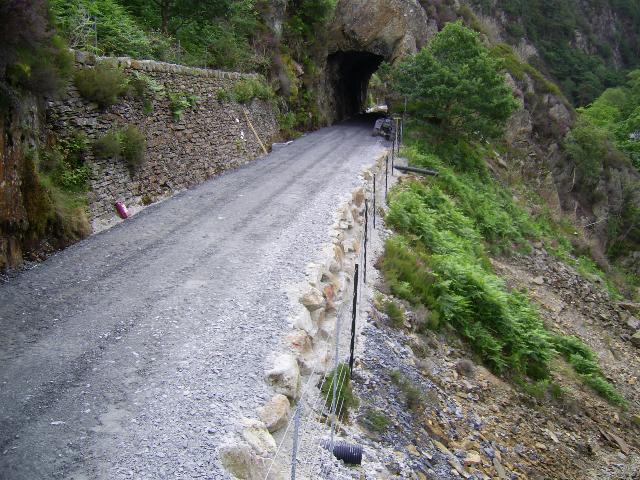
This northerly view (26/4/07) shows progress at Ch.24000 as seen from the Fisherman's Path in the middle of the Aberglaslyn Pass. The boarding and netting are preventing spillage onto the path as the embankment strengthening work continues. Click on the image to enlarge. This image is courtesy Alasdair Stewart (WHRCL) and was taken on a digital camera. Image post processed using iPhoto Plus4 and displayed at 96dpi.
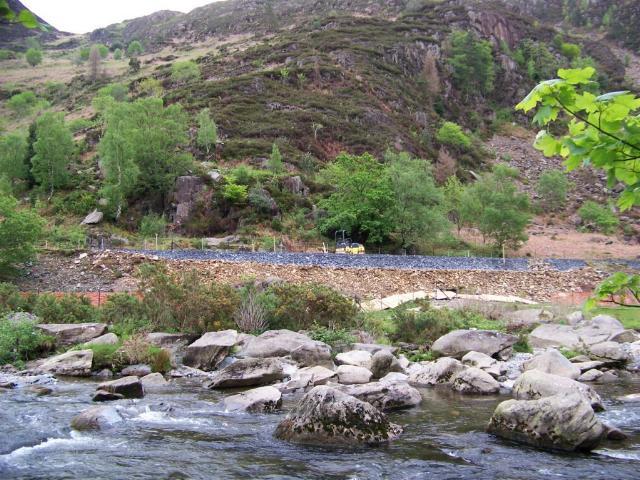
These easterly views (16/7/06 and 20/5/07)show the black metal fence posts used at the foot of the embankment and progress being made firming up the trackbed. Click on the images to enlarge. These images are copyright B.W.Hughes and were taken on a Kodak DX6490 digital camera. Images post processed using iPhoto Plus4 and displayed at 96dpi.
This easterly view (11/5/07) shows sub base being rolled along the Aberglaslyn Pass around Ch.24000. Click on the image to enlarge. This image is copyright Colin Lea and was taken on a digital camera. Image post processed using iPhoto Plus4 and displayed at 96dpi.
This northerly view (7/6/07) shows the widened formation complete at UB176 from Ch.24100. Click on the image to enlarge. This image is courtesy/copyright John Ewing and was taken on a Fuji Finepix 1400 digital camera. Image post processed using iPhoto Plus4 and displayed at 96dpi.
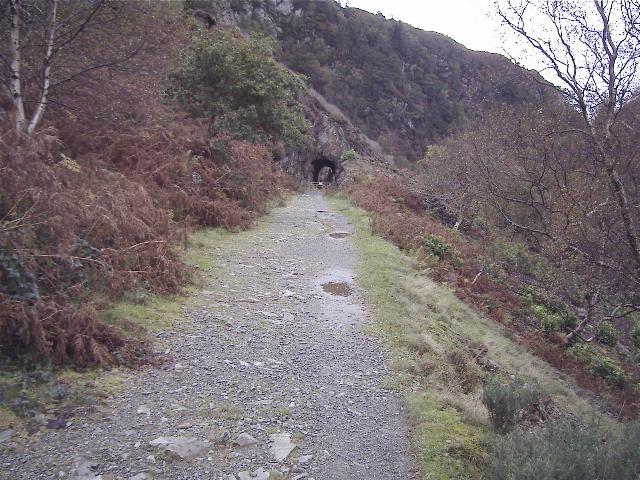
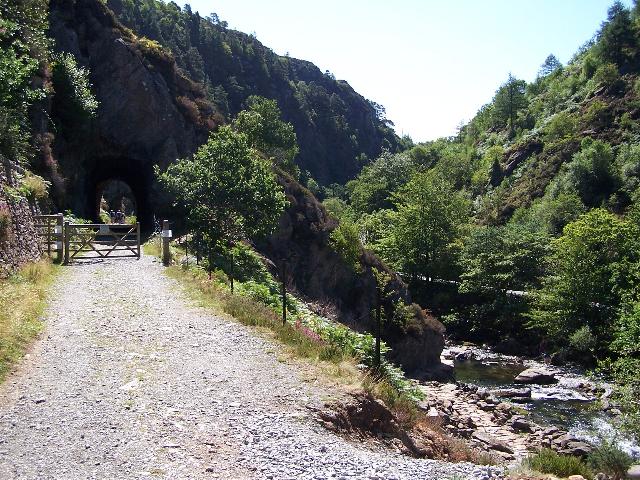
This southerly view (19/10/04) shows the final straight that leads to the short No.2 Tunnel. Click on the image to enlarge. This image is copyright B.W.Hughes. Image taken on a Concord 3340z 3.1Megapixel digital camera. Image post processed using iPhoto Plus4 and displayed at 96dpi.
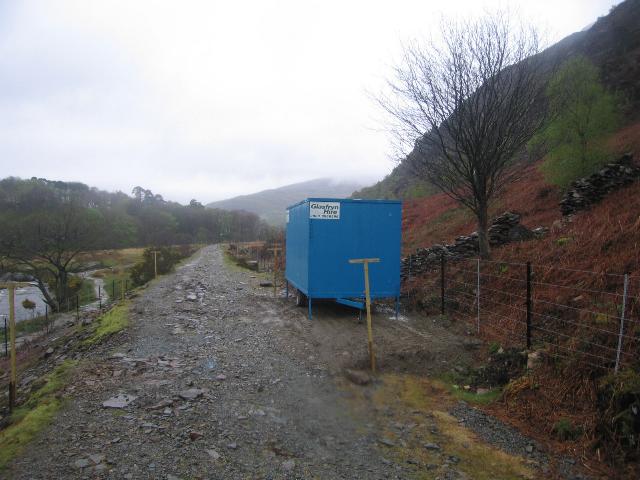
This northerly view (24/4/07) shows James Cyf's site office at UB175. Click on the image to enlarge. This image is courtesy John Peduzzi and was taken on a digital camera. Image post processed using iPhoto Plus4 and displayed at 96dpi.
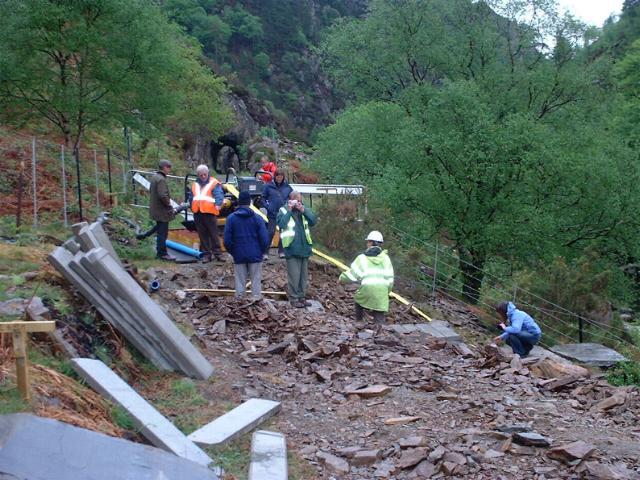
This southerly view (7/5/07) shows the Directors' Inspection at UB176, just north of T2, the first of the Aberglaslyn Tunnels. The contractors appear to be using redundant concrete fire hydrant slabs to reconstruct the culvert. Click on the image to enlarge. This image is courtesy/copyright John Ewing and was taken on a Fuji Finepix 1400 digital camera. Image post processed using iPhoto Plus4 and displayed at 96dpi.
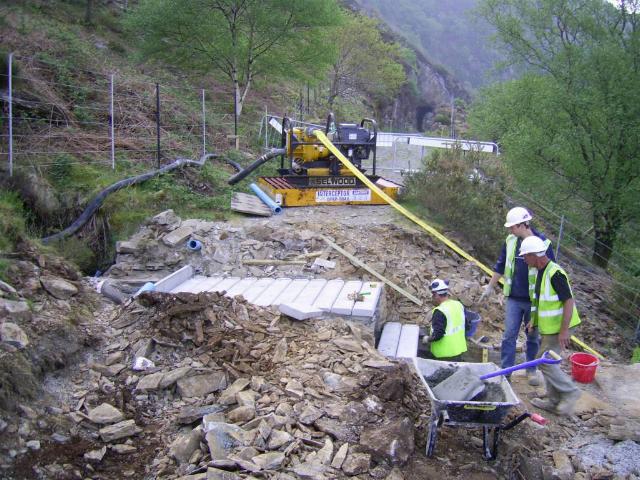
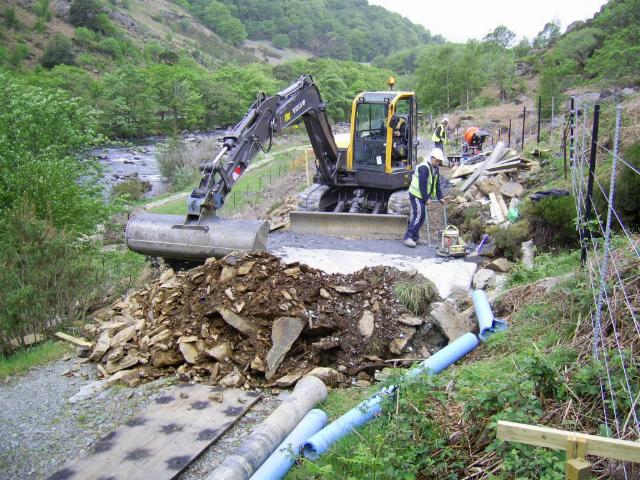
These southerly and northerly views respectively (4/5/07 and 7/5/07) show stages in the reconstruction of UB176, just north of T2 in the Aberglaslyn Pass. The abutments have been repaired and 'hydrant' slabs placed to support the in-situ cast concrete deck that followed a few days later. Finally the trackbed was backfilled and vibrated to pack it ready for load bearing. While work was in progress, a pump was used to bypass the culvert. The former Nantmor water main has been removed at this location. Click on the images to enlarge. These images are courtesy Alasdair Stewart (WHRCL) and were taken on a digital camera. Images post processed using iPhoto Plus4 and displayed at 96dpi.
Short tunnels
This southerly view (28/6/07) shows the finishing and rolling of sub base at Ch.24100. T2 frames T3 in this view and the change in gradient can be seen. Click on the image to enlarge. This image is courtesy Alasdair Stewart (WHRCL) and was taken on a digital camera. Image post processed using iPhoto Plus4 and displayed at 96dpi.

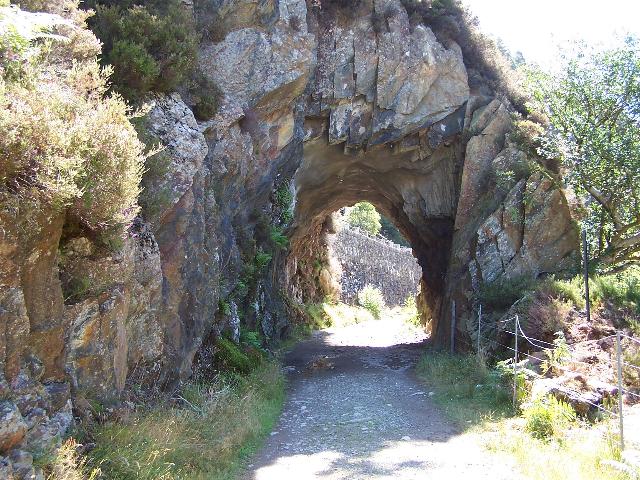
This northerly views (19/10/04 and 28/6/07) show the entrance to the short No.2 Tunnel that pierces a rocky outcrop. The large structure gauge, built with electrification in mind, means that the Garratt loading gauge can be easily accommodated through all three tunnels. The second view shows the finished formation just north of T2. A small retaining wall has been built below the formation in local stone. Click on the images to enlarge. The first image is copyright B.W.Hughes. Image taken on a Concord 3340z 3.1Megapixel digital camera. The second image is courtesy Alasdair Stewart (WHRCL) and was taken on a digital camera. Images post processed using iPhoto Plus4 and displayed at 96dpi.
This southerly view (7/8/06) shows the fence posts at Ch.23700 on one of the few sunny days in early August. Click on the image to enlarge. This image is copyright B.W.Hughes and was taken on a Kodak DX6490 digital camera. Image post processed using iPhoto Plus4 and displayed at 96dpi.
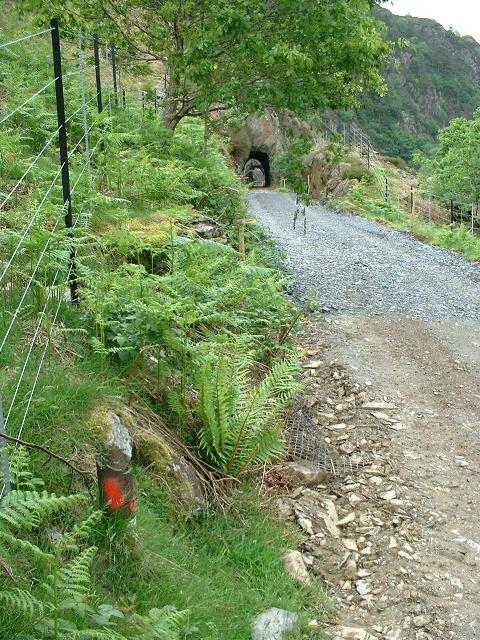
This southerly view (27/5/07) shows the trackbed improvement just north of T2. The iron stump of one of the original cast iron telegraph wire poles later used as a telephone pole can be seen marked in red on the left. Click on the image to enlarge. This image is courtesy/copyright John Ewing and was taken on a Fuji Finepix 1400 digital camera. Image post processed using iPhoto Plus4 and displayed at 96dpi.
This southerly view (7/8/06) shows Tunnel No.2. The roof has had both shotcrete and rock bolts to stabilise any loose sections. On the left is the Nantmor Water Main here in concrete cladding. Welsh Water was due to start in the Autumn of 2006 to move the pipe of the railway before works starts here on preparing the trackbed in the Winter. Click on the image to enlarge. This image is copyright B.W.Hughes and was taken on a Kodak DX6490 digital camera. Image post processed using iPhoto Plus4 and displayed at 96dpi.
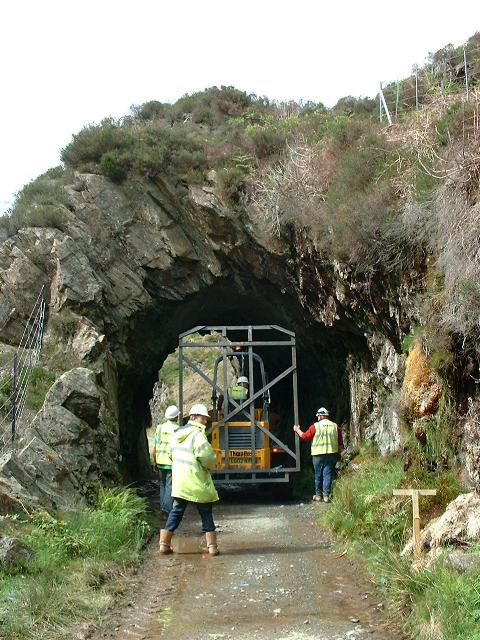
This northerly view (7/7/06) shows the square cut profile of the north portal of Tunnel No.2 designed with electrification in mind. Neither Garratts nor the high cabbed Castell Caernarfon will have any problem in these tunnels. Click on the image to enlarge. This image is copyright Andrew Thomas and was taken on a digital camera. Image post processed using iPhoto Plus4 and displayed at 96dpi.
This northerly view (7/6/07) shows the reduction in level of the formation and the removal of the former Nantmor water main through T2. Click on the image to enlarge. This image is courtesy/copyright John Ewing and was taken on a Fuji Finepix 1400 digital camera. Image post processed using iPhoto Plus4 and displayed at 96dpi.

This southerly view (7/8/06) shows Tunnel No.3 as viewed from Tunnel No.2. Click on the image to enlarge. This image is copyright B.W.Hughes and was taken on a Kodak DX6490 digital camera. Image post processed using iPhoto Plus4 and displayed at 96dpi.
By 16/12/00 work was well underway on the repointing of the retaining walls north of No. 2 tunnel and between No. 2 and 3 tunnels.
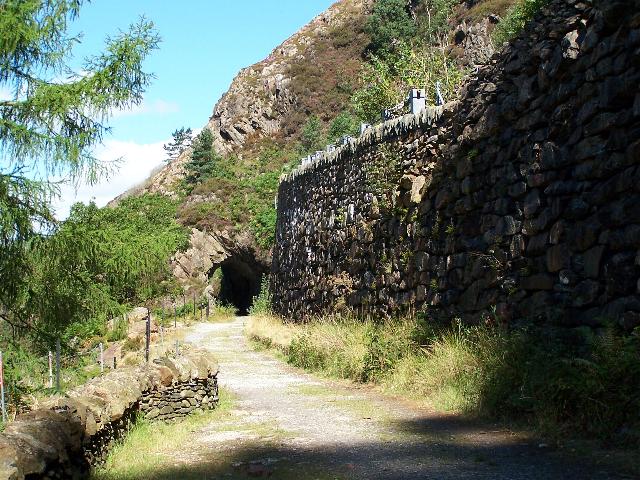
The short No. 3 tunnel pierces a rocky bluff with the river and road now far below. A concrete block reputed to be WW2 machine gun mount is situated just before the portal. All three tunnels were constructed to a remarkably large loading gauge perhaps in view of the 1906 proposal to electrify the route. The gauge is quite sufficient for the new larger locos and rolling stock. Click on the image to enlarge. This image is copyright B.W.Hughes. Slide scan technology utilised is Olympus ES10 & iPhoto Plus4. Slide scanned at 200dpi.
This easterly view (16/12/00) from the A498 shows the work north of No. 2 tunnel. The wooden gate on the formation shows where the tunnels are fenced off to the right of this. This consists of repointing work. Click on the image to enlarge. This image is copyright B.W.Hughes. Slide scan technology utilised is Olympus ES10 & iPhoto Plus4. Slide scanned at 200dpi.

This southerly view (30/12/00) shows the view from the south portal of No. 2 tunnel. The former WW2 machine gun mount is pushed aside to the left to allow vehicular access for the contractors. The short No. 3 tunnel can be seen with the scaffolding for the scree works beyond. Click on the image to enlarge. This image is copyright B.W.Hughes. Slide scan technology utilised is Olympus ES10 & iPhoto Plus4. Slide scanned at 200dpi.

This northerly view (7/8/06) shows the gun emplacement has now been set in a new concrete base clear of the trackbed. Click on the image to enlarge. This image is copyright B.W.Hughes and was taken on a Kodak DX6490 digital camera. Image post processed using iPhoto Plus4 and displayed at 96dpi.
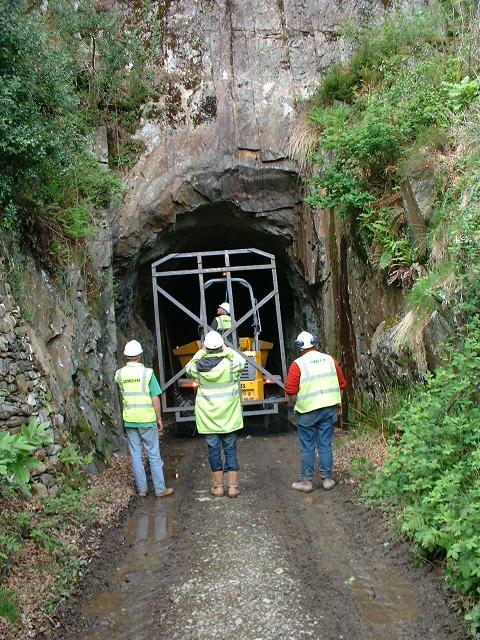
These northerly views (both 10/5/07) show gauging of T3 and T4 respectively. The gauge passed through without fouling the rock. Click on the images to enlarge. These images are courtesy/copyright John Ewing and were taken on a digital camera. Images post processed using iPhoto Plus4 and displayed at 96dpi.

This southerly view (30/12/00) was taken looking through the north portal of the short No. 3 tunnel. This tunnel has had a small amount of rockbolting and shotcrete. The scaffolding for the scree works is visible beyond. A water main runs down the left side of the trackbed through the tunnels encased in concrete in places. Click on the image to enlarge. This image is copyright B.W.Hughes. Slide scan technology utilised is Olympus ES10 & iPhoto Plus4. Slide scanned at 200dpi.
This southerly view (7/8/06) shows north portal of Tunnel No.3. Click on the image to enlarge. This image is copyright B.W.Hughes and was taken on a Kodak DX6490 digital camera. Image post processed using iPhoto Plus4 and displayed at 96dpi.
This southerly view (7/8/06) shows the shotcrete work done to stabilise Tunnel No.3. Click on the image to enlarge. This image is copyright B.W.Hughes and was taken on a Kodak DX6490 digital camera. Image post processed using iPhoto Plus4 and displayed at 96dpi.
This northerly view (7/7/06) in the Aberglaslyn Pass shows the two short tunnels No.3 and No.2. Click on the image to enlarge. This image is copyright Andrew Thomas and was taken on a digital camera. Image post processed using iPhoto Plus4 and displayed at 96dpi.
These southerly views (7/8/06 and 7/6/07) show the view from the south portal of Tunnel No.3. The second view shows the formation level being reduced between T2 and T3. The concrete cased former Nantmor water main has been left in place here on the left against the retaining wall. It appears a reduction of about 30cm have been achieved which will improve clearances through the tunnels. Click on the images to enlarge. The first image is copyright B.W.Hughes and was taken on a Kodak DX6490 digital camera. The second image is courtesy/copyright John Ewing and was taken on a Fuji Finepix 1400 digital camera. Image post processed using iPhoto Plus4 and displayed at 96dpi.

These northerly views (both 10/5/07) show gauging of T2 and T3 respectively. The former WW2 Blacker Bombard gun mount is seen between the two tunnels, now moved clear of the trackbed. It will be moved right up to the fence to allow clearance. The gauge passed through without fouling the rock. Click on the images to enlarge. These images are courtesy/copyright John Ewing and were taken on a digital camera. Images post processed using iPhoto Plus4 and displayed at 96dpi.
Scree slope
The main work is taking place between No. 2 and No. 1 (long) tunnels further south down the Pass.
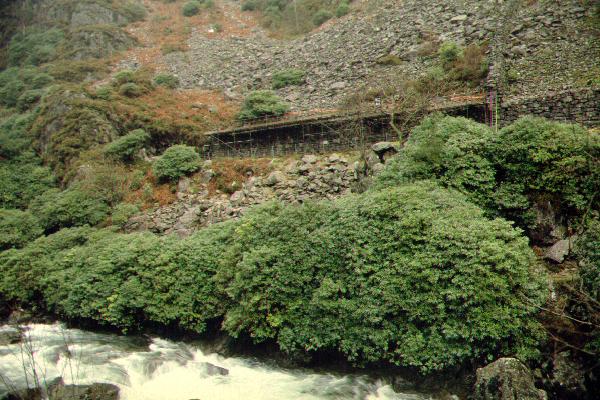
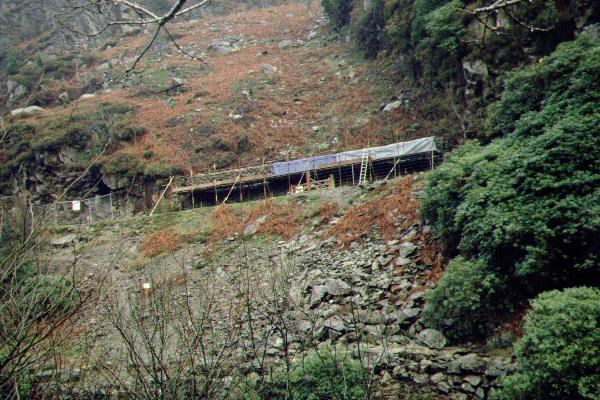
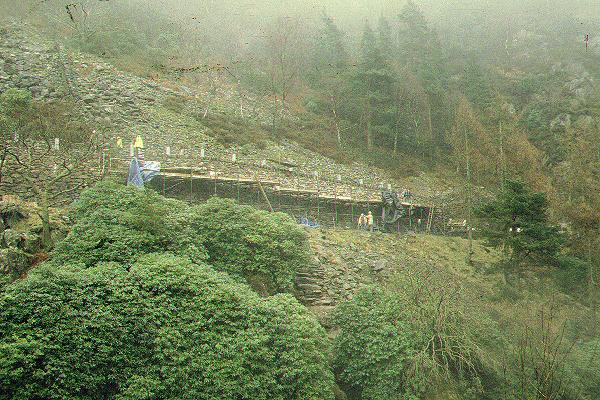
This easterly close up view (16/12/00) from the A498 shows the main area of work between No. 3 and No.4 (long) tunnels. The scaffolding lies between No. 3 tunnel and the wall going up the hillside. The concrete is to be extended upwards by 2 m and the wall crowned by a catch fence. In the foreground, the Afon Glaslyn tumbles over boulders of the Glaslyn Rapids. A boundary wall rises up the hillside above the retaining wall on the right of the view. Click on the image to enlarge. This image is copyright B.W.Hughes. Slide scan technology utilised is Olympus ES10 & iPhoto Plus4. Slide scanned at 200dpi.
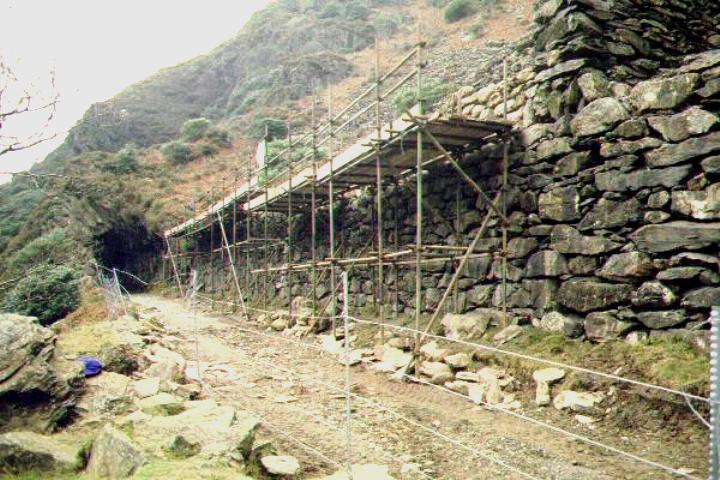
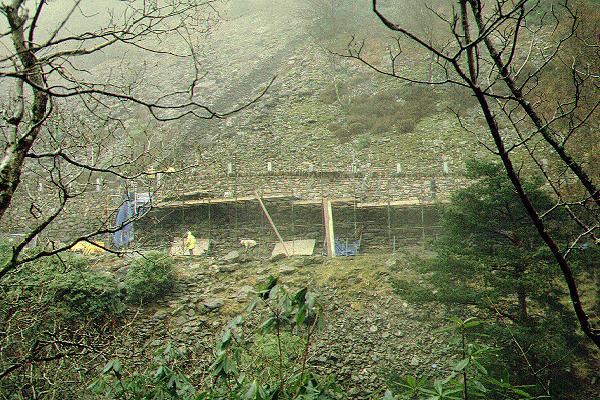
This northerly view (30/12/00) shows a close up of contractors scaffolding from a point near the south portal of No. 3 tunnel. At this stage the concrete behind the facia stones was being drilled and rebar formed for the 2 metre extension in height. The property boundary wall rises up the hillside of the extreme right. This area is fenced off from the Fisherman's Path. Click on the image to enlarge. This image is copyright B.W.Hughes. Slide scan technology utilised is Olympus ES10 & iPhoto Plus4. Slide scanned at 200dpi.

This southerly view (30/12/00) was taken from above No. 3 tunnel portal looking down on the back of the retaining wall works. A massive concrete wall of 1922 construction lies behind the local stone facia. Rebar has been keyed into this and the framework extends upward 2 metres. Concrete will be cast around the rebar and then local stone will finish off the new structure so that it blends into the pastoral setting of the Pass. A two metre catch fence will rise above the top of the wall. Click on the image to enlarge. This image is copyright B.W.Hughes. Slide scan technology utilised is Olympus ES10 & iPhoto Plus4. Slide scanned at 200dpi.
This easterly view (20/2/01) shows the completed works between No. 3 Tunnel and the dividing wall. The 2 metre increase in height is seen by the lighter stone colour but this will weather to form the same colour as the original stone in time. Work continues to the right of the boundary wall re-pointing the short section of retaining wall towards No. 4 Tunnel which was also increased in height. The catch fence can be seen behind the wall with stanchions placed at 2 metre intervals. The two wires hang loosely prior to tensioning. Click on the image to enlarge. This image is copyright B.W.Hughes. Slide scan technology utilised is Olympus ES10 & iPhoto Plus4. Slide scanned at 200dpi.
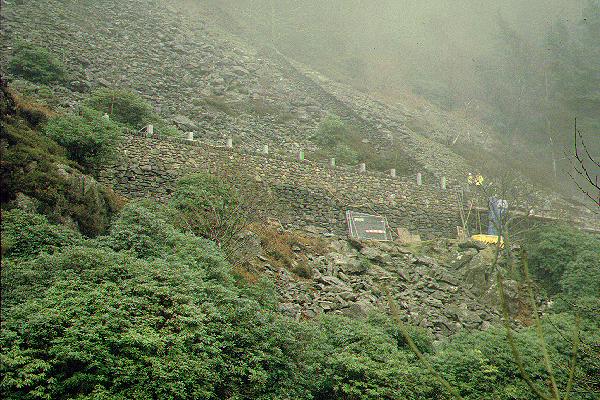
This northerly view (30/12/00) was taken from the portal of No. 4 (long) tunnel). The retaining wall south of the boundary fence had so far not been touched. The scree this side of the boundary wall can be seen to be managed. The rocks are laid regularly at an angle at 90 degrees to the slope. Click on the image to enlarge. This image is copyright B.W.Hughes. Slide scan technology utilised is Olympus ES10 & iPhoto Plus4. Slide scanned at 200dpi.
This northerly view (7/8/06) shows the south portal of the short Tunnel No.3. Click on the image to enlarge. This image is copyright B.W.Hughes and was taken on a Kodak DX6490 digital camera. Image post processed using iPhoto Plus4 and displayed at 96dpi.

This southerly view (7/8/06) shows the Aberglaslyn Pass from the north portal of Tunnel No.3 on one of the few sunny days in early August. Click on the image to enlarge. This image is copyright B.W.Hughes and was taken on a Kodak DX6490 digital camera. Image post processed using iPhoto Plus4 and displayed at 96dpi.
This northerly view (7/8/06) shows the retaining wall and Tunnel No.3 as viewed from the portal of Tunnel No.4. Click on the image to enlarge. This image is copyright B.W.Hughes and was taken on a Kodak DX6490 digital camera. Image post processed using iPhoto Plus4 and displayed at 96dpi.
This easterly view (20/2/01) shows work nearing completion of the final section of raised wall near the mouth of No. 4 Tunnel. Behind the wall, galvanised metal stanchions protrude a metre above the top of the wall. Two cables hang loosely between them prior to tensioning. Click on the image to enlarge. This image is copyright B.W.Hughes. Slide scan technology utilised is Olympus ES10 & iPhoto Plus4. Slide scanned at 200dpi.
This more southerly view (20/2/01) of the same location shows how the newly raised wall above the scaffolding platform dovetails nicely into the retaining wall for the No. 4 Tunnel entrance. Final re-pointing works are underway on the facing stones. Click on the image to enlarge. This image is copyright B.W.Hughes. Slide scan technology utilised is Olympus ES10 & iPhoto Plus4. Slide scanned at 200dpi.
Long Tunnel

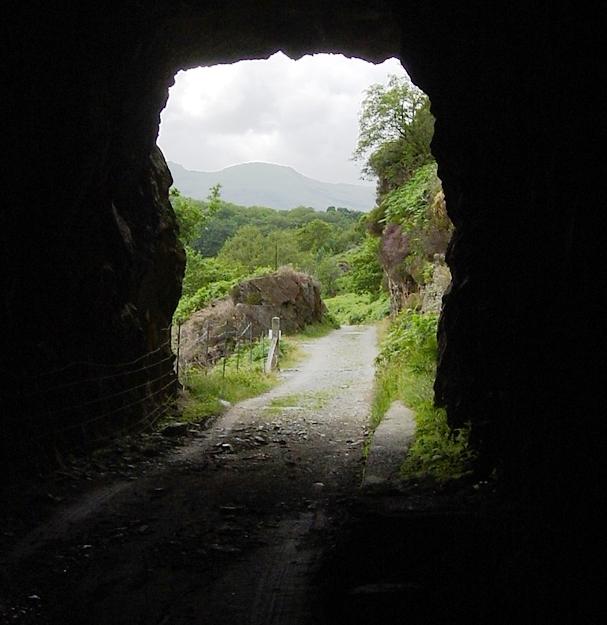
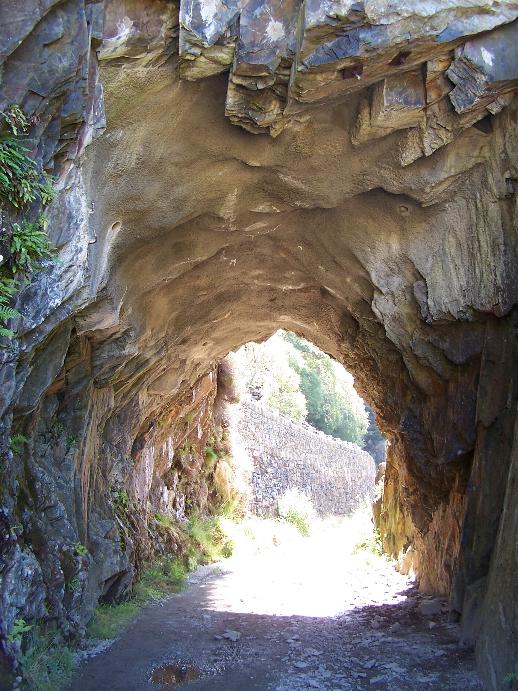
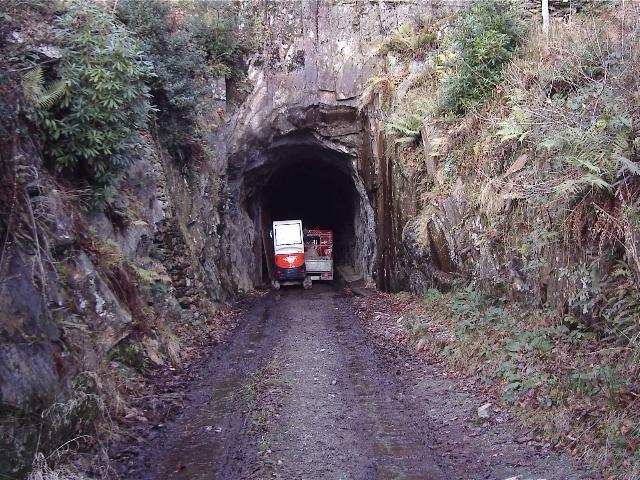
This view (3/7/99), looking south towards Nantmor and Porthmadog, shows the north portal of the 292 metre long Aberglaslyn No. 4 (long) Tunnel. The trackbed turns left into the tunnel and right immediately inside. The tunnel then cuts through a spur to Cwm Bychan in a straight line. Since this view was taken, the trackbed has been fenced off as the FR has responded to the concerns of objectors to the dangers of falling rocks. A heavy-duty grill has been fitted to both portals to prevent access. Click on the image to enlarge. This image is copyright B.W.Hughes. Slide scan technology utilised is Olympus ES10 & iPhoto Plus4. Slide scanned at 200dpi.
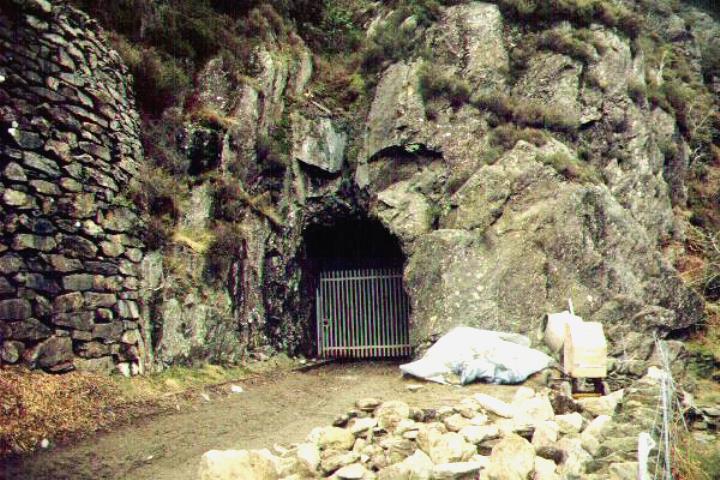
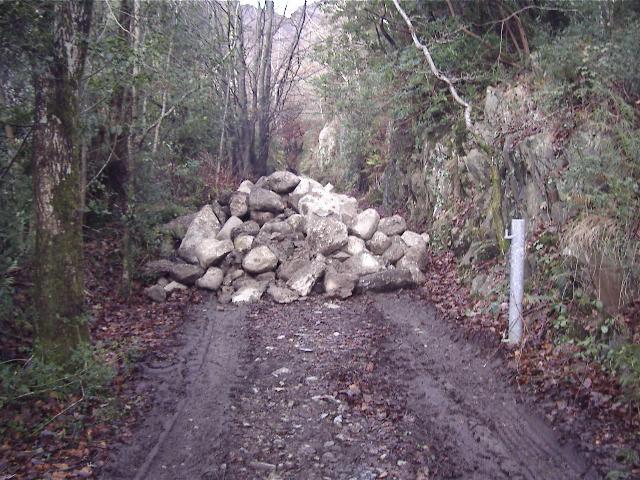
This southerly view 30/12/00) shows the north portal of No. 4 (long) tunnel. The entrance has been sealed with a heavy duty steel grill. Some rockbolting has taken place above the portal and there is a small amount of shotcreting inside the portal. Rocks have been stockpiled in the foreground as facing for the newly heightened retaining wall. Click on the image to enlarge. This image is copyright B.W.Hughes. Slide scan technology utilised is Olympus ES10 & iPhoto Plus4. Slide scanned at 200dpi.
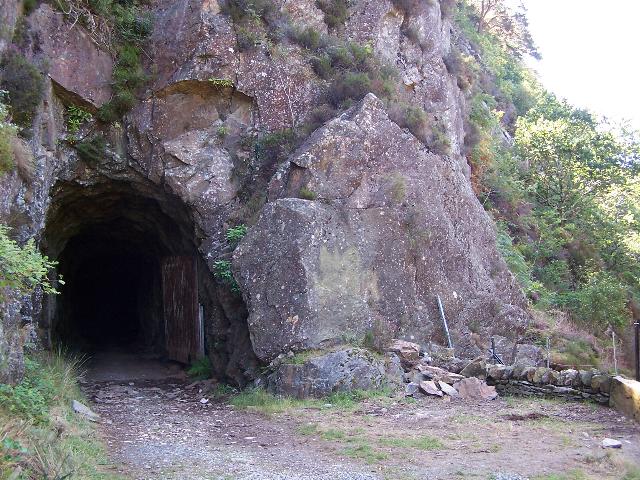

These southerly views (7/8/06 and 31/5/07) shows the north portal of Tunnel No.4. The second view shows the concrete water Nantmor water main, due for renewal and the reduction in levels of the loose stone in the tunnel base to improve clearances. Click on the images to enlarge. The first image is copyright B.W.Hughes and was taken on a Kodak DX6490 digital camera. The second image is courtesy Alasdair Stewart (WHRCL) and was taken on a digital camera. Image post processed using iPhoto Plus4 and displayed at 96dpi.
These northerly views (both 31/5/07) show the trackbed level reduced at the north portal of T4. The second view shows the remains of the Nantmor water main that was recently broken out of T4. Click on the images to enlarge. These images are courtesy/copyright Alasdair Stewart (WHRCL). Both were taken on a digital camera. Images post processed using iPhoto Plus4 and displayed at 96dpi.
This southerly view (7/7/06) shows the shotcreted interior of the long No.4 Tunnel with the south portal visible at the far end. The concrete armoured Nantmor water main can be seen on the left. Click on the image to enlarge. This image is copyright Andrew Thomas and was taken on a digital camera. Image post processed using iPhoto Plus4 and displayed at 96dpi.

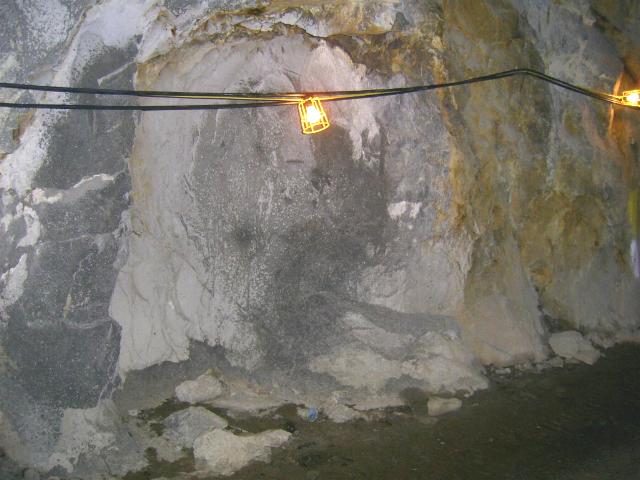
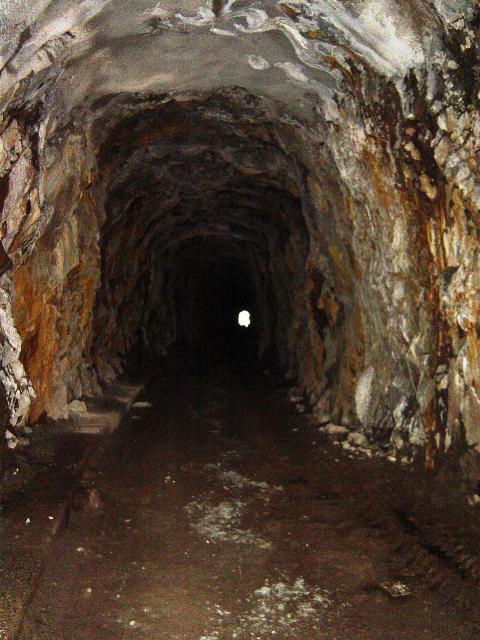
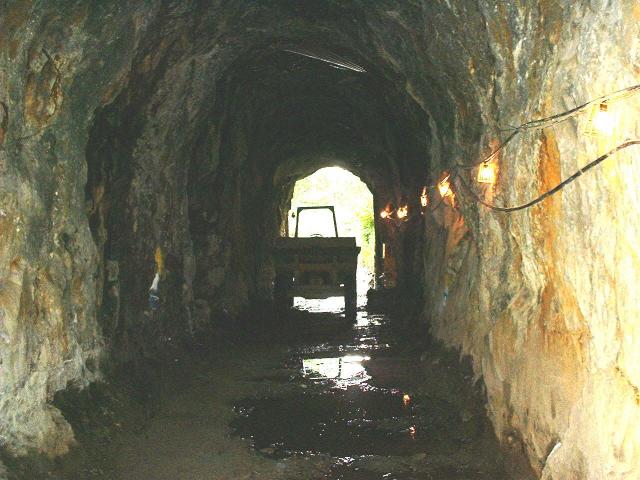
These views (both 10/5/07) show lighting in T4, the long Aberglaslyn Tunnel, lit by a generator just outside the south portal. The first photo shows the view down the tunnel with a vehicle at the end and the second shows a refuge. Click on the images to enlarge. These images are courtesy Alasdair Stewart (WHRCL) and were taken on a digital camera. Images post processed using iPhoto Plus4 and displayed at 96dpi.
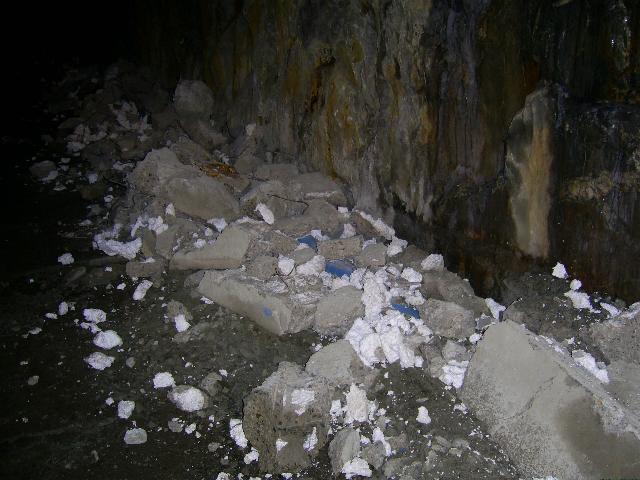
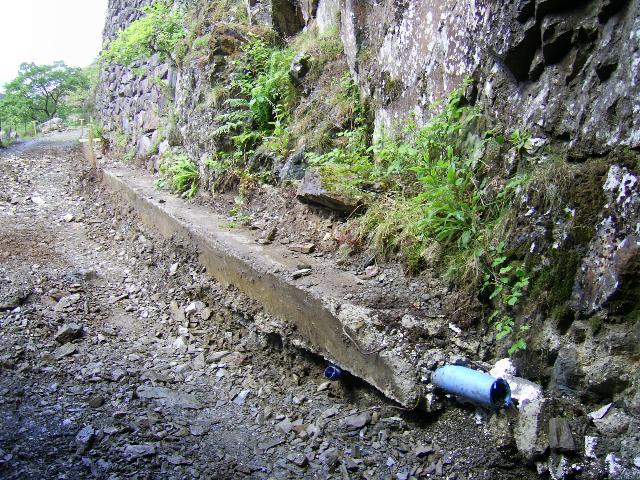
This northerly view (15/5/07) shows the contractor breaking out the former Nantmor water main in T4, the long tunnel. The pipe was set in concrete and had polystyrene insulation material to protect it from freezing as it could get quite cold in the draughty tunnel in Winter! Click on the image to enlarge. This image is courtesy Alasdair Stewart (WHRCL) and was taken on a digital camera. Image post processed using iPhoto Plus4 and displayed at 96dpi.
This southerly view (31/5/07) shows that excavation of lose material in the base of T4 has now taken the base of the tunnel down about 50cm, improving clearance. Click on the image to enlarge. This image is courtesy/copyright John Ewing and was taken on a Fuji Finepix 1400 digital camera. Image post processed using iPhoto Plus4 and displayed at 96dpi.
The former WW2 machine gun post was removed from the trackbed to allow vehicle access and there has been some rockbolting around the portals. A small amount of shotcreting has been completed just inside the portals.
Cwm Bychan
The railway emerges from the 292 metre No. 4 (long) tunnel to cross Cwm Bychan on a high embankment and bridge.

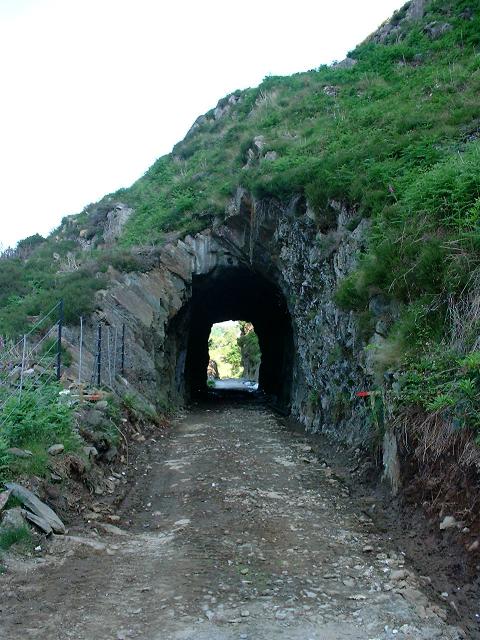
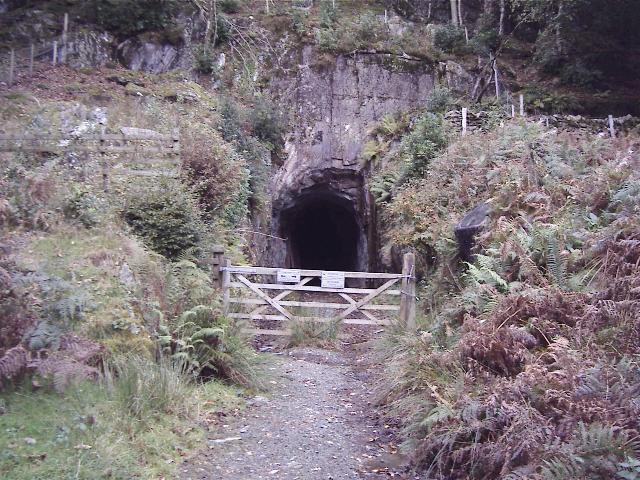
This view (3/7/99) shows the southern entrance to the long Aberglaslyn No. 1 Tunnel in Cwm Bychan. The entrance is now fenced off with a heavy-duty steel grill at both ends. There is a National Trust car park and toilets at this location. A footpath leads up the valley past the portal and crosses the trackbed at this location. Click on the image to enlarge. This image is copyright B.W.Hughes. Slide scan technology utilised is Olympus ES10 & iPhoto Plus4. Slide scanned at 200dpi.
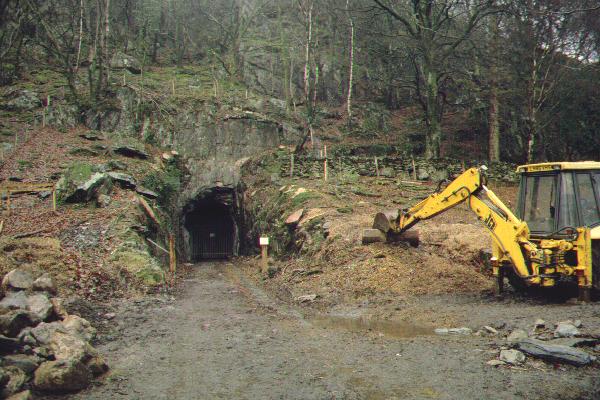
These northerly views (16/12/00, 18/10/04 and 12/12/04) show the south portal of the No. 4 (long) tunnel. All the trees have been cut back and rock bolting has taken place on the left side of the cutting to secure loose slabs. The second view shows the tunnel has been gated for insurance purposes. The third view shows the tunnel in use as a temporary access for the NT's Fisherman's Path works. Click on the image to enlarge. These images are copyright B.W.Hughes. Slide scan technology utilised is Olympus ES10 at 200dpi.. The second and third images were captured on a Concord 23340z Digital camera with post processing by iPhoto Plus4. Images displayed at 96dpi.
Work was well underway on the Fisherman's Path in the Aberglaslyn Pass in December 2004 and completed in early 2005. Quantities of stone were delivered to Nantmor l/c and trucked up the trackbed to Cwm Bychan. Plant was stored under cover just inside the south end of the long tunnel.

These northerly and westerly views (both 22/5/07) show the work to drain T4 and the footpath diversion to UB177, the Cwm Bychan footpath underbridge. Click on the images to enlarge. These images are courtesy/copyright Alasdair Stewart (WHRCL). Both were taken on a digital camera. Images post processed using iPhoto Plus4 and displayed at 96dpi.
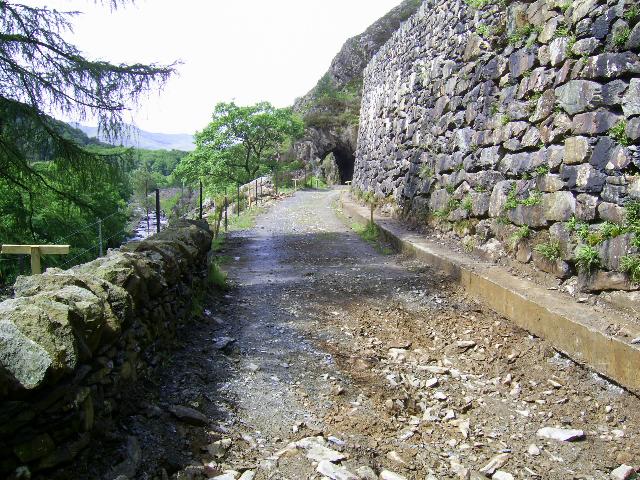
This southerly view (16/12/00) shows the view south from the public footpath at the south portal of the No. 4 (long) tunnel. The trackbed over the Cwm Bychan bridge has been widened to allow vehicular access via Nantmor station. Click on the image to enlarge. This image is copyright B.W.Hughes. Slide scan technology utilised is Olympus ES10 & iPhoto Plus4. Slide scanned at 200dpi.
This southerly view (18/10/04) shows the view from the south portal of the No. 4 (long) tunnel towards Nantmor Halt. The railway crosses the valley of Cwm Bychan on an embankment over two bridges. Click on the image to enlarge. This image is copyright B.W.Hughes. This image was captured on a Concord 23340z Digital camera with post processing by iPhoto Plus4. Image displayed at 96dpi.
This northerly view (10/5/07) shows UB177, the large underbridge at Nantmor, fenced off prior to the start of trackbed widening at this location. Click on the image to enlarge. This image is courtesy Alasdair Stewart (WHRCL) and was taken on a digital camera. Image post processed using iPhoto Plus4 and displayed at 96dpi.
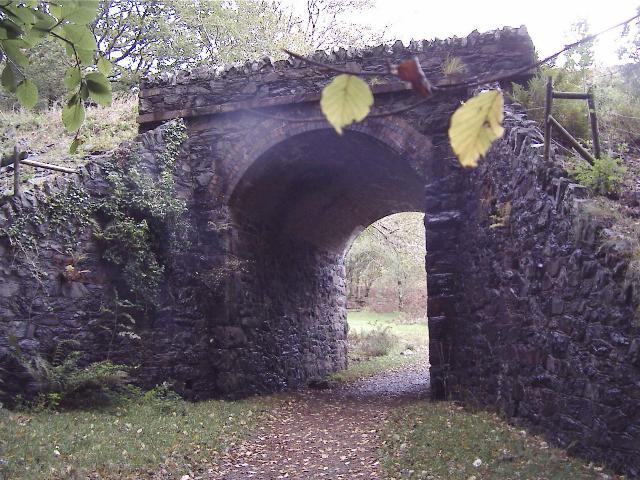
This northerly view (18/10/04) shows the Cwm Bychan underbridge as seen from the footpath from the National Trust car park. Beyond the bridge are the remains of an ore processing plant. Click on the image to enlarge. This image is copyright B.W.Hughes. This image was captured on a Concord 23340z Digital camera with post processing by iPhoto Plus4. Image displayed at 96dpi.
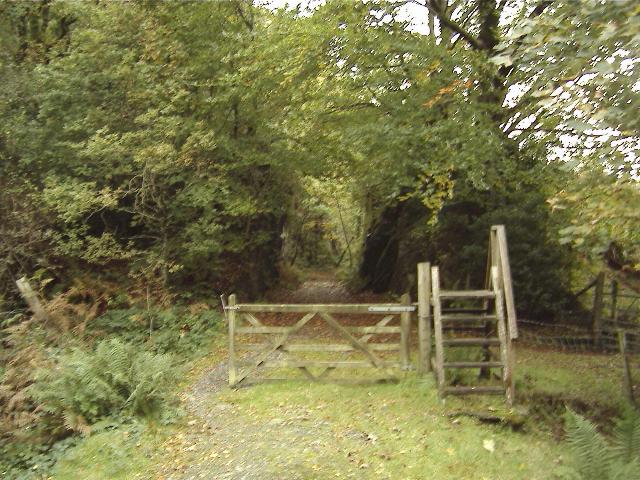
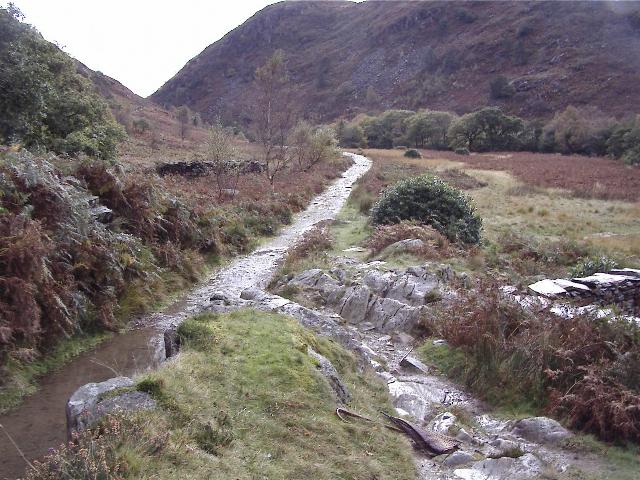
This southerly view (18/10/04) shows the stile at the south end of Cwm Bychan, evidence of Gwynedd CC attempts to make a long distance footpath on the line of the railway. The railway now enters a series of deep vertical sided rock cuttings on the approach to Nantmor Halt. Click on the image to enlarge. This image is copyright B.W.Hughes. This image was captured on a Concord 23340z Digital camera with post processing by iPhoto Plus4. Image displayed at 96dpi.
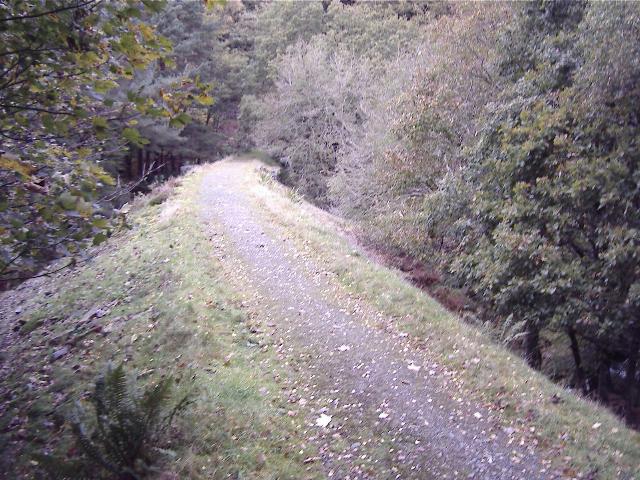
This northerly view (18/10/04) from the stile above shows the Cwm Bychan embankment crossing a stream and a bridge overa footpath. The car park and toilets are to the left. Click on the image to enlarge. This image is copyright B.W.Hughes. This image was captured on a Concord 23340z Digital camera with post processing by iPhoto Plus4. Image displayed at 96dpi.
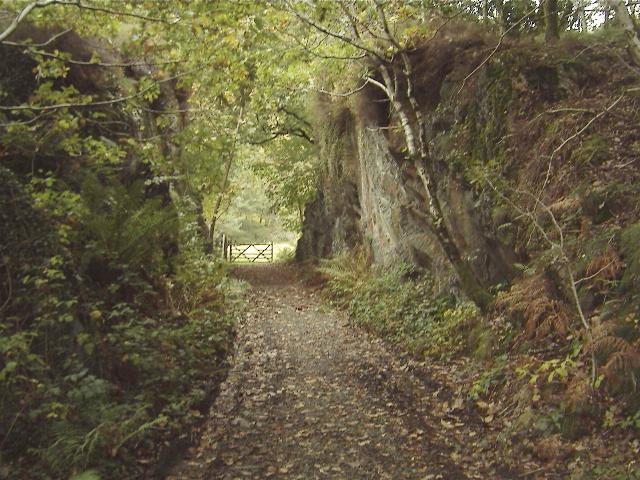
This northerly view (18/10/04) shows the first of several vertical sided rock cuttings started by the PBSSR south of Cwm Bychan, with the previously seen stile in the background. The cuttings were finished to a wide loading gauge untypical of the 1922 WHR works that used the incomplete PBSSR works. Click on the image to enlarge. This image is copyright B.W.Hughes. This image was captured on a Concord 23340z Digital camera with post processing by iPhoto Plus4. Image displayed at 96dpi.
This northerly view (20/10/04) shows the view from Nantmor l/c. The former gatepost for the Aberglaslyn Works is visible at the start of the cutting. Local residents have (strangely) campaigned against a halt at this location and the FR has guaranteed it will not construct one. At some time in the near future, the residents seem likely to change their minds, one feels, as public transport into Porthmadog becomes available on their doorstep. Click on the image to enlarge. This image is copyright B.W.Hughes. This image was captured on a Concord 23340z Digital camera with post processing by iPhoto Plus4. Image displayed at 96dpi.
This northerly view (12/12/04) from Nantmor l/c shows stone dumped on the trackbed for use in the improvement works for the Fisherman's Path in the Aberglaslyn Pass. Click on the image to enlarge. This image is copyright B.W.Hughes and was taken on a Concord 3340z (3.1 Mega pixel) digital camera. Image post processed using iPhoto Plus4 image correction technology and displayed at 96dpi.
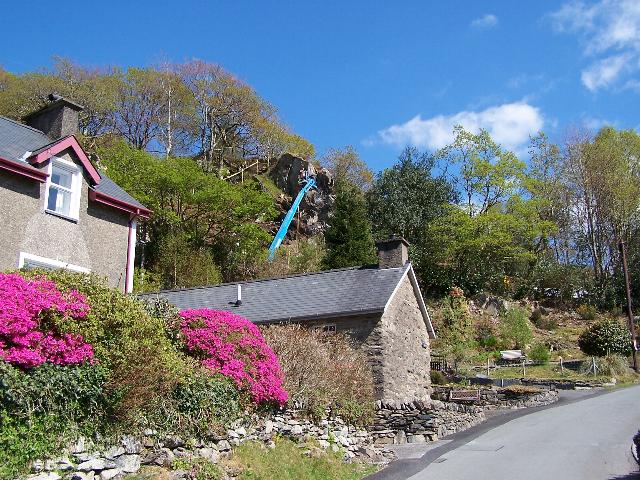
This easterly view (15/4/07) shows Ray Jarvis doing the rockwork on the very deep cutting north of Nantmor Halt and LC92 as seen from the Nantmor village lane. The blue cherry picker arm and platform can be seen to be extended high above the houses. Click on the image to enlarge. This image is copyright B.W.Hughes and was taken on a Kodak DX6490 digital camera. Image post processed using iPhoto Plus4 and displayed at 96dpi.

This southerly view (10/4/07) shows the rockbolting going on in Nantmor Cutting just north of LC92. Click on the image to enlarge. This image is copyright Ray Jarvis, courtesy Alasdair Stewart, and was taken on a digital camera. Image post processed using iPhoto Plus4 and displayed at 96dpi.

This northerly view (19/4/07) shows the rockbolting going on in Nantmor Cutting just north of LC92, high up the side of the cutting from the cherry-picker. The shattered nature of the rock is evident here. Click on the image to enlarge. This image is copyright Ray Jarvis, courtesy Alasdair Stewart, and was taken on a digital camera. Image post processed using iPhoto Plus4 and displayed at 96dpi.
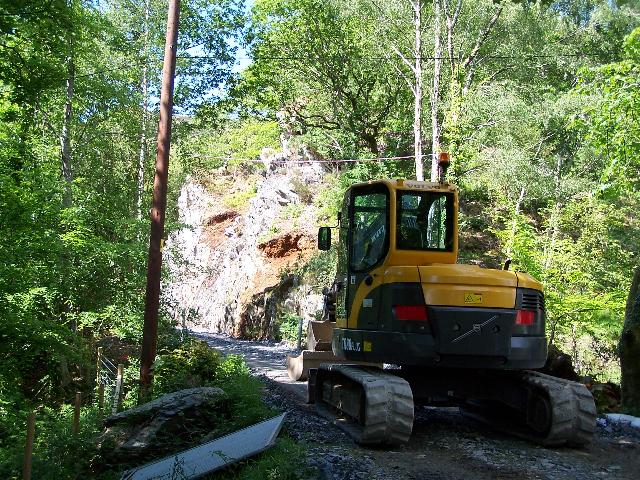
This northerly view (20/5/07) from Nantmor Level Crossing shows James Cyf's plant on site. Scaling and bolting of the cliff in view to the left is complete. Work can now proceed north from this point. Click on the image to enlarge. This image is copyright B.W.Hughes and was taken on a Kodak DX6490 digital camera. Image post processed using iPhoto Plus4 and displayed at 96dpi.
Click here to visit the Nantmor-Pont Croesor page
Click here to return to Stop Press page
Site Development
If you have suggestions for development of this site, please contact me by email from the address on the Stop Press page.
Page Version 4.8 Dated 2/7/07