WHR
Beddgelert Forest Halt to Beddgelert Station page
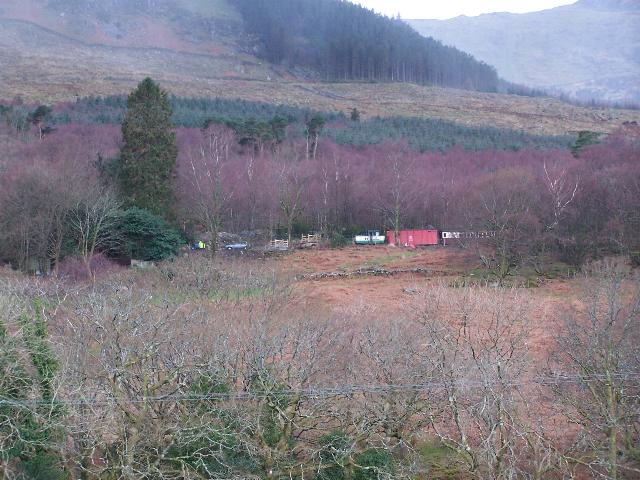
(part of the Beddgelert Area page)
V4.14 updated 1/7/07
Images updated from 15/6/07.
Click here for new images on this page
Click here for Laurence Armstrong's latest WHR North map
Click here for Steve Harris' Phase 4 gradient profiles
Click here for Steve Harris' Phase 4 TWA maps
Click here for Chainages and OS Map References
Beddgelert Forest Halt
This section will not require much work other than drainage and replacing culverts as a hard base has been maintained as a Forest Enterprise track and permitted path.

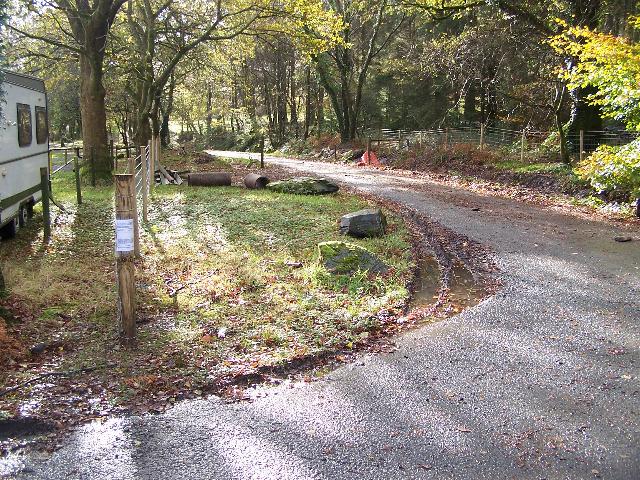
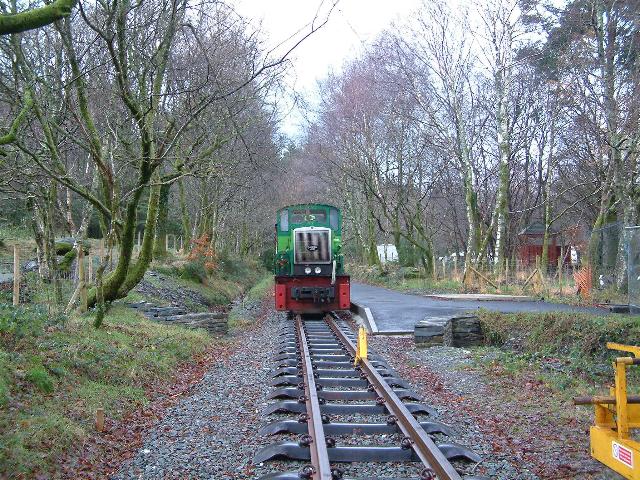
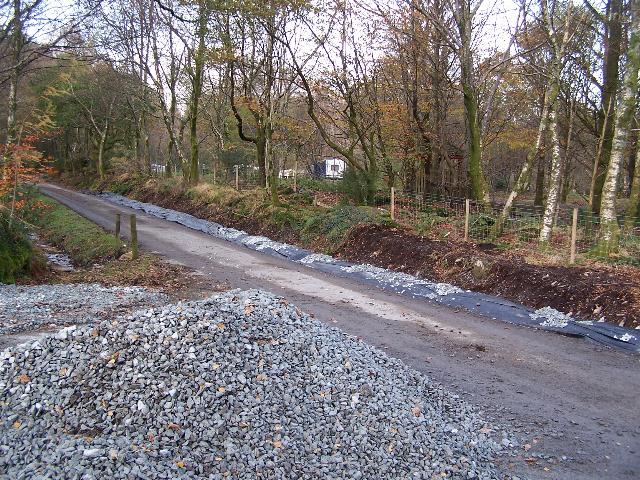
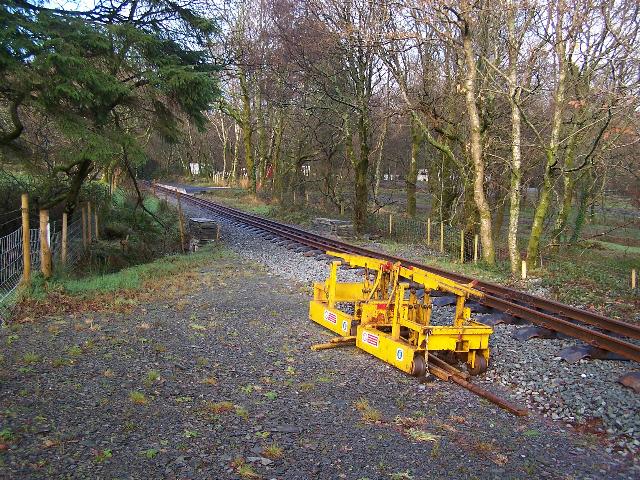
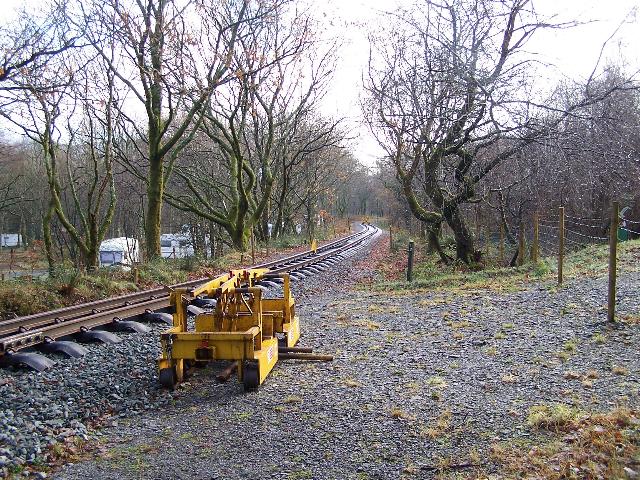
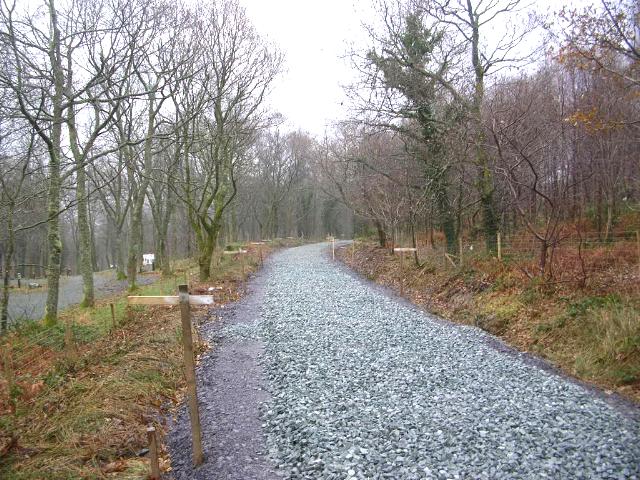
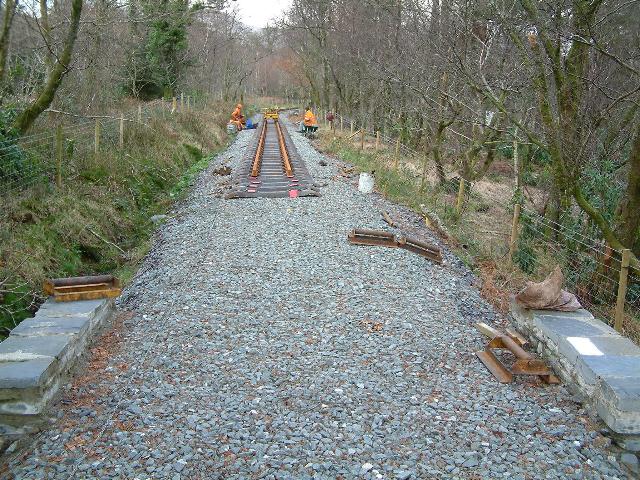
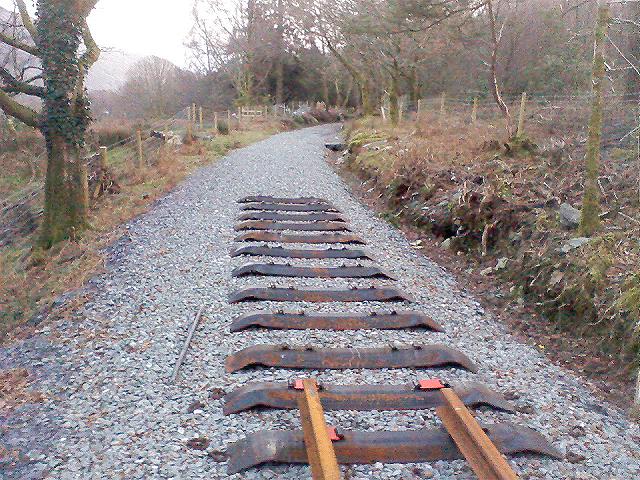
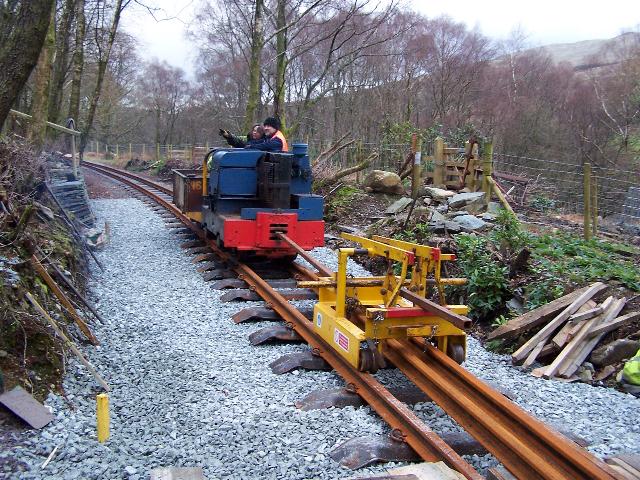
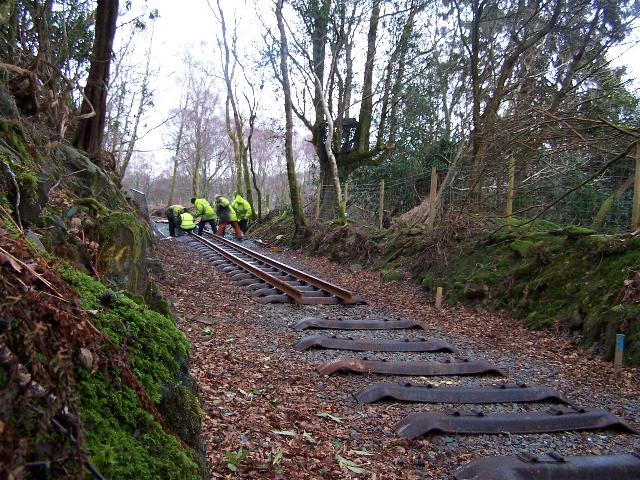
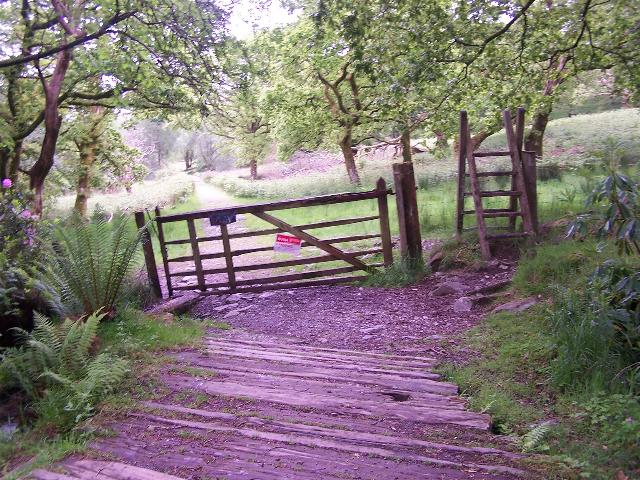
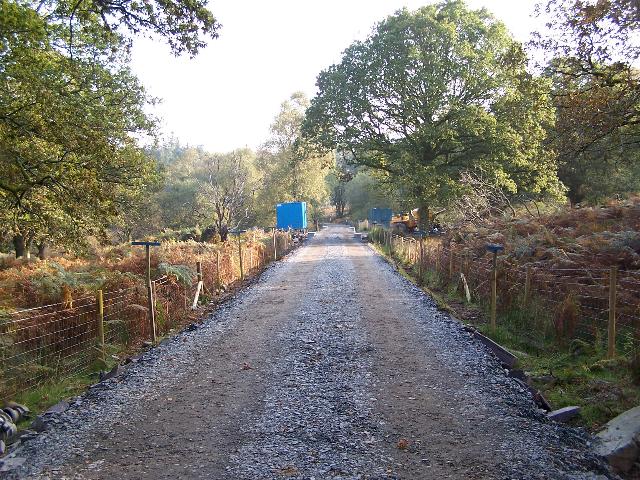
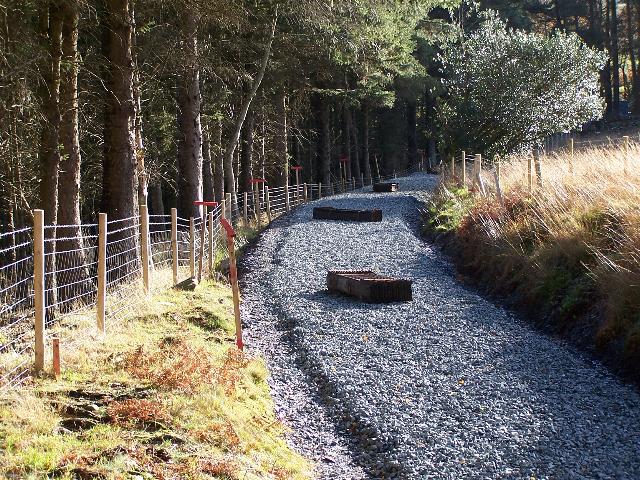
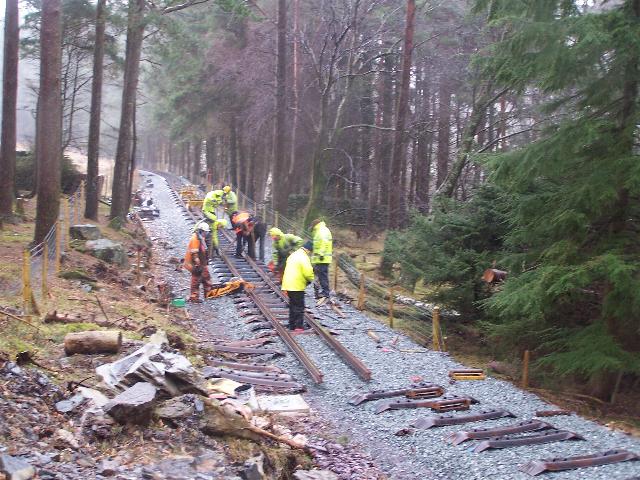
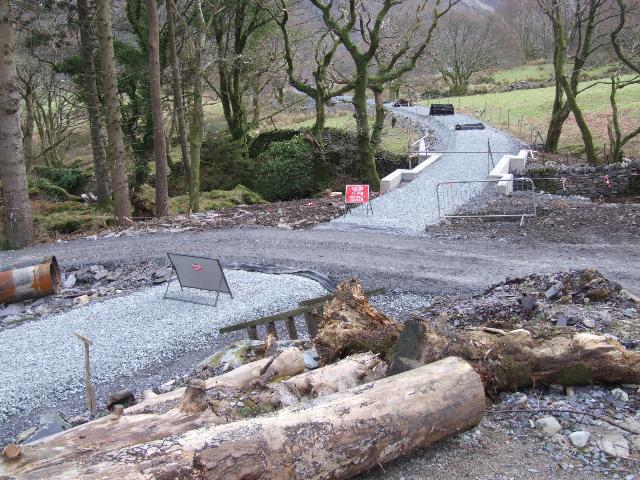
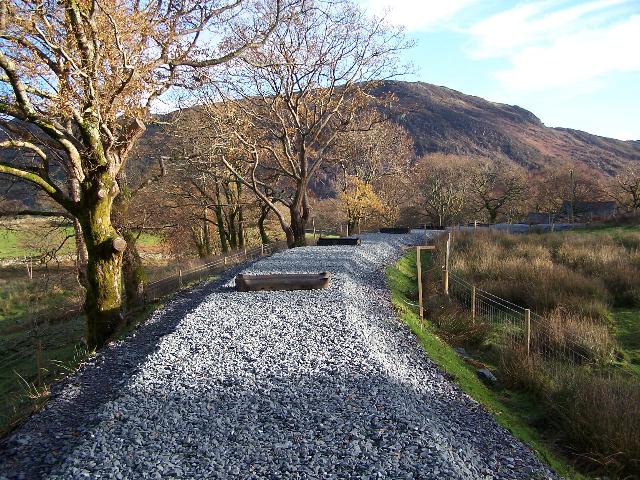
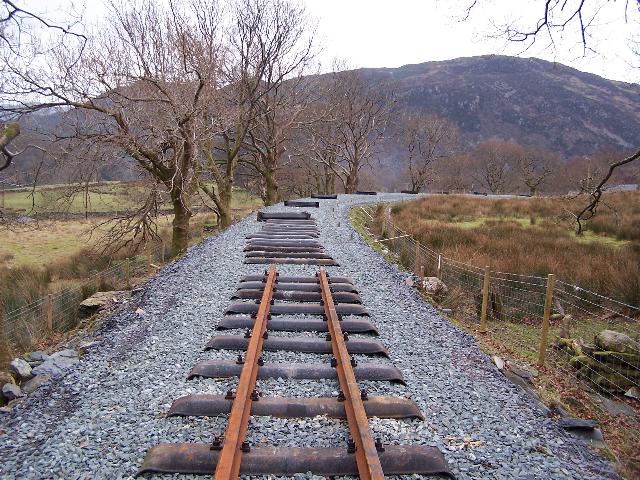
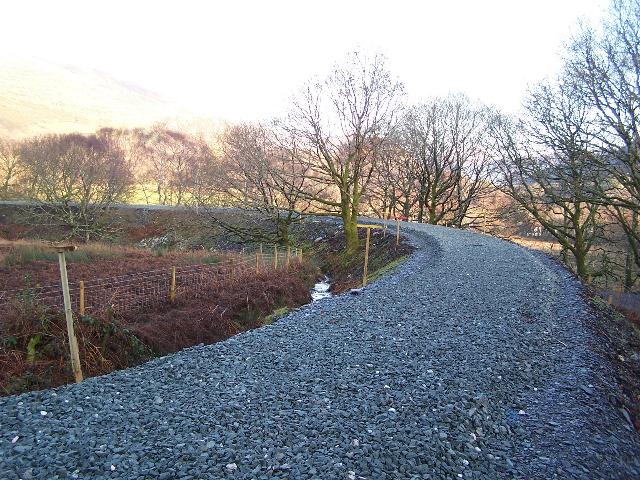
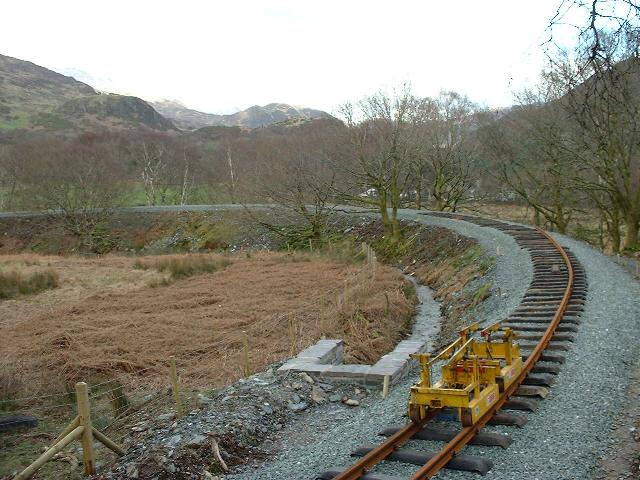
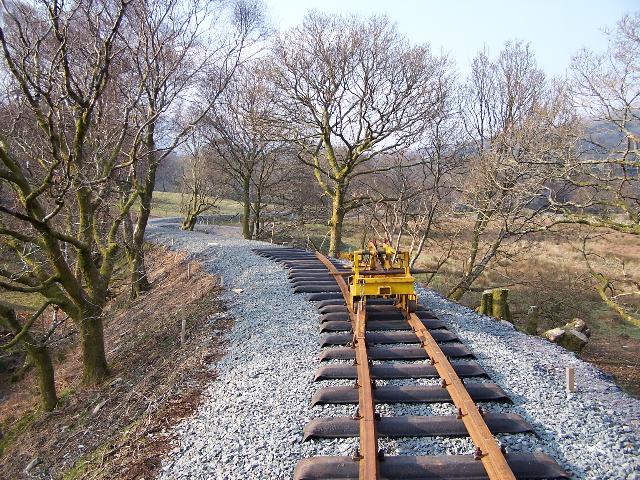
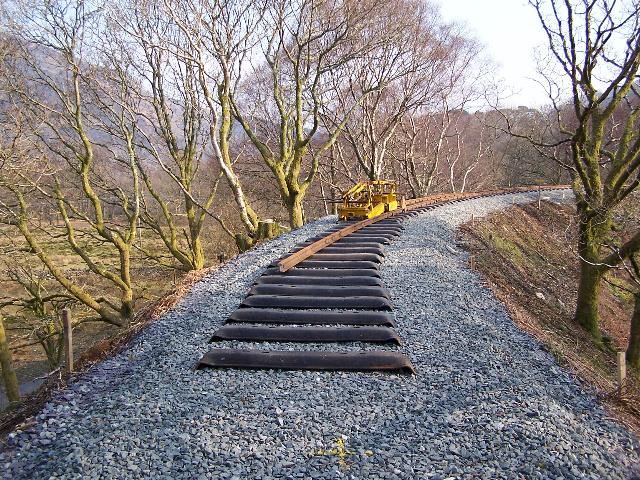
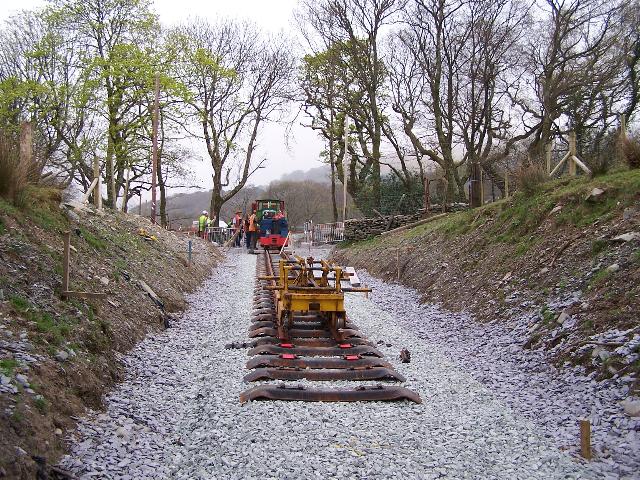
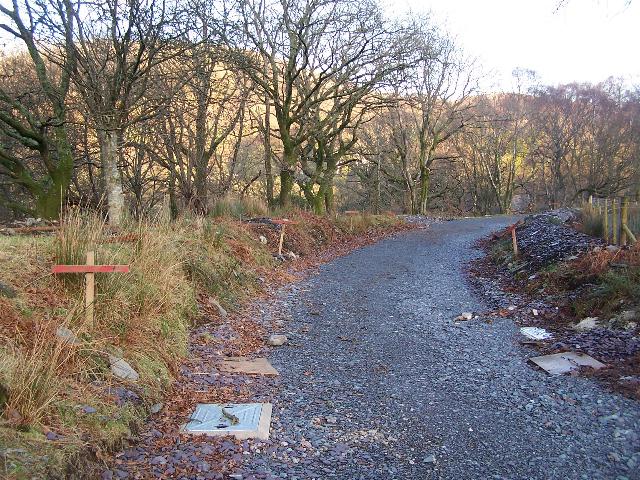
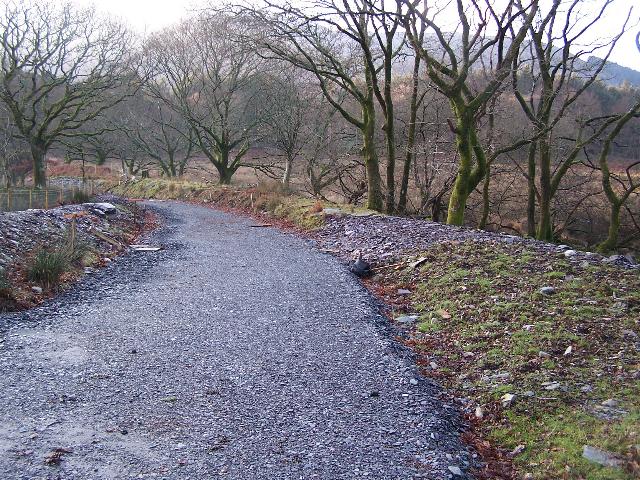
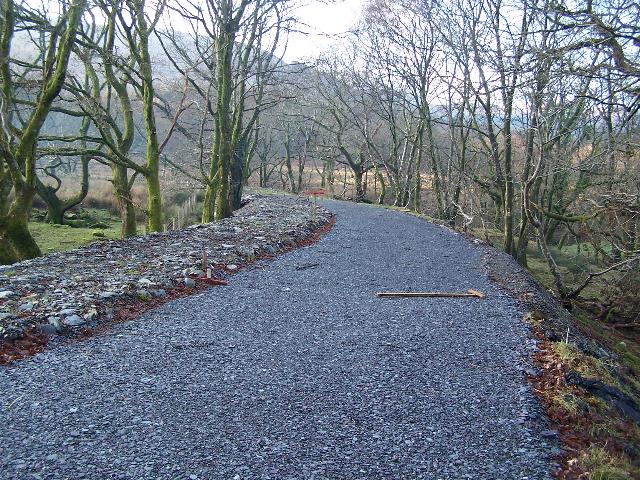
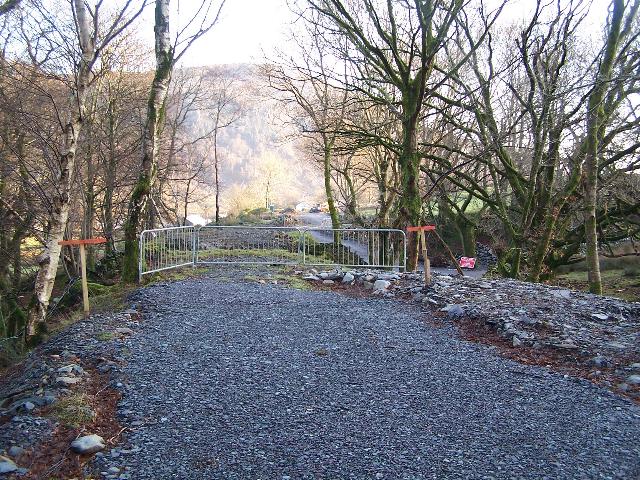
These southerly views (12/11/05, 23/12/05 and 21/1/07) from LC77 show the fencing through the campsite has been completed. The site of the future Beddgelert Forest Halt is just around the corner. The sign on the post indicates the former permissive path on the trackbed has been closed by order of the Forestry Commission and the WHRCL. However, on this date, the tarmac had still not been removed from the trackbed. The second view shows the formation finished with tarmac removed, slate fines sub base rolled and a ballast bed added. The third view shows track laid although not tamped as the variable vertical alignment shows. Click on the images to enlarge. These images are copyright B.W.Hughes and were taken on a Kodak DX6490 digital camera. Images post processed using iPhoto Plus4 and displayed at 96dpi.
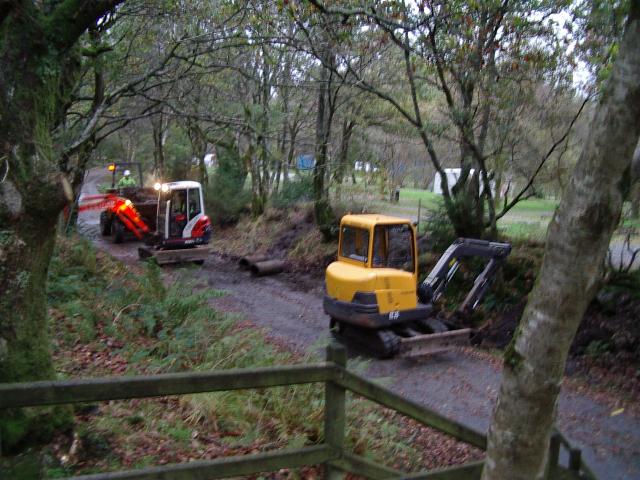
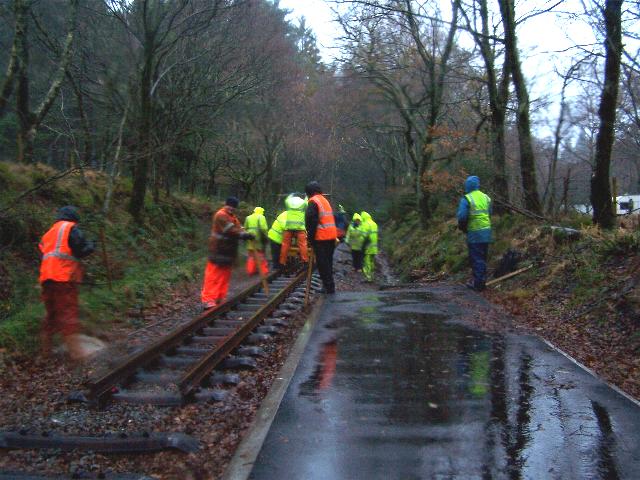
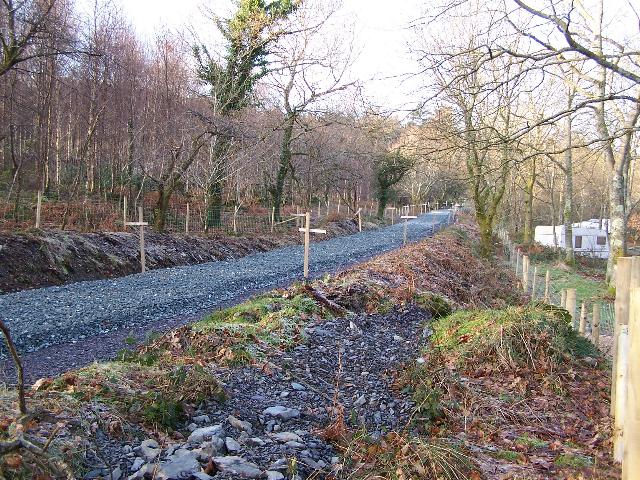
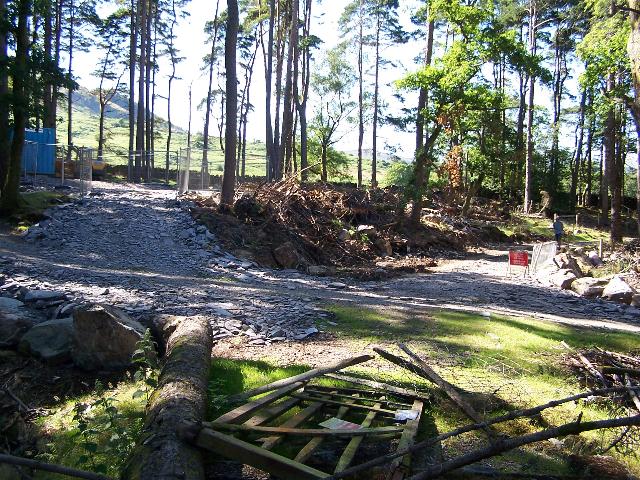
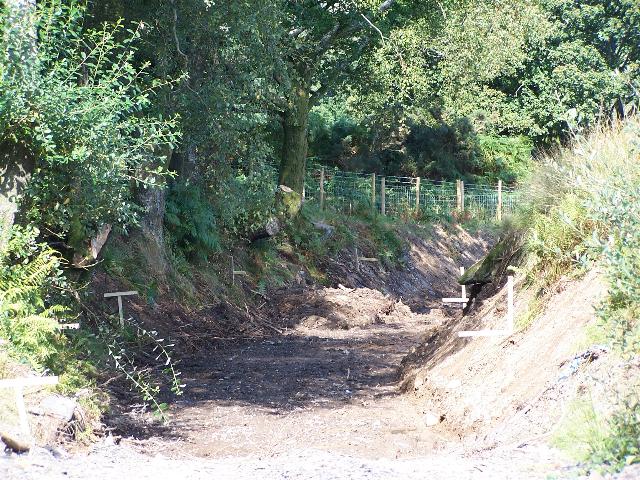
This northerly view (7/11/05) just north of the site of the future Beddgelert Forest Halt shows contractor James Cyf. on site ditching. The tarmac roadway on this section must also be excavated. This was to be the site of OB151, a footpath bridge. The footpath fencing can be seen leading down to the railway. Click on the image to enlarge. This image is copyright Roger Dick and was taken on a digital camera. Image post processed using iPhoto Plus4 and displayed at 96dpi.
It has been decided to close the former footpath crossing as the part of the campsite to the west of the railway is being closed. This will mean that the proposed footbridge at OB151 will not be required. It would have made an excellent photographic vantage point.

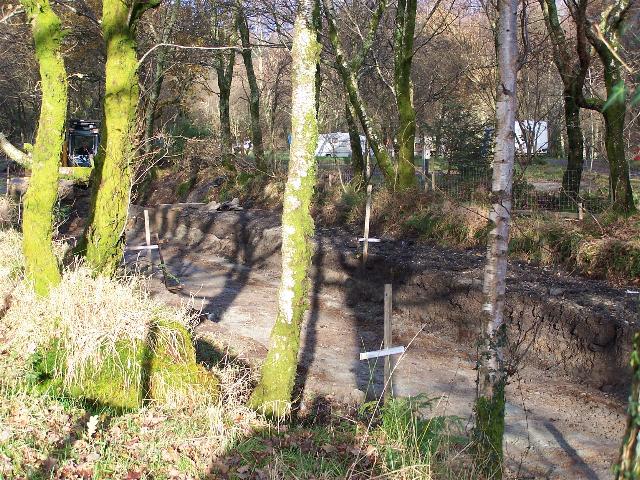
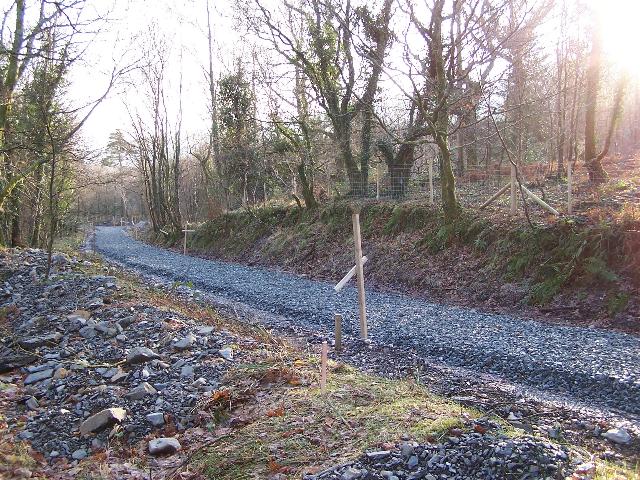
These northerly views (12/11/05 and 11/12/05) from the site of the formerly proposed OB151 (as above image) show the fencing through the campsite has been completed and the former footpath level crossing closed. The second view shows the trackbed was being excavated down through the tarmac to the correct level that day and some spoil has been banked to the right for the construction of the platform for Beddgelert Forest Halt. Click on the images to enlarge. These images are copyright B.W.Hughes and were taken on a Kodak DX6490 digital camera. Images post processed using iPhoto Plus4 and displayed at 96dpi.
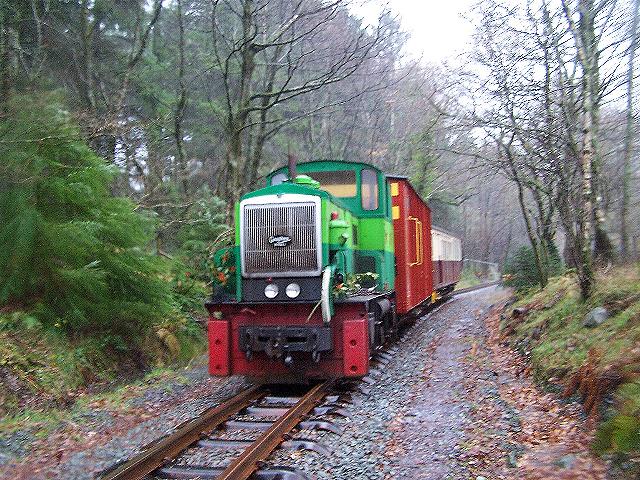
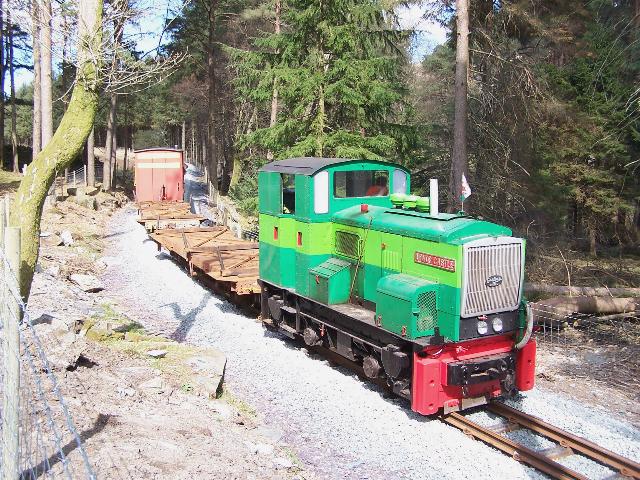
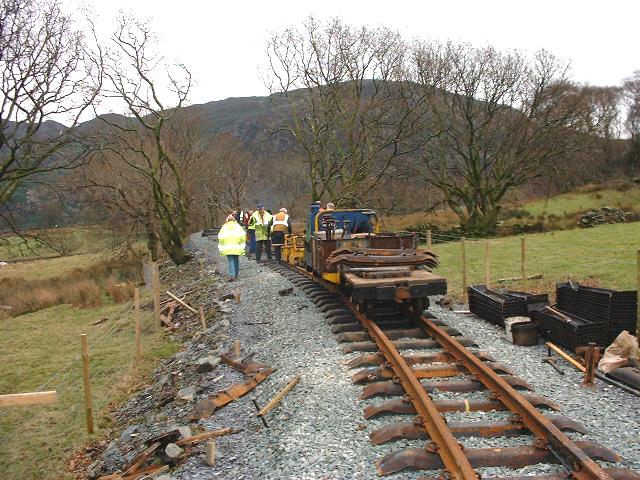
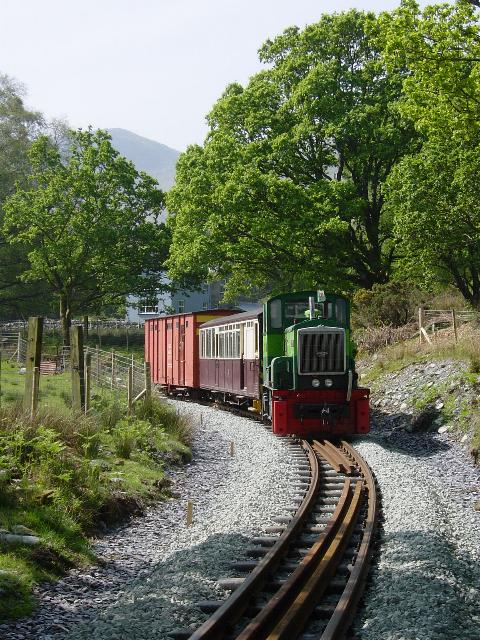
This northerly view (10/12/06) shows Upnor Castle on the Phase 4 PW train just north of Beddgelert Forest Halt. Despite the rain, the loco looks a little festive adorned with holly. Click on the image to enlarge. This image is copyright B.W.Hughes and was taken on a Kodak DX6490 digital camera. Image post processed using iPhoto Plus4 and displayed at 96dpi.

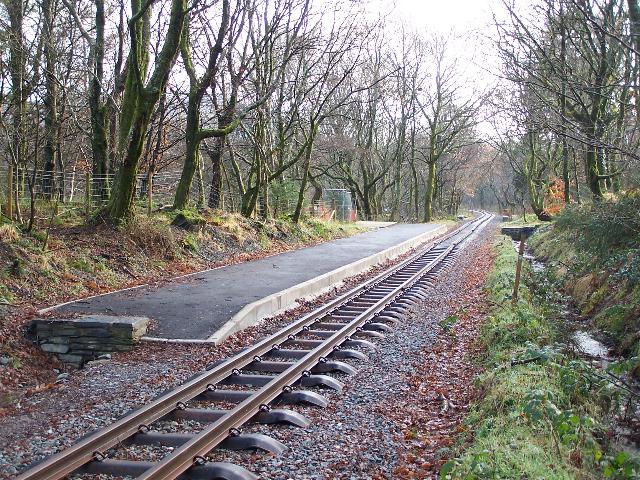
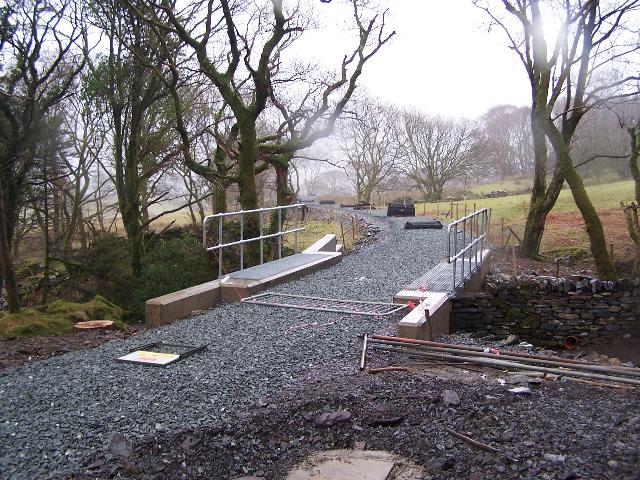
These southerly views (17/4/06 and 23/12/06) at Ch.19950 shows the platform of Beddgelert Forest Halt under construction. Platform rear edge kerbing is visible but not yet fitted. The concrete area in the background is the base of the waiting shelter, which will be fitted nearer the opening day. The second view shows the track and rear kerb completed. Click on the images to enlarge. These images are copyright B.W.Hughes and were taken on a Kodak DX6490 digital camera. Images post processed using iPhoto Plus4 and displayed at 96dpi.
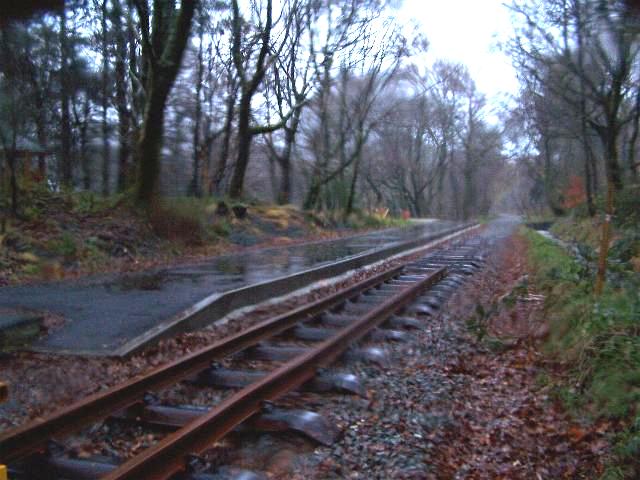
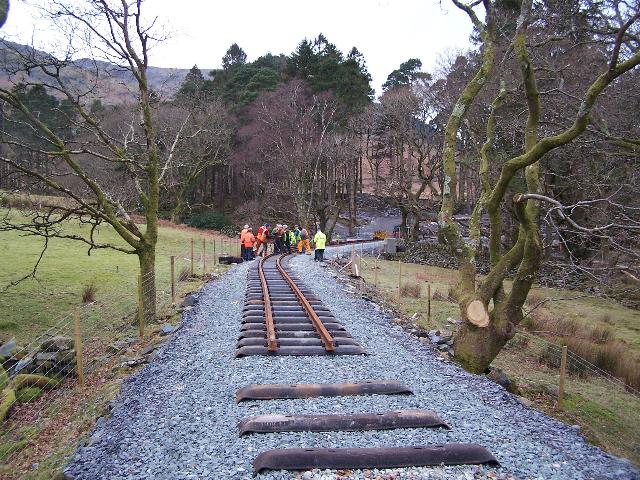
These views (10/12/06) show the Head of Steel at the end of the day's tracklaying in the pouring rain! The first view shows the first track alongside the platform looking south and the second view shows the north view of the Head of Steel. Click on the image to enlarge. This image is copyright B.W.Hughes and was taken on a Kodak DX6490 digital camera. Image post processed using iPhoto Plus4 and displayed at 96dpi.
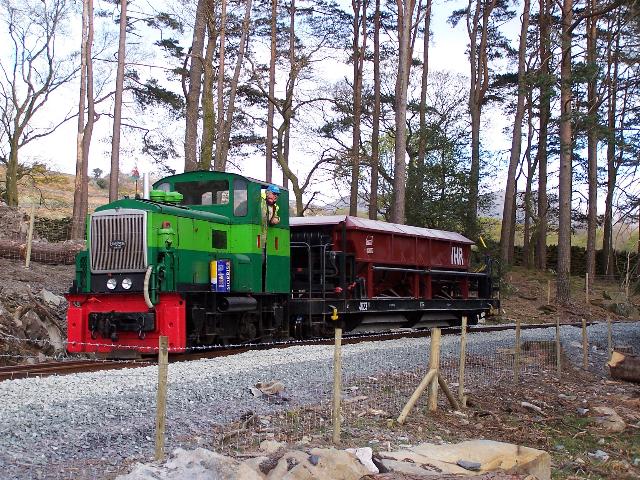
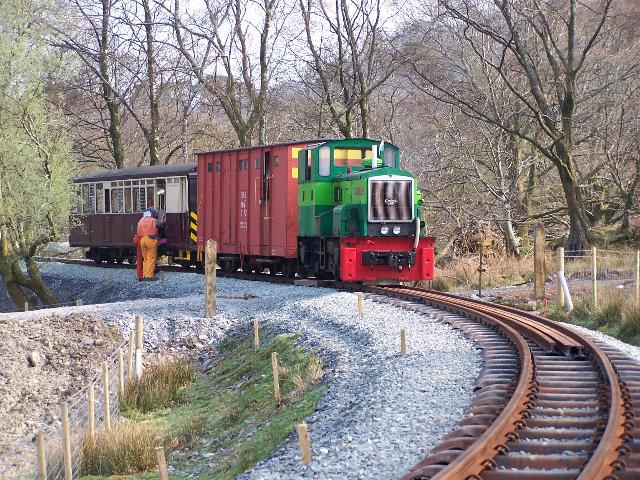
This northerly view (17/12/06) shows Upnor Castle standing in the platform of Beddgelert Forest Campsite Halt with the Phase 4 PW train. This was the first train to stop at the halt! Click on the image to enlarge. This image is courtesy/copyright Tim Evans and was taken on a digital camera. Image post processed using iPhoto Plus4 and displayed at 96dpi.
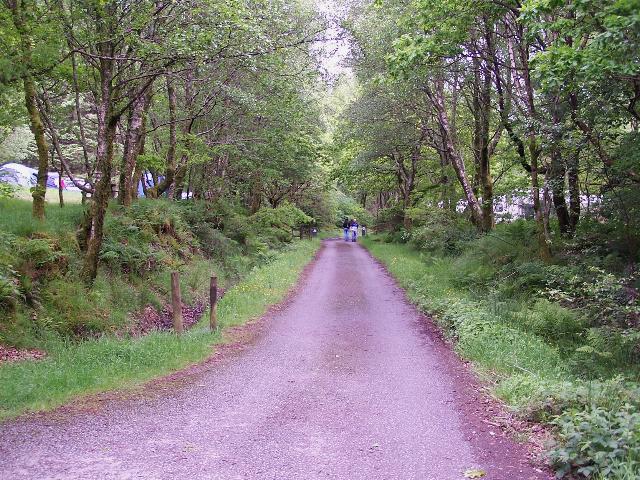
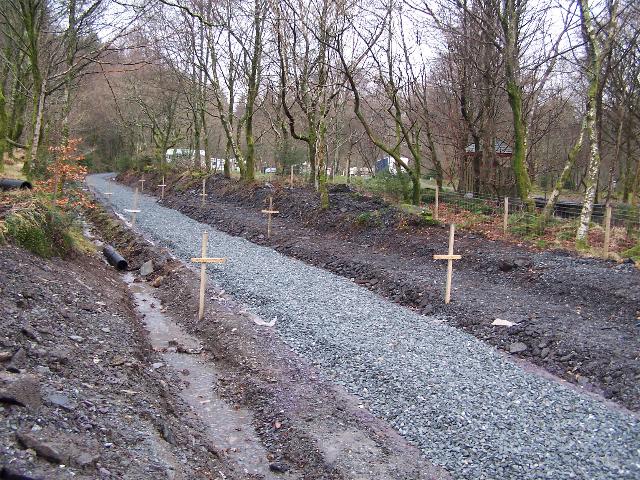

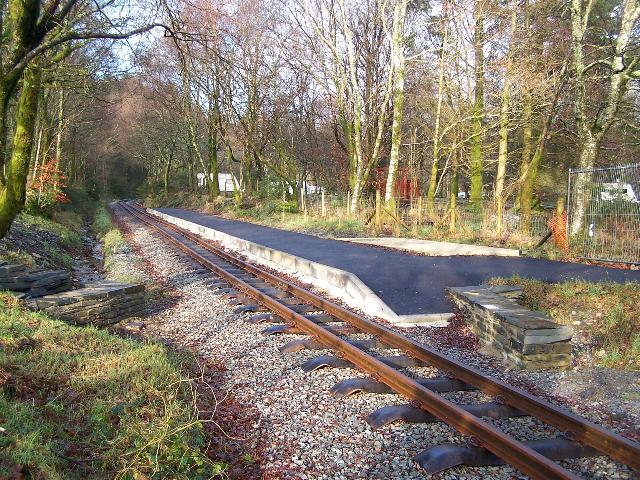
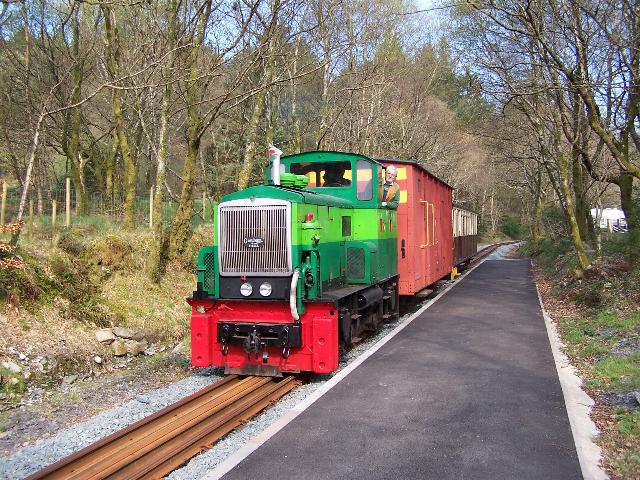
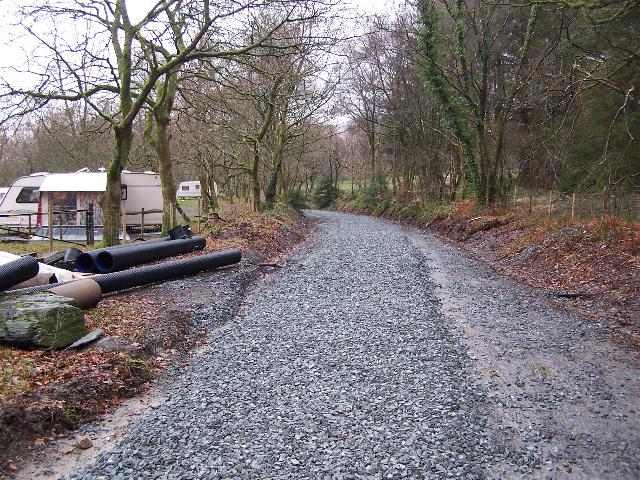
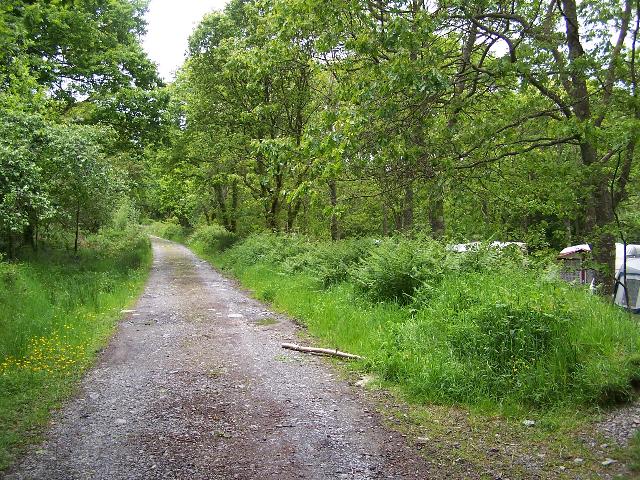
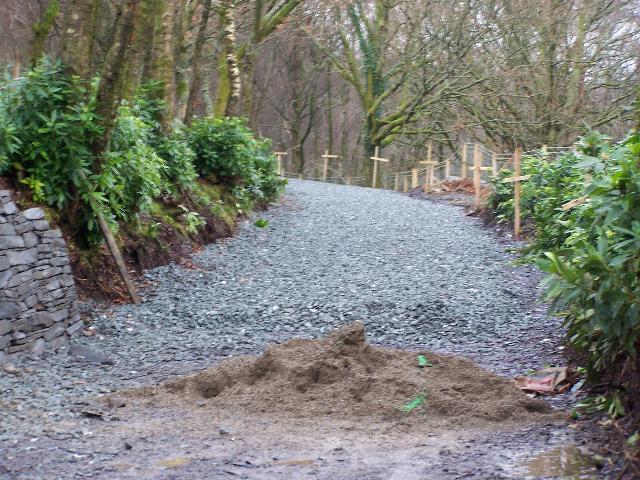
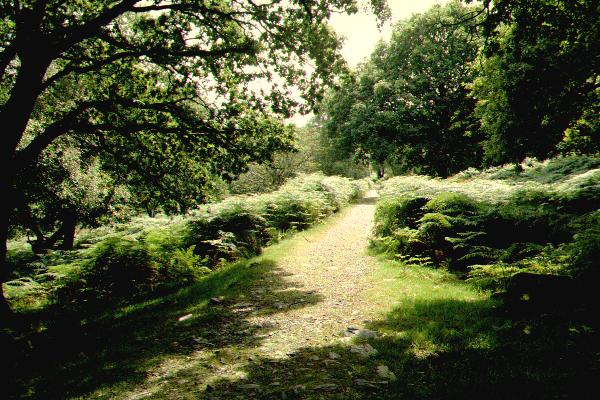
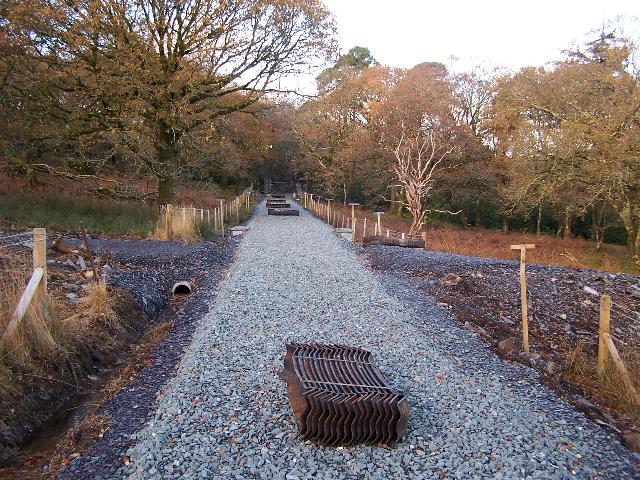
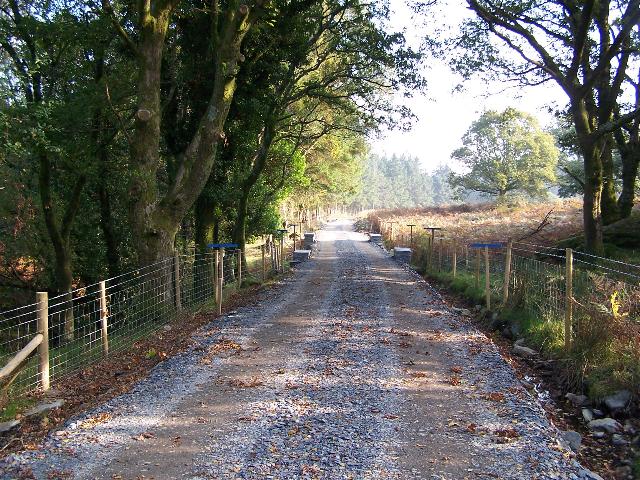
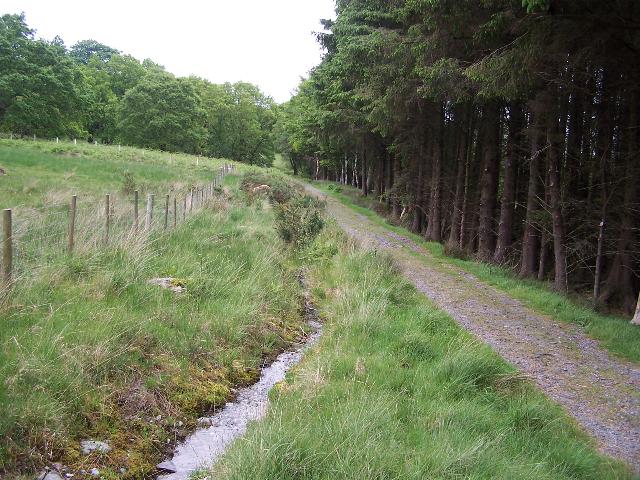
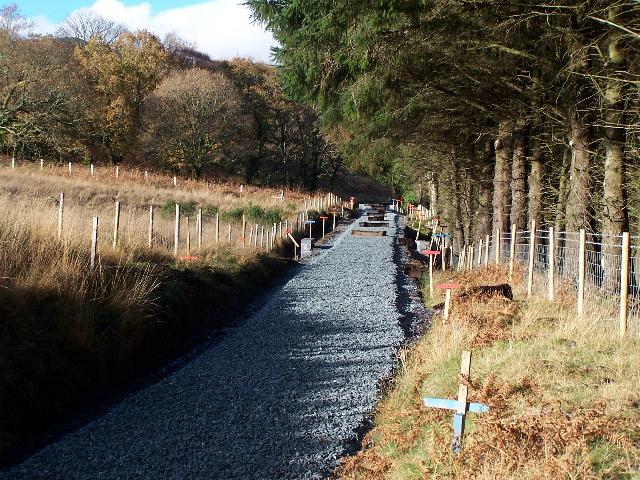
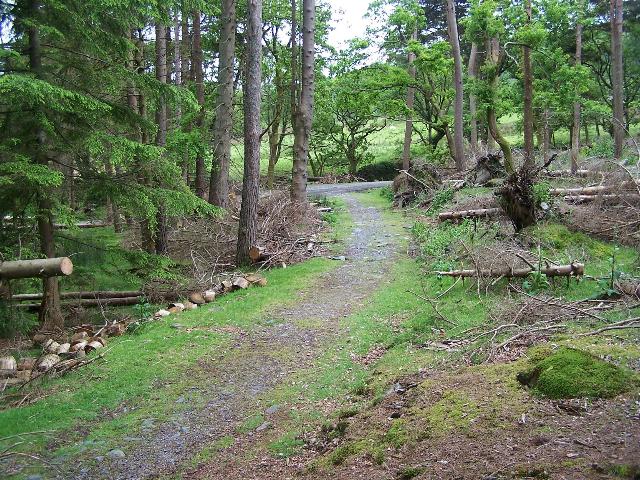
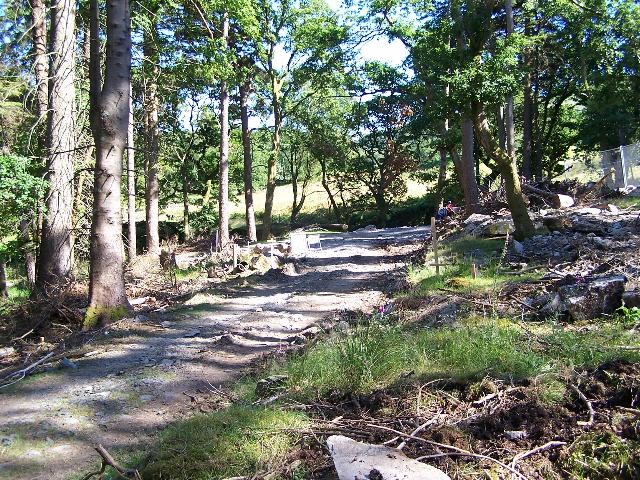
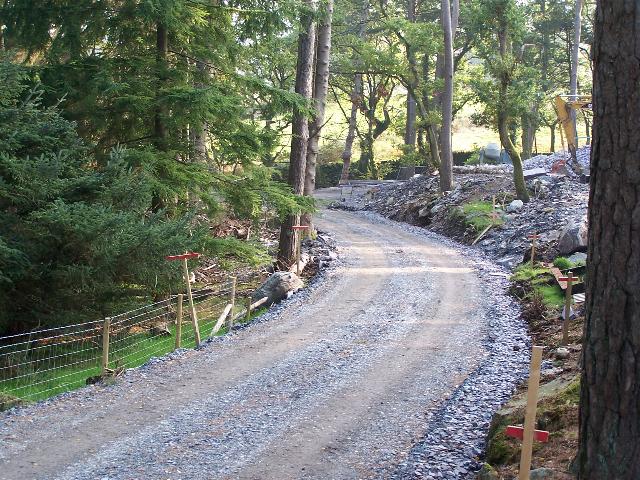
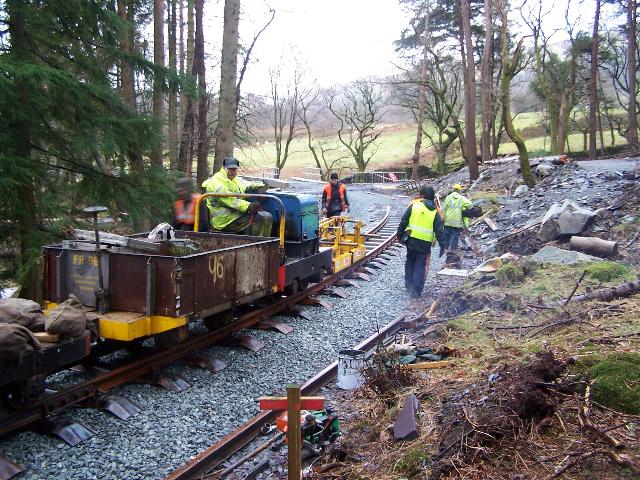
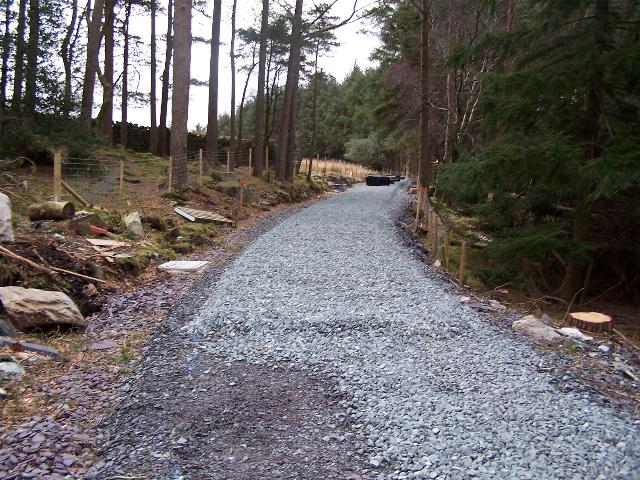
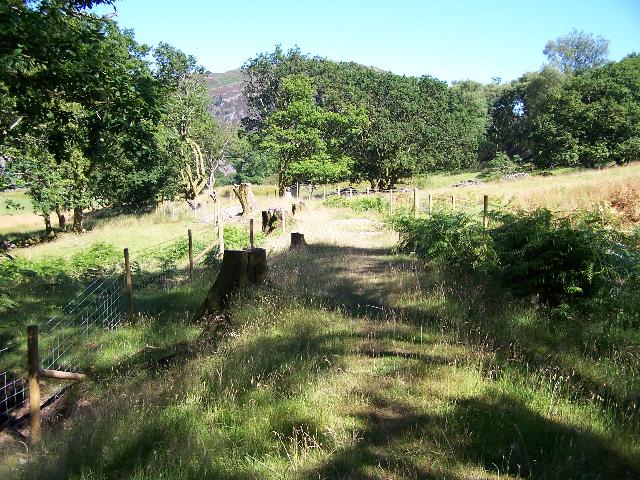
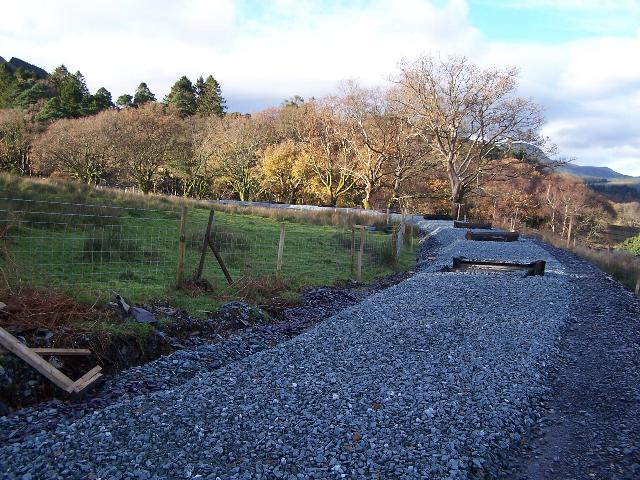
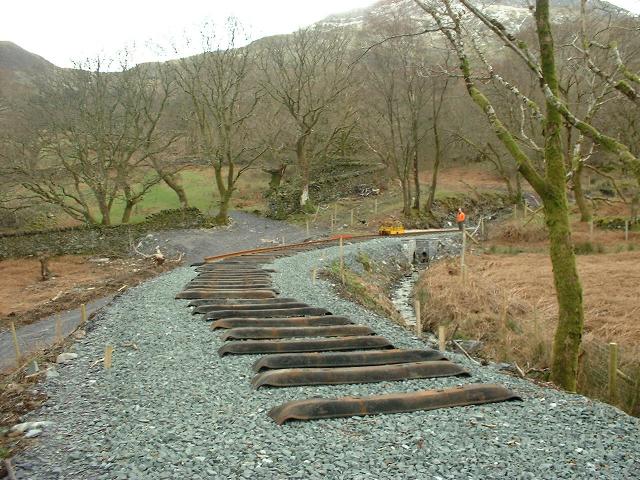
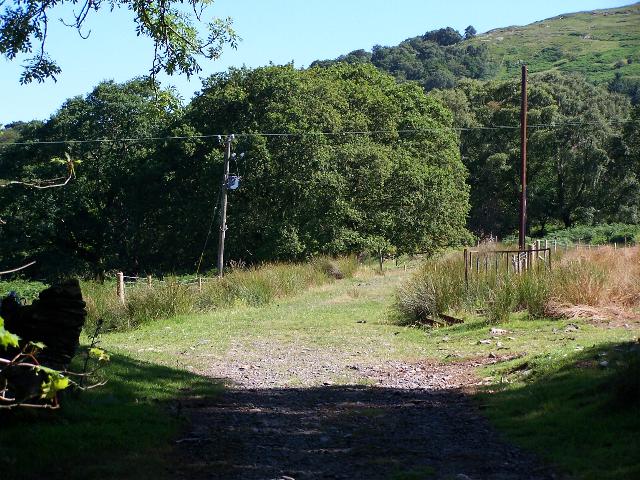
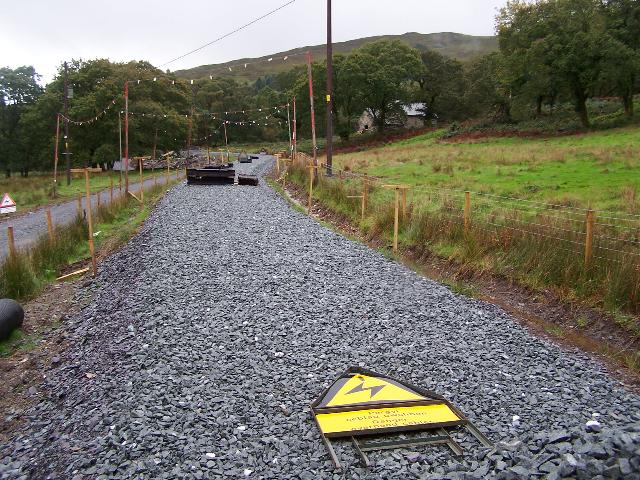
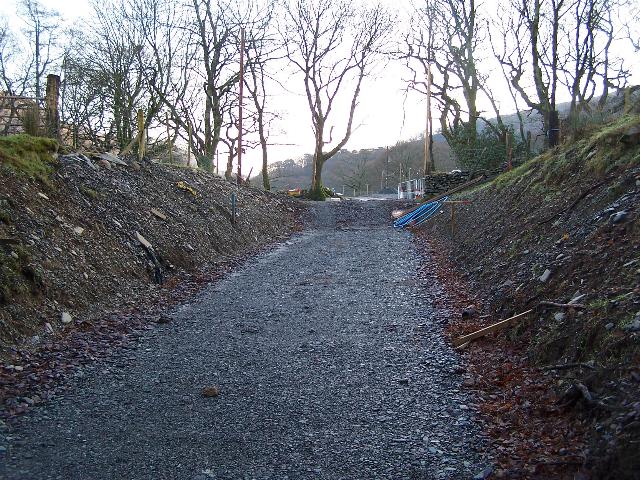
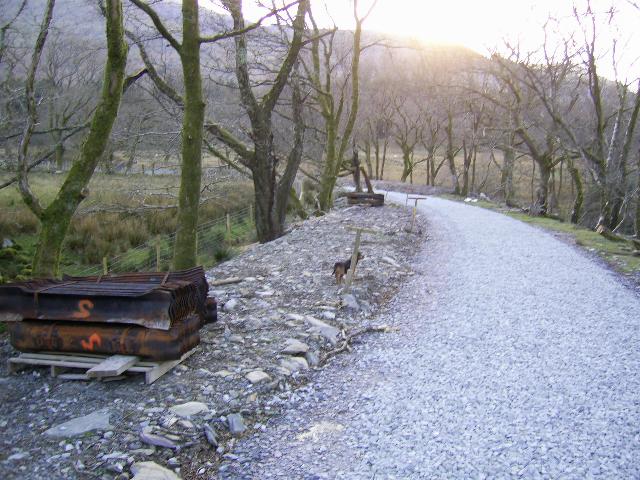
These northerly views (3/6/05, 20/11/05, 23/12/05, 17/4/06, 23/12/06 and 14/4/07) show the site of Beddgelert Forest Halt at Ch.20000 from the permitted path on the trackbed. This straight section between the footpath crossing in the distance and the point of view is the proposed site of the platform on the east side of the alignment. The caravan site, which it is hoped will contribute significant traffic to the railway, is to the right, though a small camping field was also situated to the left and is now closed. The second view shows the site fenced and the drainage buried on the east side, so that the platform can be built up on top. The third and fourth view shows the 40m platform built up on the east side of the line. The platform was well established by Easter 2006 with a concrete base for a waiting shelter. Surveyors' 10m marker posts are also visible. The fifth view shows the track laid through the halt. The final view shows Upnor Castle stopping at the Halt to pick up the first 'passenger', your webmaster volunteering on Phase 4 tracklaying! Click on the images to enlarge. These images are copyright B.W.Hughes and were taken on a Kodak DX6490 digital camera. Images post processed using iPhoto Plus4 and displayed at 96dpi.
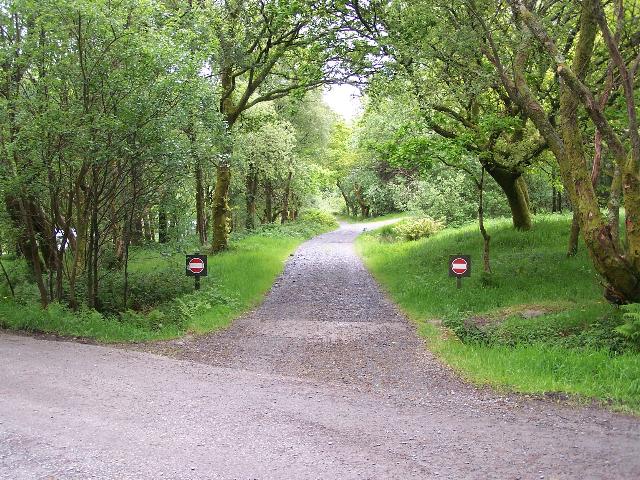
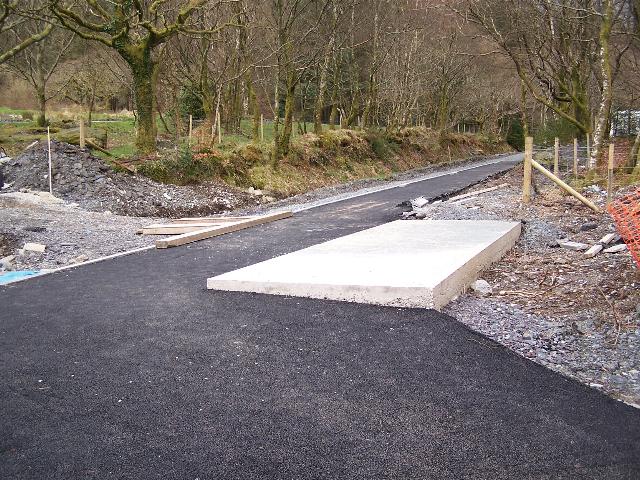
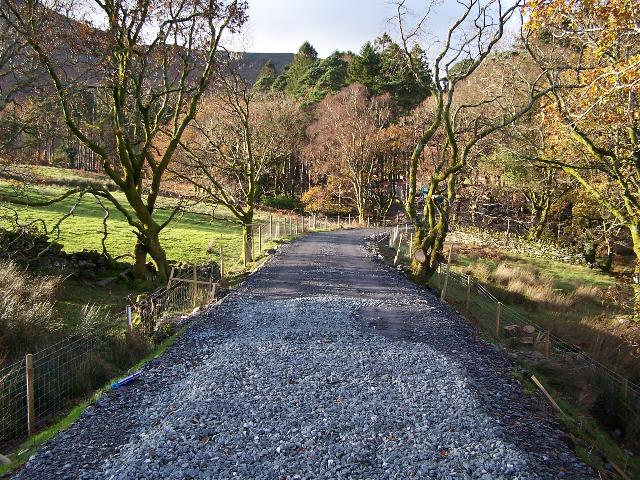
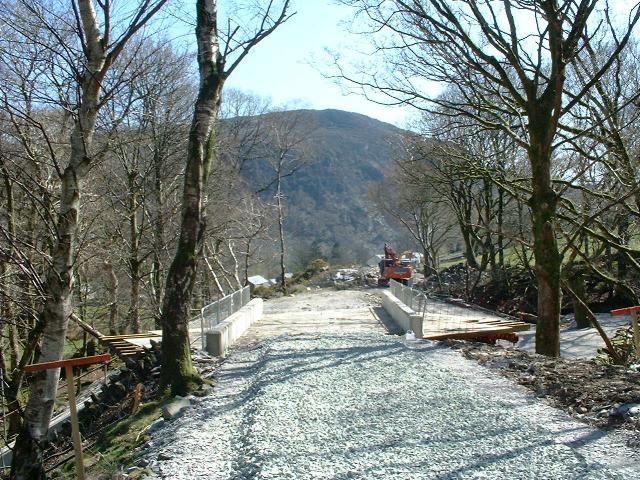
These southerly views (3/6/05 and 11/12/05) at Ch.20000 from the former level crossing show the trackbed continuing straight on in the distance where the forestry track diverges to the right. The road to the level crossing will be the access to the platform at Beddgelert Forest Halt. The second view shows the ballast laid through the site. Click on the images to enlarge. The first image is copyright B.W.Hughes and was taken on a Kodak DX6490 digital camera. The second image is courtesy/copyright Mike Hart and was taken on a digital camera. Images post processed using iPhoto Plus4 and displayed at 96dpi.
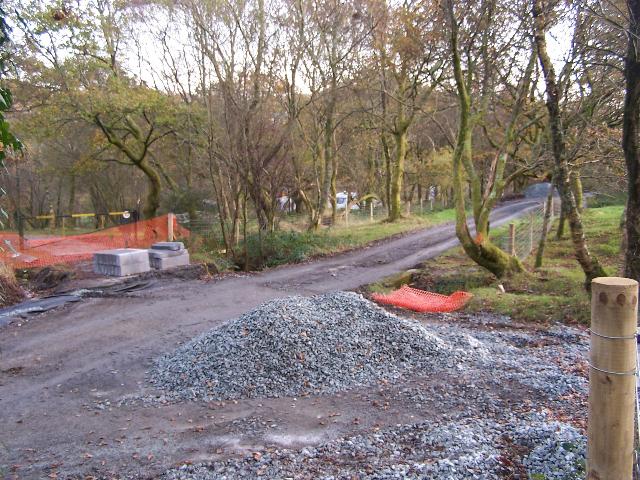
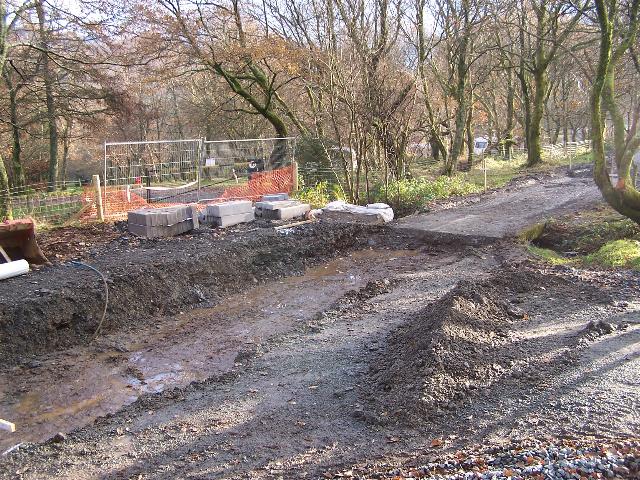
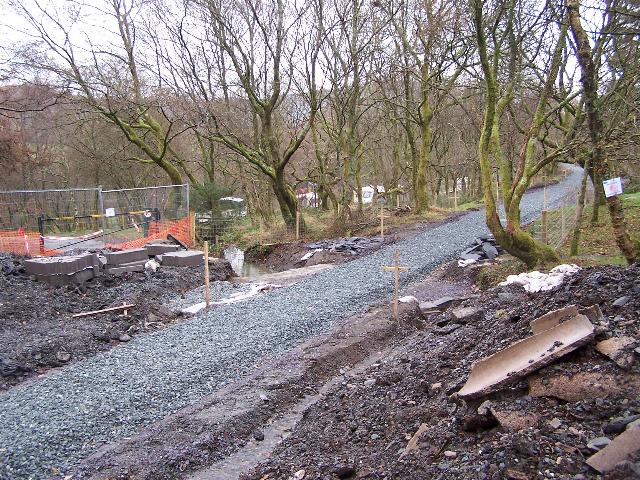
These southerly views (20/11/05, 11/12/05 and 23/12/05) at Ch.20000 from the former level crossing show the trackbed at the south end of Beddgelert Forest Halt at UB152. The second view shows platform kerbing has been stored at this future public access point and the excavation of the former tarmac road on the trackbed north from UB152, a job being done that Sunday. Slate fines sub base was stockpiled at LC77 ready to back fill this section to the correct levels. The third view shows the ballast laid through the site. Click on the images to enlarge. The images are copyright B.W.Hughes and were taken on a Kodak DX6490 digital camera. Images post processed using iPhoto Plus4 and displayed at 96dpi.

This southerly view (8/1/06) at Ch.20050 shows the site of Beddgelert Forest Halt under construction. Platform edge kerbing is visible stored at the public access point to the halt. The area in the foreground is the site of the waiting shelter. Click on the image to enlarge. This image is copyright B.W.Hughes and was taken on a Kodak DX6490 digital camera. Image post processed using iPhoto Plus4 and displayed at 96dpi.
This northerly view (17/4/06) at Ch.20050 shows entrance to the site of Beddgelert Forest Halt under construction. Platform rear edge kerbing is visible stored. The concrete area in the foreground is the site of the future waiting shelter. Click on the image to enlarge. This image is copyright B.W.Hughes and was taken on a Kodak DX6490 digital camera. Image post processed using iPhoto Plus4 and displayed at 96dpi.

This northerly view (20/11/05) at Ch.20050 shows the site of Beddgelert Forest Halt under construction. Platform edge kerbing is visible stored at the public access point to the halt. Click on the image to enlarge. This image is copyright B.W.Hughes and was taken on a Kodak DX6490 digital camera. Image post processed using iPhoto Plus4 and displayed at 96dpi.

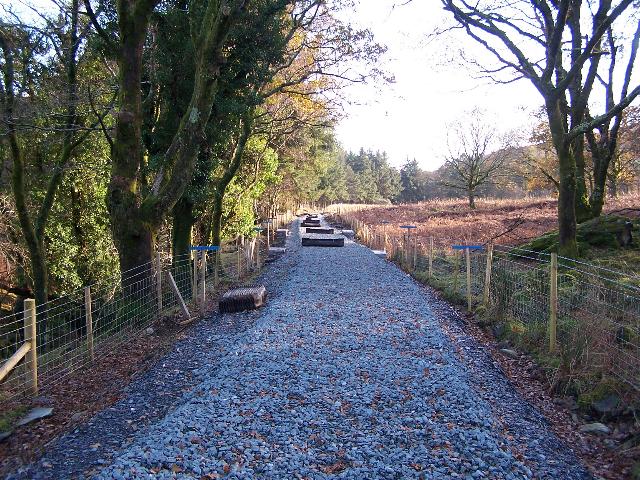
These northerly view (20/11/05 and 23/12/06) at Ch.20100 shows the site of Beddgelert Forest Halt under construction in the distance. The campsite is visible to the right. In the second view, the completed halt can be seen and track has been laid south of the halt with some RRMs left on the ballast for safe keeping. Click on the image to enlarge. This image is copyright B.W.Hughes and was taken on a Kodak DX6490 digital camera. Image post processed using iPhoto Plus4 and displayed at 96dpi.
This southerly view (23/12/06) at Ch.20050 shows the trackbed alongside the south end of the Beddgelert Forest Campsite with rail laid in the final weekend of 2006. Click on the image to enlarge. This image is copyright B.W.Hughes and was taken on a Kodak DX6490 digital camera. Image post processed using iPhoto Plus4 and displayed at 96dpi.
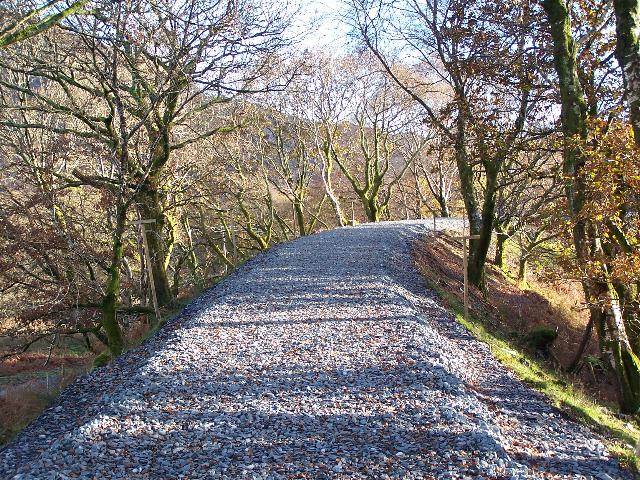
This northerly view (8/1/06) at Ch.20150 shows the trackbed alongside the Beddgelert Forest Campsite now ballasted and awaiting rail. Click on the image to enlarge. This image is copyright B.W.Hughes and was taken on a Kodak DX6490 digital camera. Image post processed using iPhoto Plus4 and displayed at 96dpi.
This southerly view (8/1/06) at Ch.20150 shows the ballasted trackbed alongside the Beddgelert Forest Campsite. Click on the image to enlarge. This image is copyright B.W.Hughes and was taken on a Kodak DX6490 digital camera. Image post processed using iPhoto Plus4 and displayed at 96dpi.
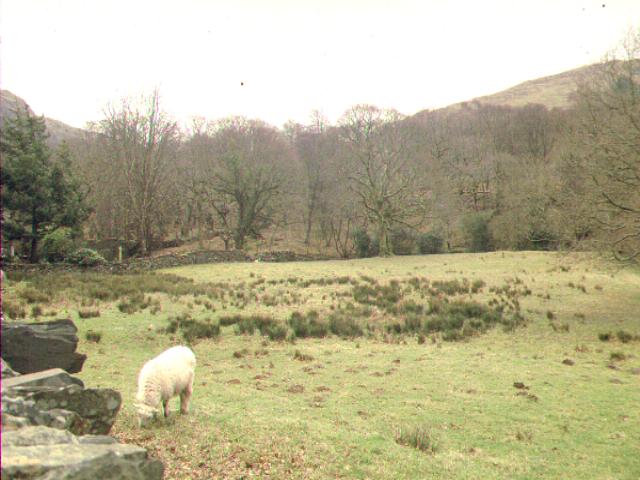
This northerly view (3/6/05) at Ch.20200 approx. from the permitted path on the trackbed shows the end of the Beddgelert Forest campsite to the right. Click on the image to enlarge. This image is copyright B.W.Hughes and was taken on a Kodak DX6490 digital camera. Image post processed using iPhoto Plus4. Image displayed at 96dpi.
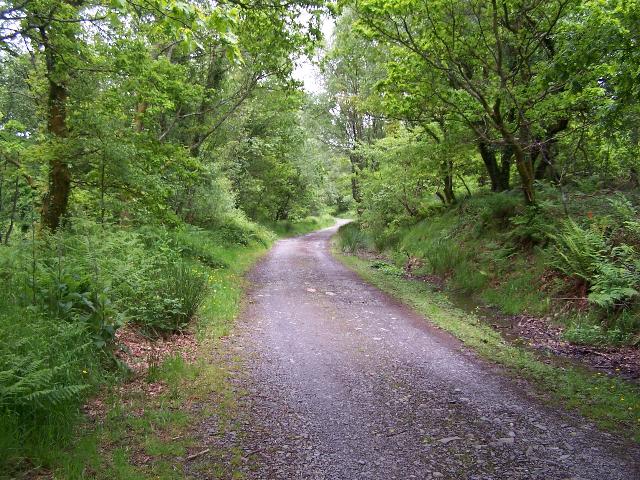

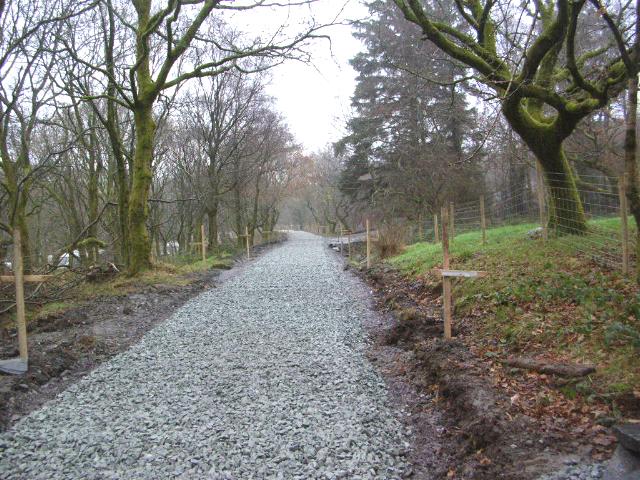
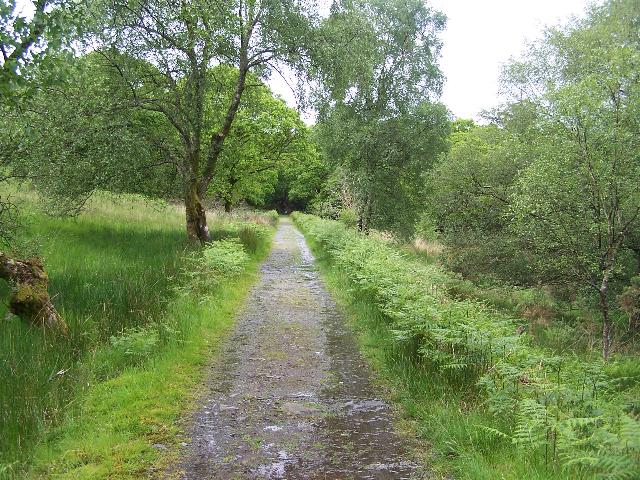
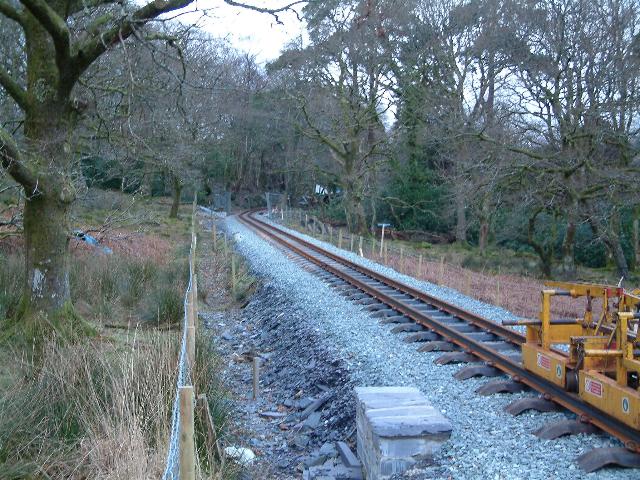
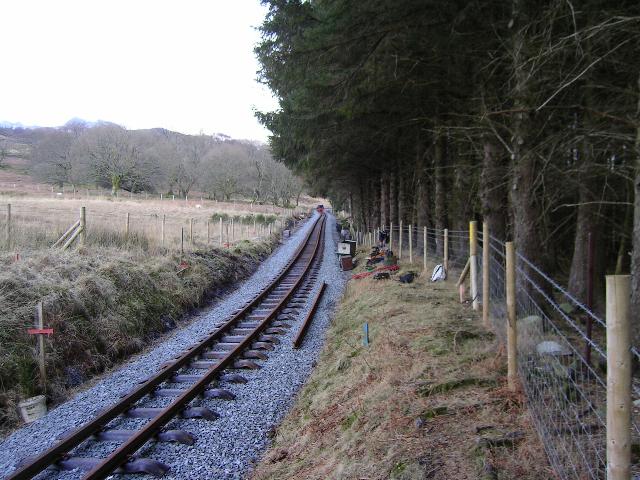
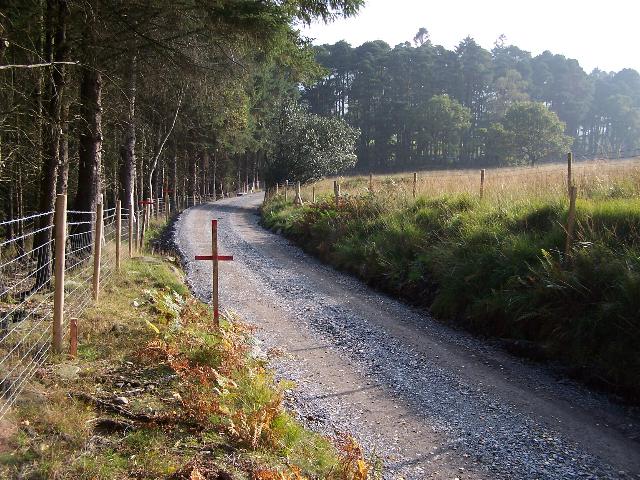
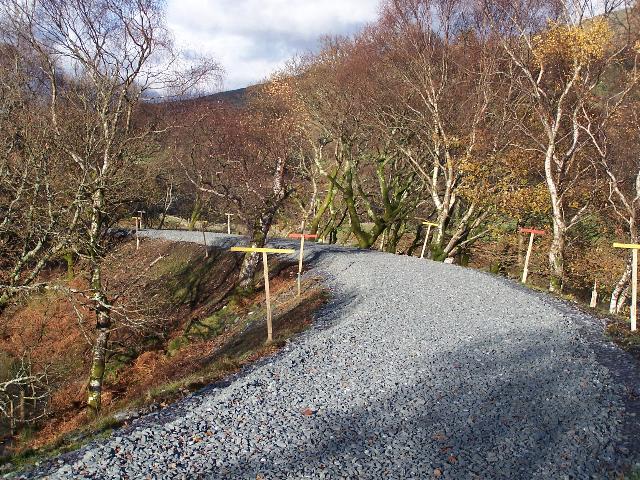
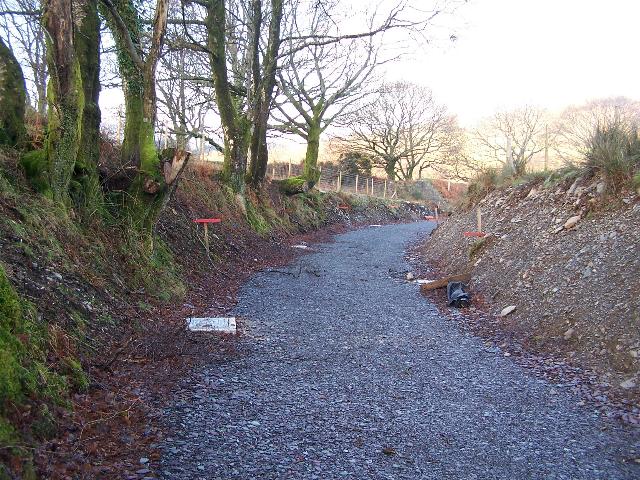
These southerly views (3/6/05, 18/12/05 and 23/12/06) near Ch.20150 from the (now closed) permitted path on the trackbed shows the alignment curving along the hillside through deciduous forest alongside the Beddgelert Forest Campsite (left). The residents of Ty'n-y-coed small holding used the trackbed for vehicular access and alternative access has been provided a few metres away in the forest to the west. The second view shows the route fenced and finished with a rolled slate fines sub base and a ballast bed. The third view shows the Head of Steel on this section at the end of 2006 at Ch.20112. Click on the images to enlarge. The first and third images are copyright B.W.Hughes and were taken on a Kodak DX6490 digital camera. The second image is courtesy/copyright Mike Hart. Images post processed using iPhoto Plus4 and displayed at 96dpi.
This northerly view (14/1/07) at UB155 shows the Head of Steel at Ch.20418 at the end of the weekend's tracklaying. Click on the image to enlarge. This image is courtesy/copyright Tim Evans and was taken on a digital camera. Image post processed using iPhoto Plus4 and displayed at 96dpi.
This southerly view (14/1/07) at UB155 shows the Head of Steel at Ch.20418 at the end of the weekend's tracklaying with Ty'n-y-coed Cutting visible in the distance. Click on the image to enlarge. This image is courtesy/copyright Jonathan Hall and was taken on a digital camera. Image post processed using iPhoto Plus4 and displayed at 96dpi.

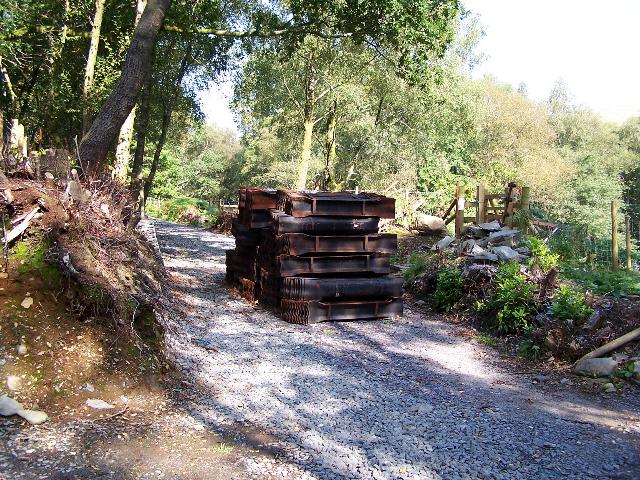
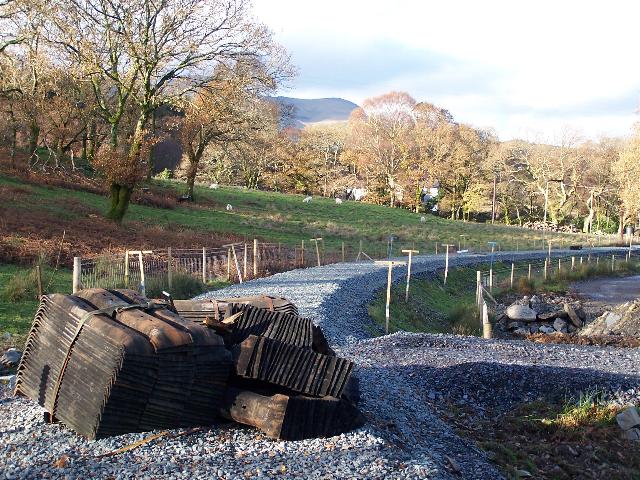
This southerly view (14/1/07) at LC78 shows the large piles of sleepers at LC79 at the Ty'n-y-coed access that had to be removed before track could pass over UB156. Click on the image to enlarge. This image is courtesy/copyright Tim Evans and was taken on a digital camera. Image post processed using iPhoto Plus4 and displayed at 96dpi.

This northerly view (3/6/05) at Ch.20300 approx. from the permitted path on the trackbed shows the end of the campsite woods (right). The Ty'n-y-coed smallholding is behind the viewpoint to the right. Click on the image to enlarge. This image is copyright B.W.Hughes and was taken on a Kodak DX6490 digital camera. Image post processed using iPhoto Plus4. Image displayed at 96dpi.
Ty'n-y-coed
LC78 is believed to be the diverted public footpath crossing immediately north of Ty'n-y-coed. The original LC78 accommodation crossing at Ch.20450 was not required and the new crossing is just a few metres north of LC79, the Ty'n-y-coed road access.
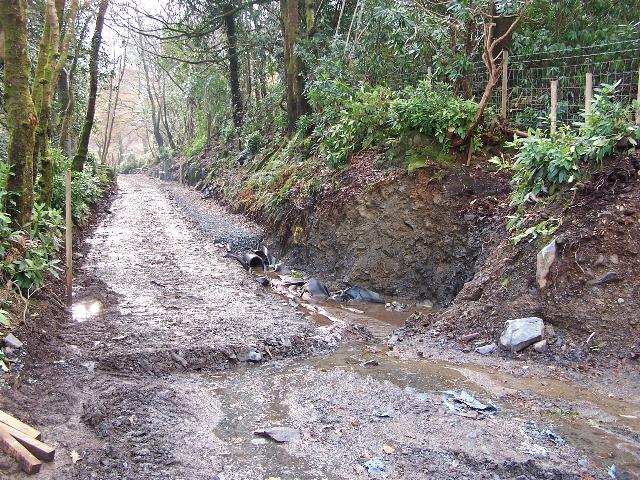
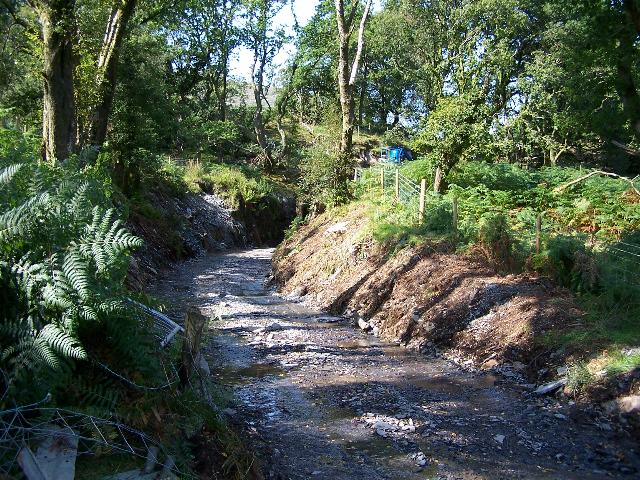
This southerly view (21/1/07) shows the original state of the trackbed just north of LC79 at Ty'n-y-coed, with UB156 in the distance. Click on the image to enlarge. This image is copyright B.W.Hughes and was taken on a Kodak DX6490 digital camera. Image post processed using iPhoto Plus4 and displayed at 96dpi.
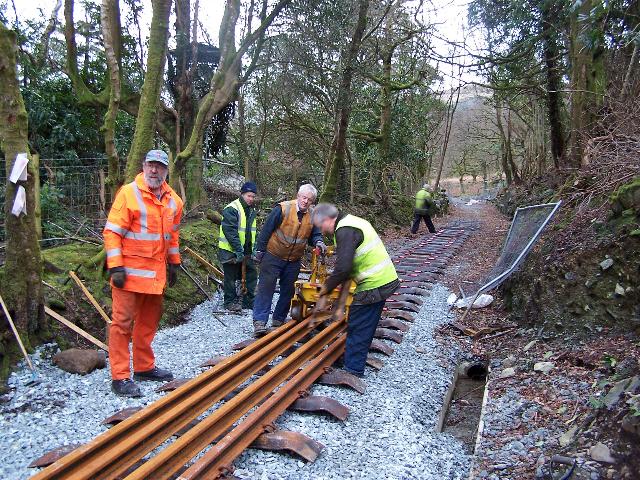
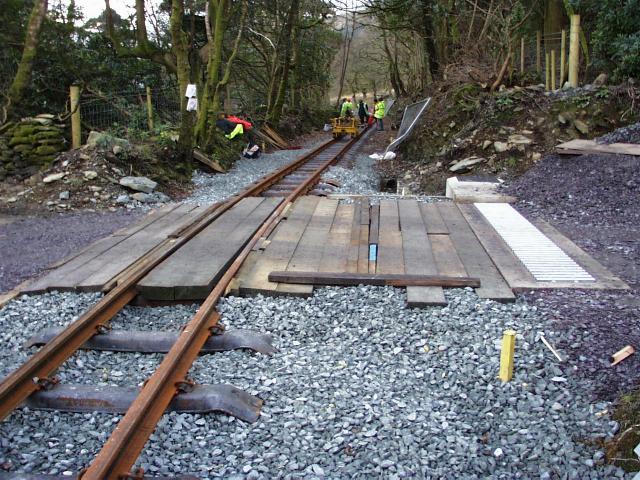
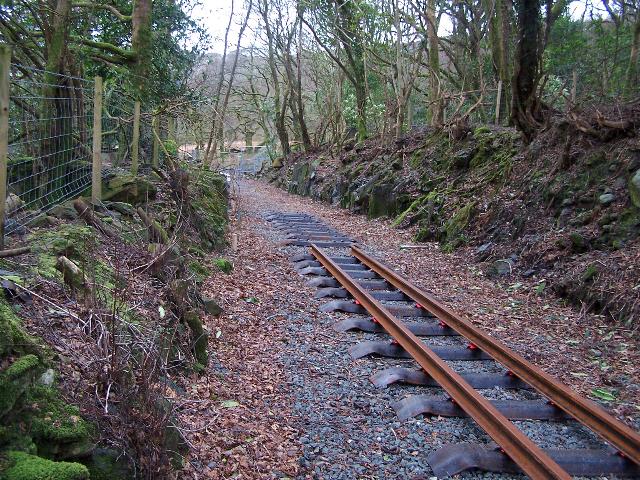
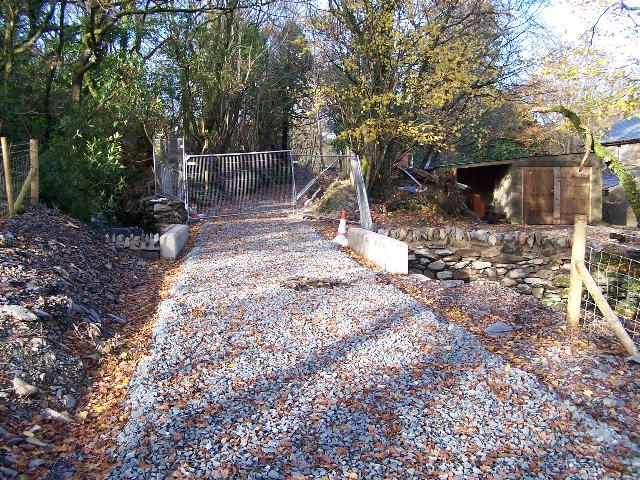
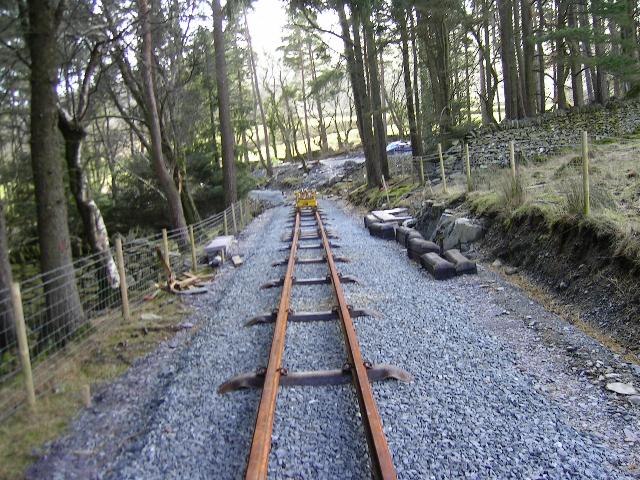
These northerly views (11/12/05, 23/12/07 and 21/1/07) show what is believed to be the diverted public footpath crossing at LC78. The first view shows the trackbed cleared and hardened. The second view shows track laid and Dolgarrog crossing. Click on the images to enlarge. These images are copyright B.W.Hughes and were taken on a Kodak DX6490 digital camera. Images post processed using iPhoto Plus4 and displayed at 96dpi.
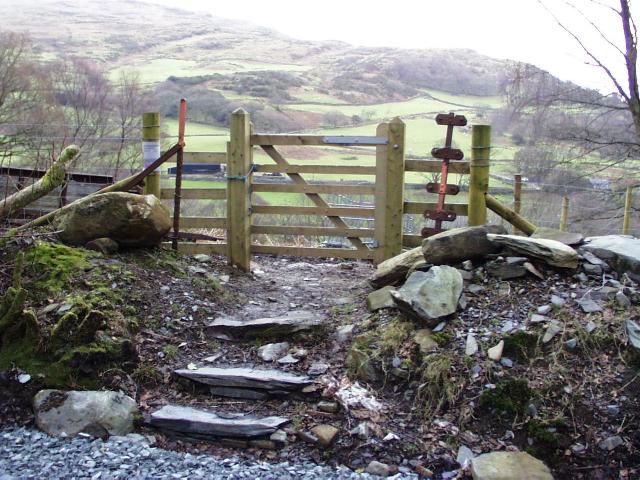
This easterly view shows what is believed to be the diverted public footpath crossing at LC78. Click on the image to enlarge. This image is copyright Kim Winter and was taken on a Olympus Camedia C-1400XL digital camera. Image post processed using iPhoto Plus4 and displayed at 96dpi.
This westerly view shows what is believed to be the diverted public footpath crossing at LC78. Click on the image to enlarge. This image is copyright Kim Winter and was taken on a Olympus Camedia C-1400XL digital camera. Image post processed using iPhoto Plus4 and displayed at 96dpi.
LC79
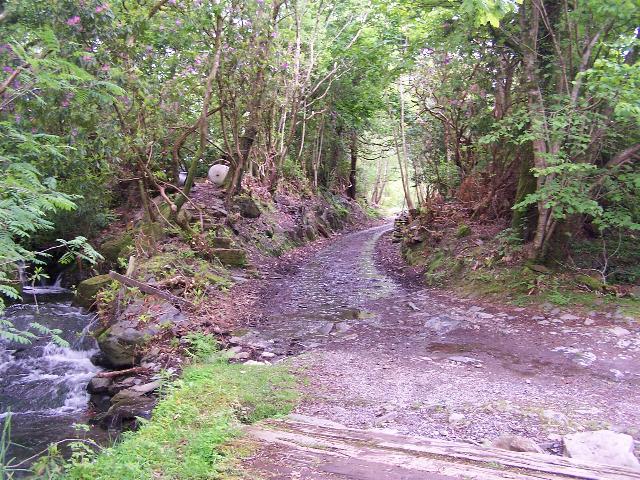
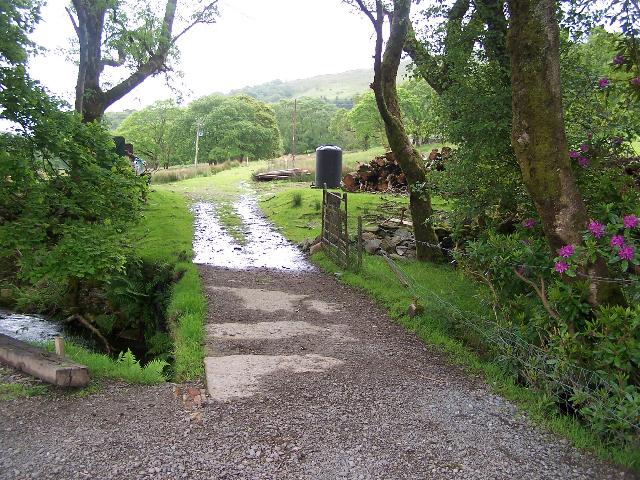
This is the new road access for Ty'n-y-coed at Ch.20500, just a few metres south of LC78. The new forest track parallels the WHR on the west from LC77 at the Beddgelert Forest Campsite.


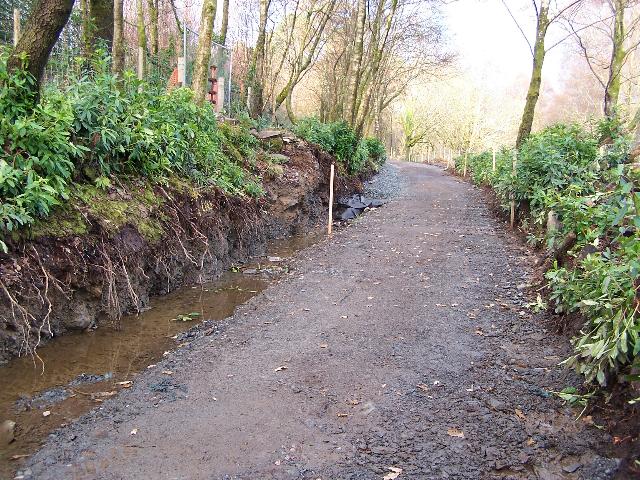
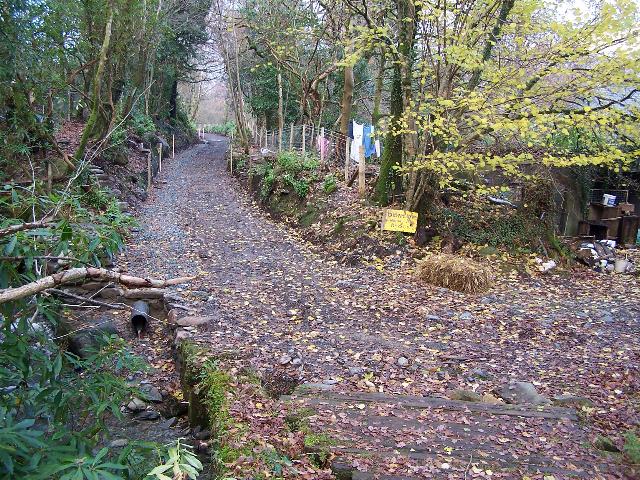
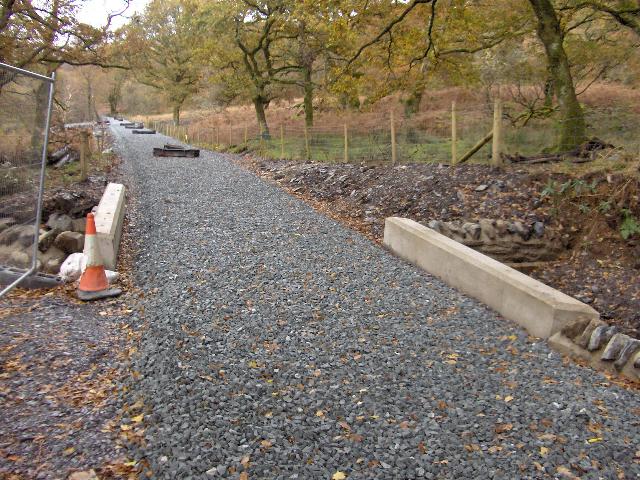
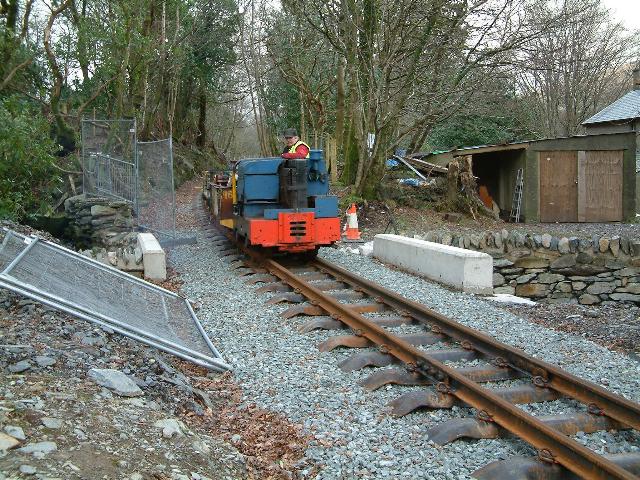
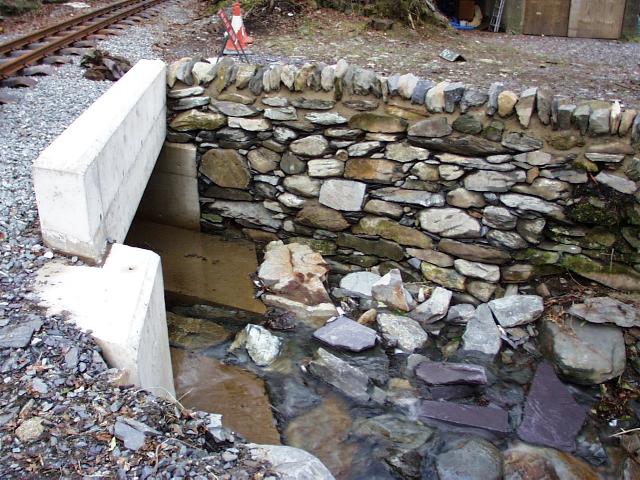
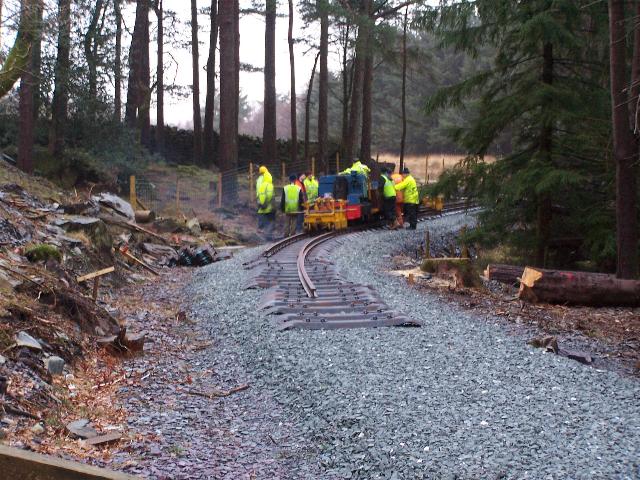
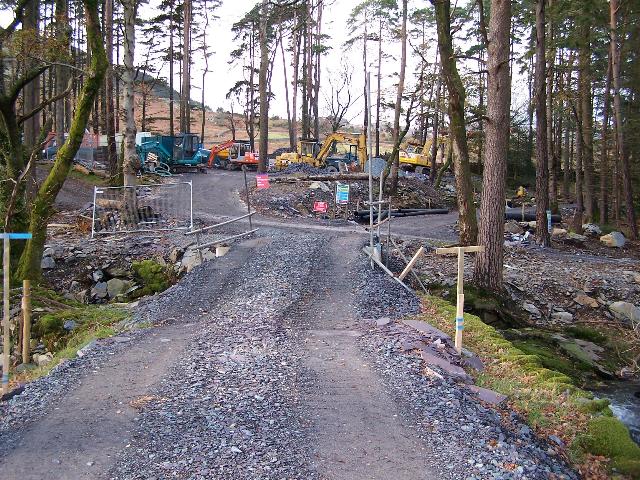
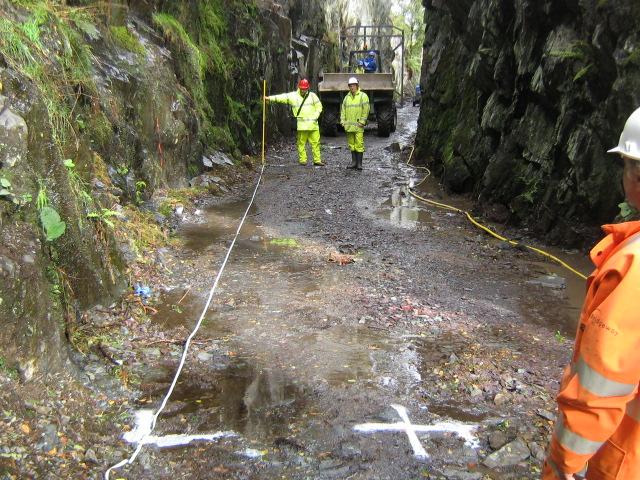
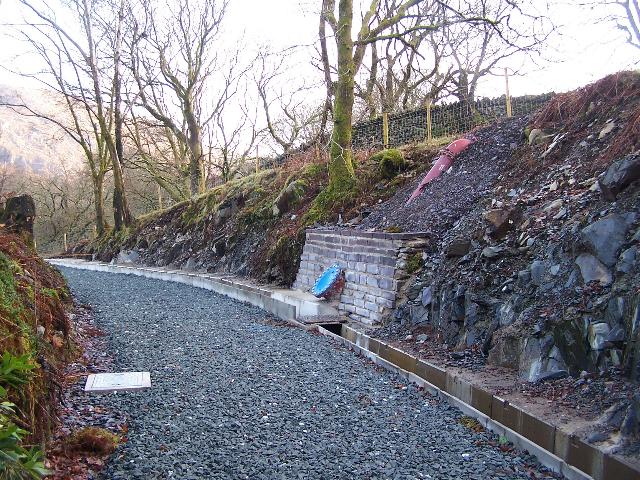
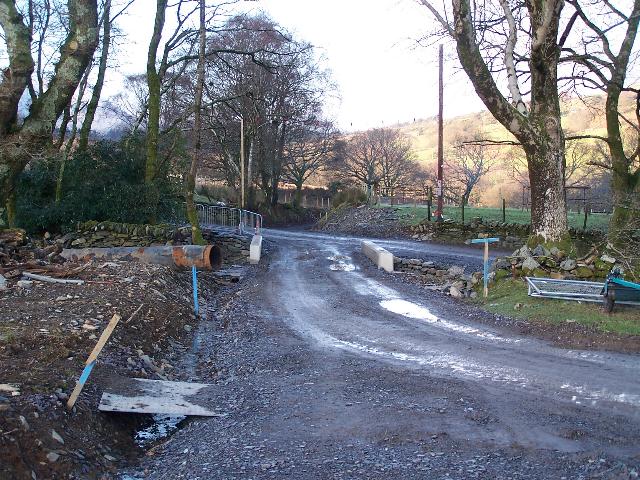
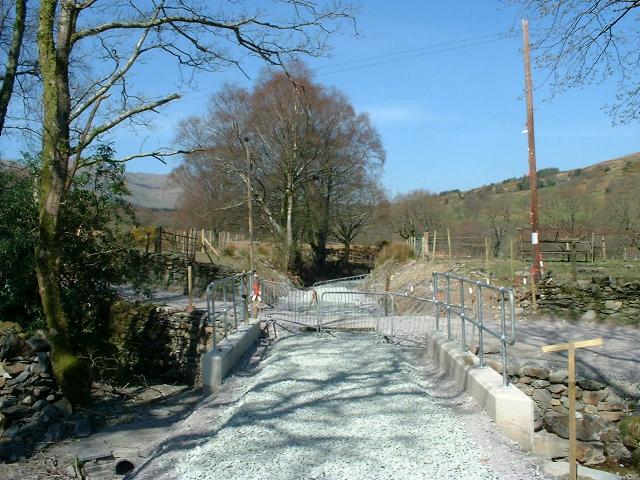
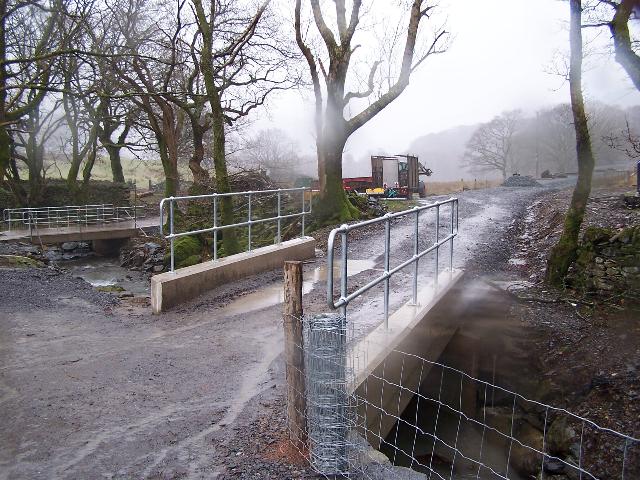
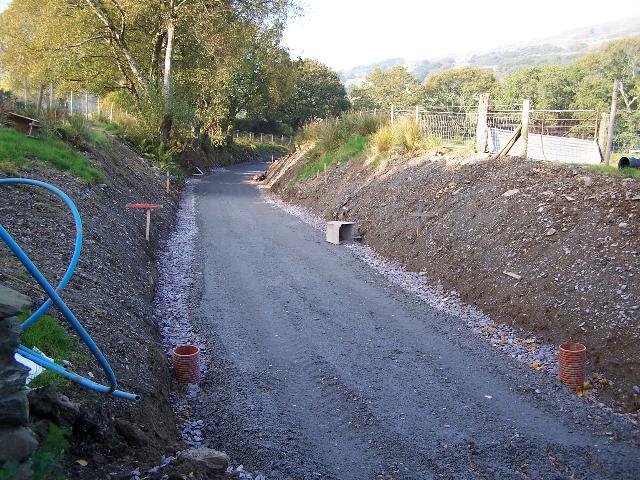
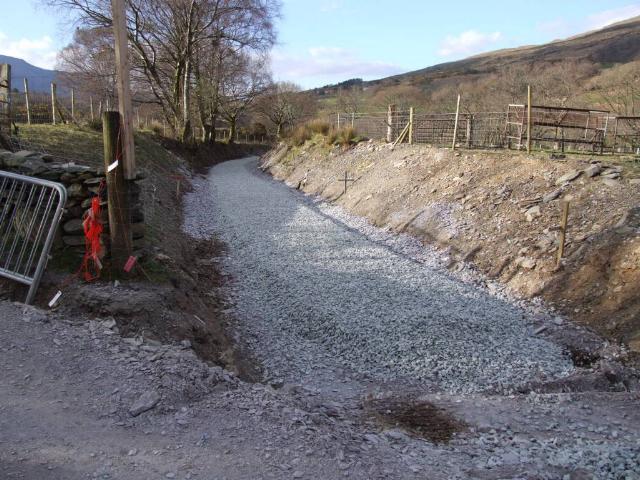
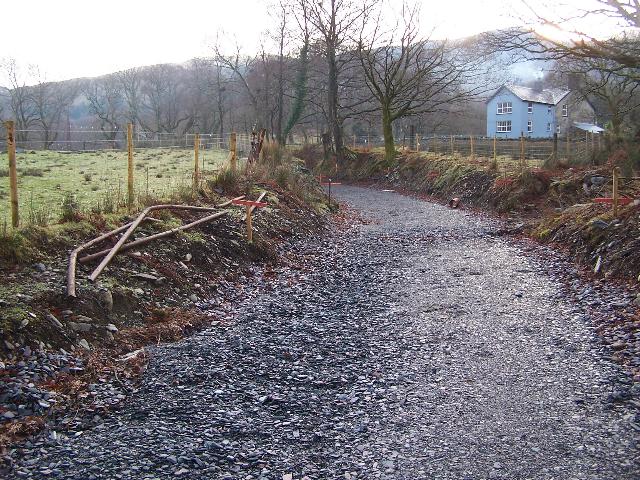
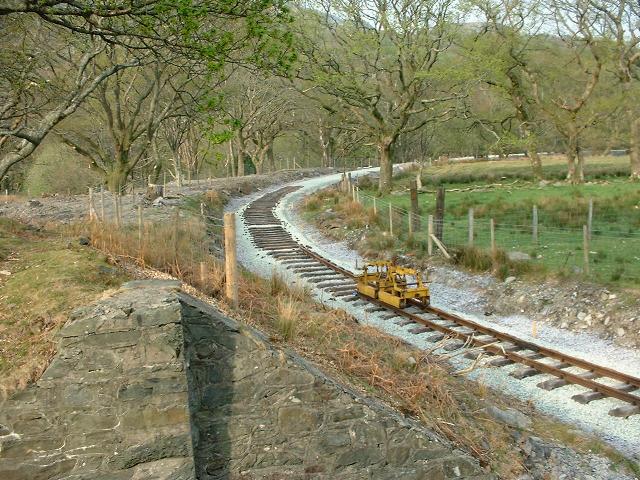
These northerly views (12/11/05, 10/9/06 and 28/1/07) from LC79 shows the cleared trackbed with initial drainage ditching added. The second view shows sleepers delivered to the site and ballast laid. The third view shows the track laid and a concrete catch pit across the steep road to the left of the level crossing. Click on the images to enlarge. The first two images are copyright B.W.Hughes and were taken on a Kodak DX6490 digital camera. The third image is copyright Kim Winter and was taken on a Olympus Camedia C-1400XL digital camera. Images post processed using iPhoto Plus4 and displayed at 96dpi.

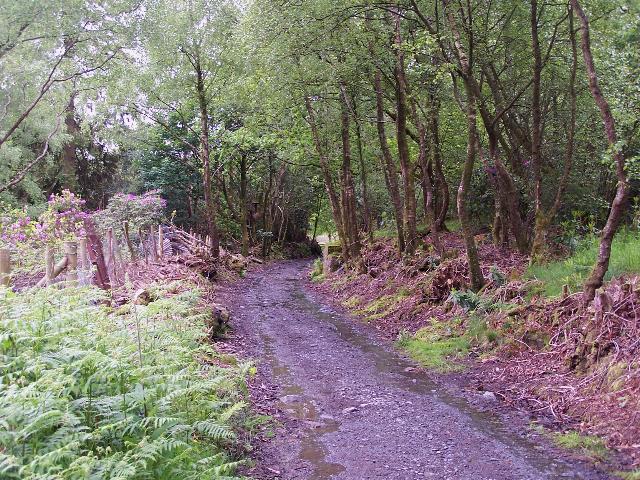
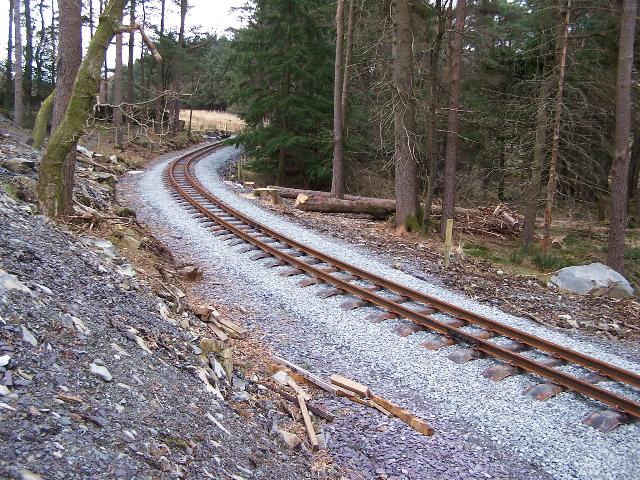
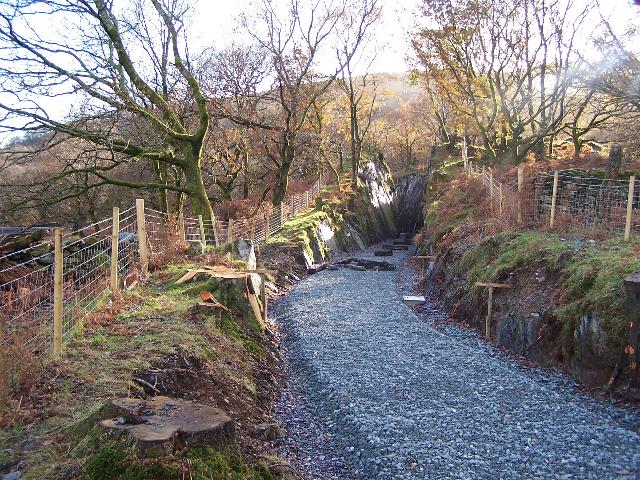
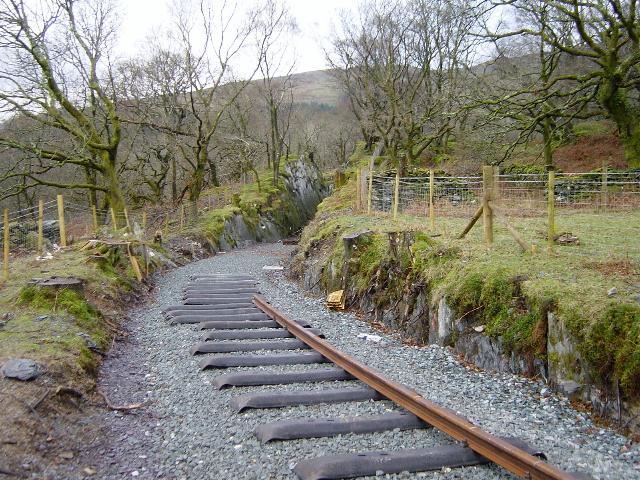
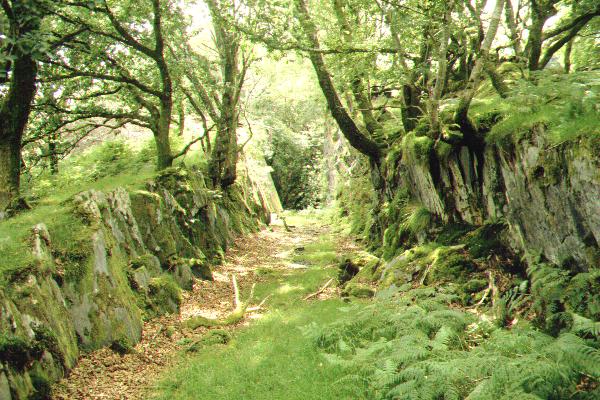
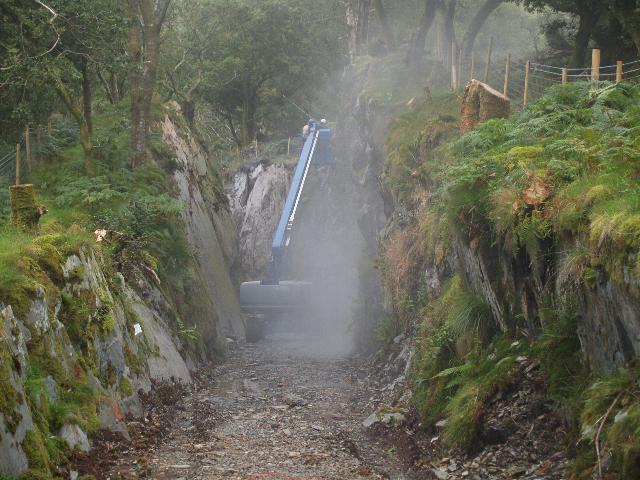
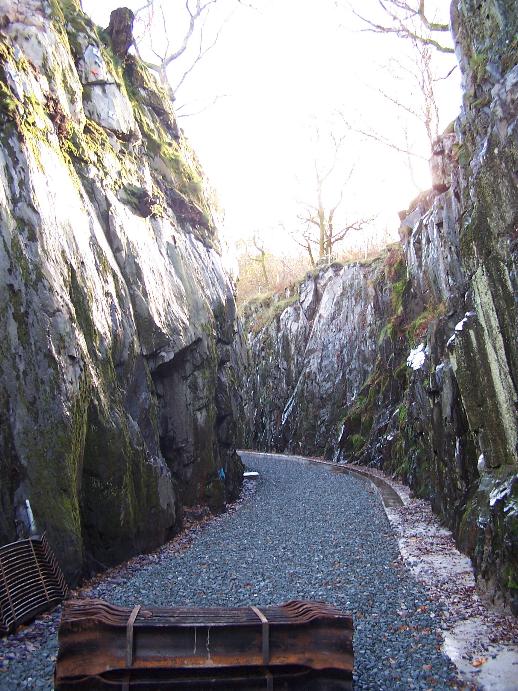
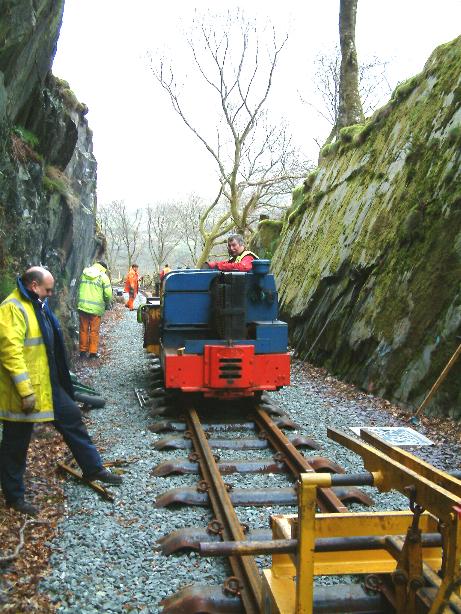
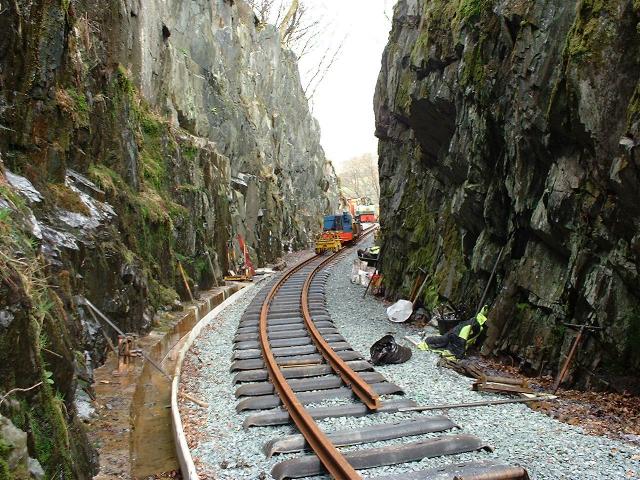
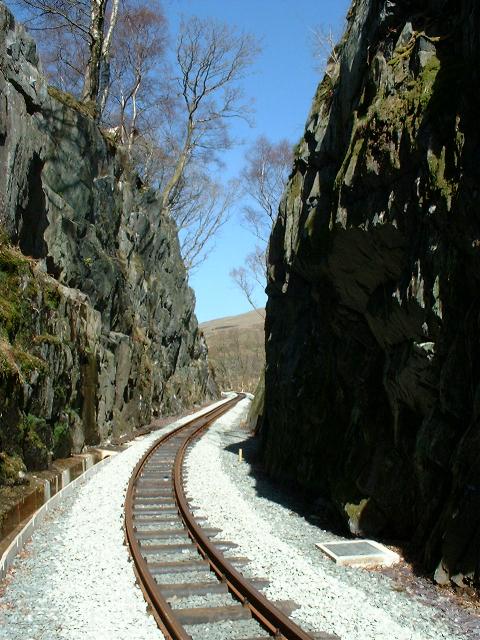
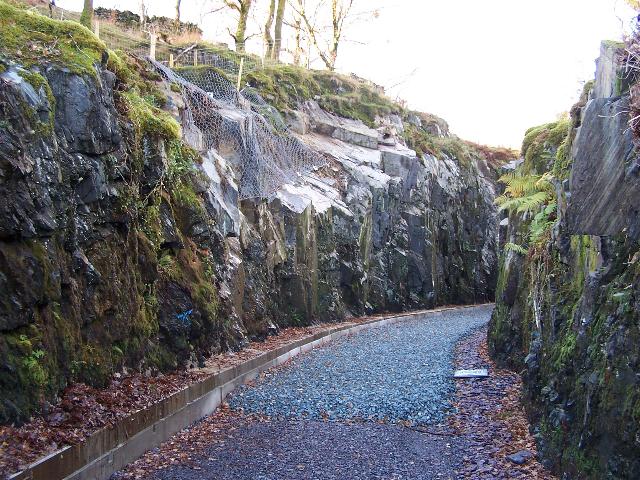
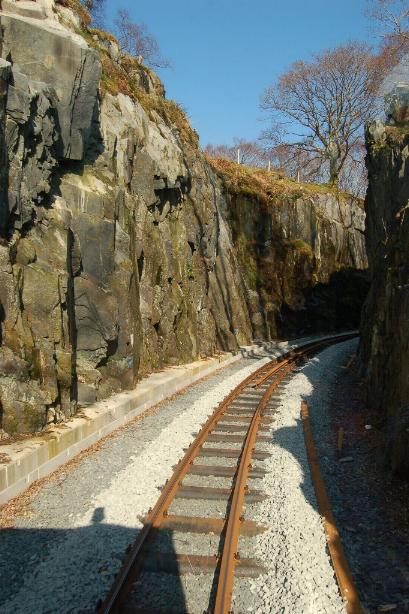
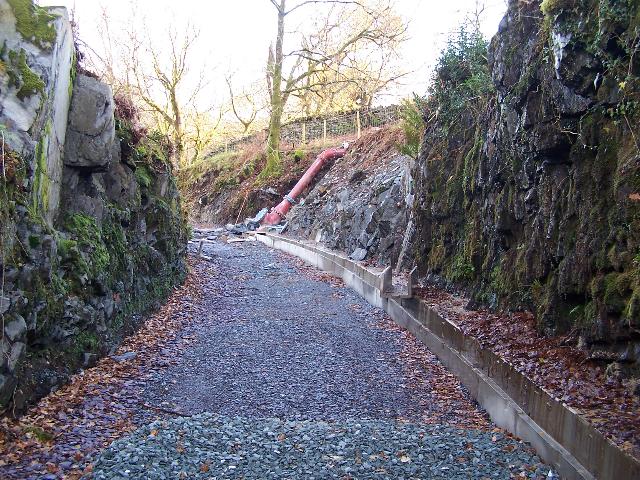
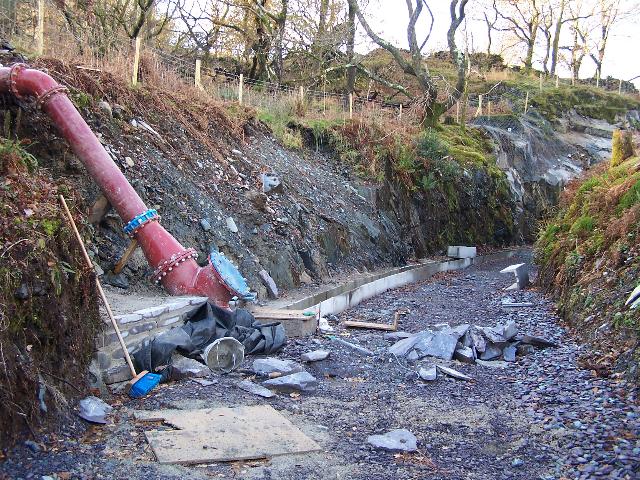
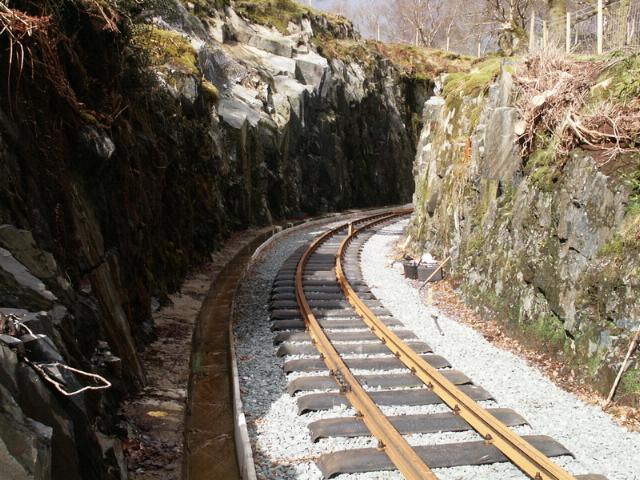
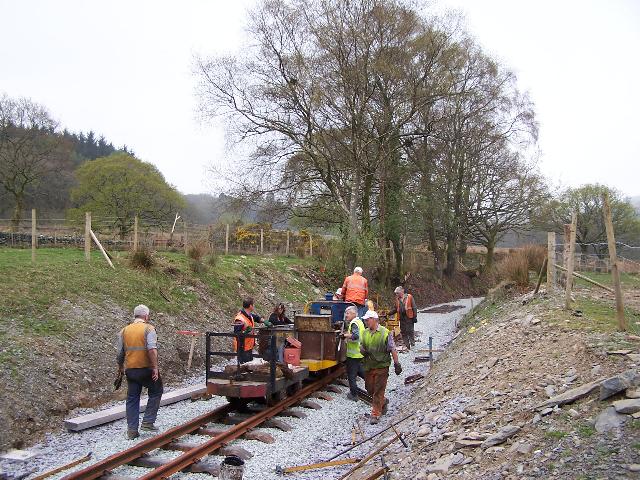
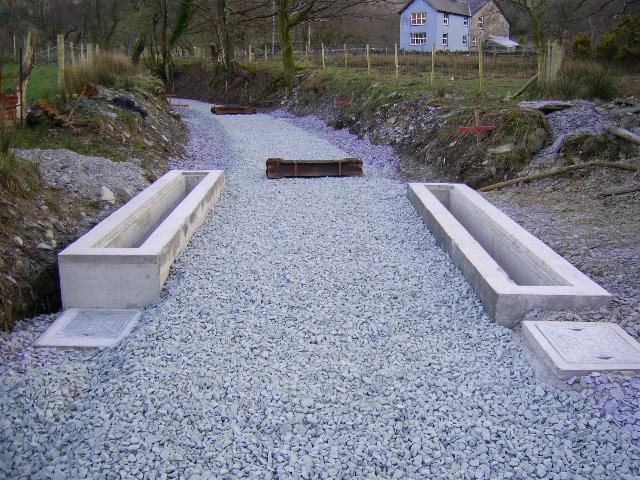
These southerly views (12/11/05, 11/12/05, 21/1/07 and 28/1/07) at LC79 (Ch.20500 approx.) show Ty'n-y-coed Curve with the smallholding to the left. This is one of the few rock cuttings on this section of the route and is a little wet. This location represents the end of the Beddgelert Forest and, just beyond the curve, the line runs into open pasture. The second view shows the excavator clearing the trackbed to full width. The third view shows the trackbed levelled and drainage provided on the west side to intercept run-off from the forest. The fourth view shows track laid south of the LC79 with Ty'n-y-coed Cutting beyond. The fifth view shows the temporary level crossing allowing the Ty'n-y-coed residents access to their property. There is a concrete catch pit to the right. Click on the images to enlarge. The first three images are copyright B.W.Hughes and were taken on a Kodak DX6490 digital camera. The fourth image is copyright Kim Winter and was taken on a Olympus Camedia C-1400XL digital camera. Images post processed using iPhoto Plus4 and displayed at 96dpi.
This southerly view (21/1/07) shows the Head of Steel at Ch.20535, just south of LC79 at Ty'n-y-coed, with UB156 in the distance. Click on the image to enlarge. This image is copyright B.W.Hughes and was taken on a Kodak DX6490 digital camera. Image post processed using iPhoto Plus4 and displayed at 96dpi.
This northerly view (21/1/07) shows the Head of Steel at Ch.20535, just south of LC79 at Ty'n-y-coed. Click on the image to enlarge. This image is copyright B.W.Hughes and was taken on a Kodak DX6490 digital camera. Image post processed using iPhoto Plus4 and displayed at 96dpi.
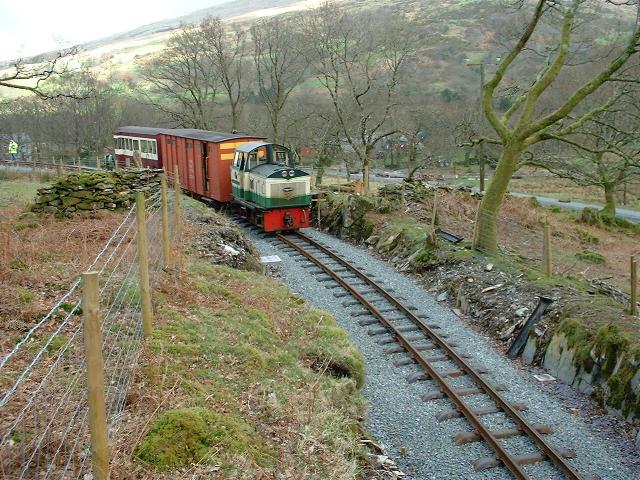
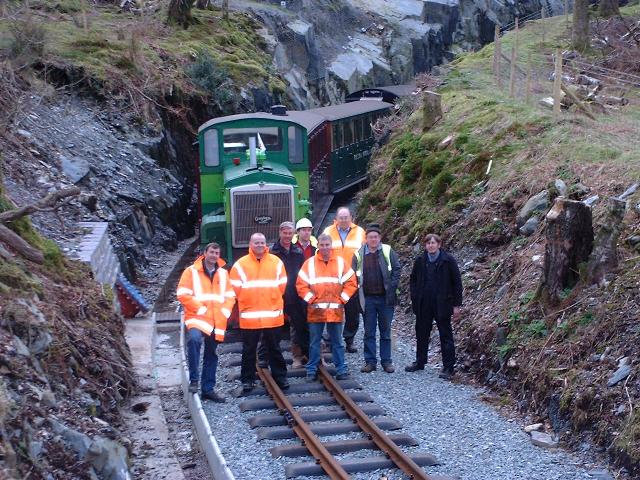
This westerly view (21/1/07) shows Conway Castle on the Phase 4 construction train at LC82 at Ty'n-y-coed. Click on the image to enlarge. This image is copyright B.W.Hughes and was taken on a Kodak DX6490 digital camera. Image post processed using iPhoto Plus4 and displayed at 96dpi.
UB156
There is a footpath crossing for the Ty'n-y-coed residents at LC80 immediately north of the UB156. The railway crosses the Afon Glochig via UB156 at the south end of the Ty'n-y-coed smallholding. With the trackbed now ballasted north of here, access to construct the section south of here must be from the Bryn Alyn bridleway.
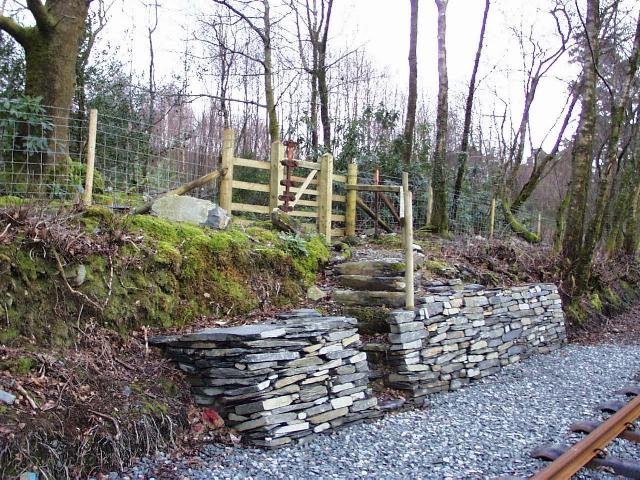
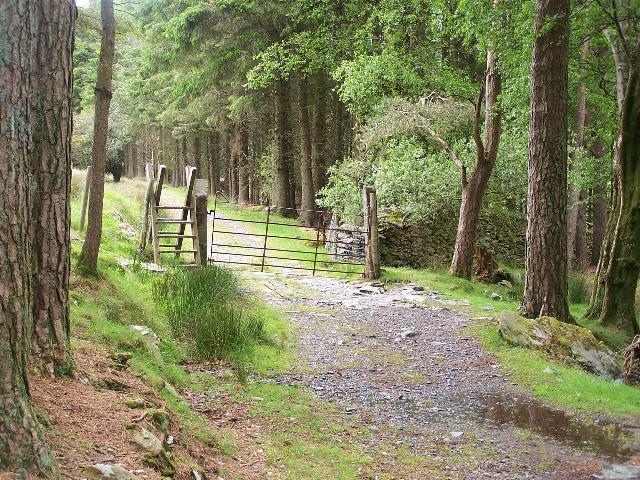
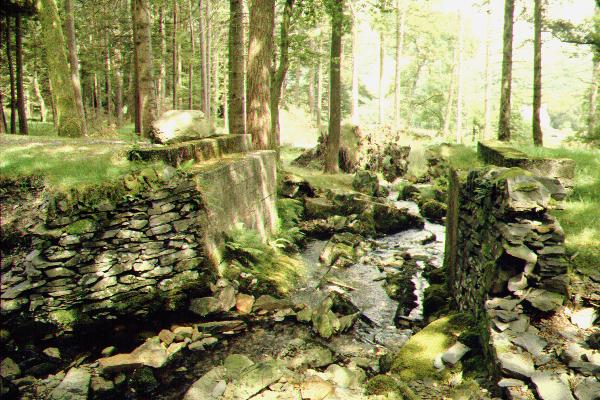
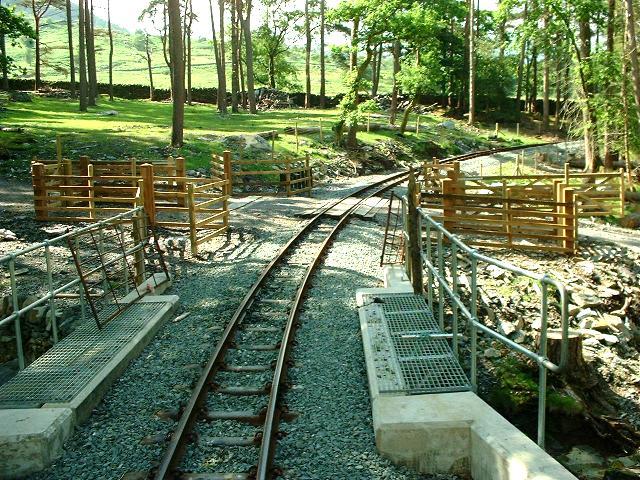
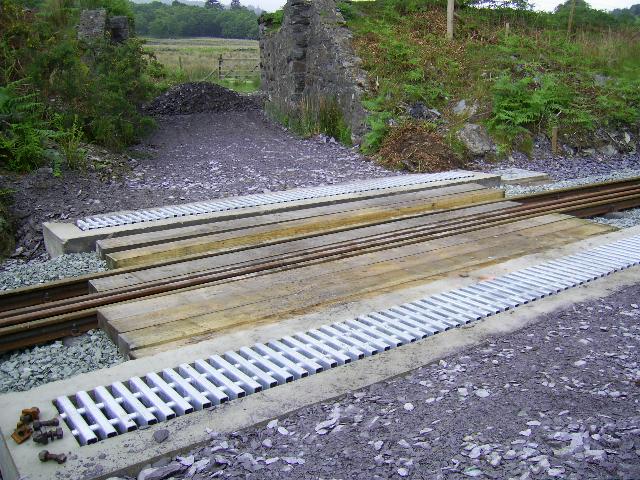
These northerly views (3/6/05 and 11/12/05) at Ch.20570 show the wooden sleeper bridge UB156 over the Afon Glochig at Ty'n-y-coed. The smallholding is to the right and the stone steps of a footpath (LC80) lead up into the forest to the west. The second view shows the trackbed complete with drainage and levels established. Click on the images to enlarge. These images are copyright B.W.Hughes and were taken on a Kodak DX6490 digital camera. Images post processed using iPhoto Plus4. Image displayed at 96dpi.
Work started on UB156 in mid-September and the site was cleared by 16/9/06 including the removal of the previous abutments as they had shallow foundations. Work was expected to be complete by the end of October, allowing the section south of Ty'n-y-coed to be ballasted.
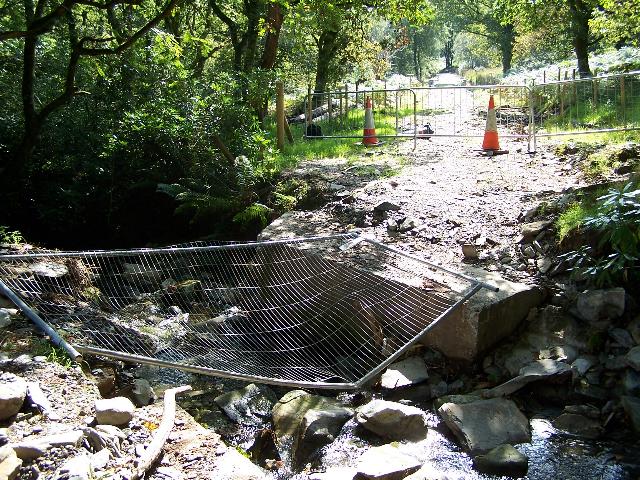
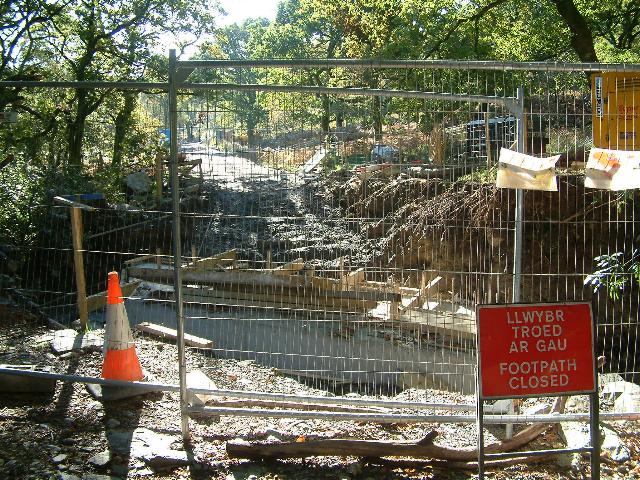
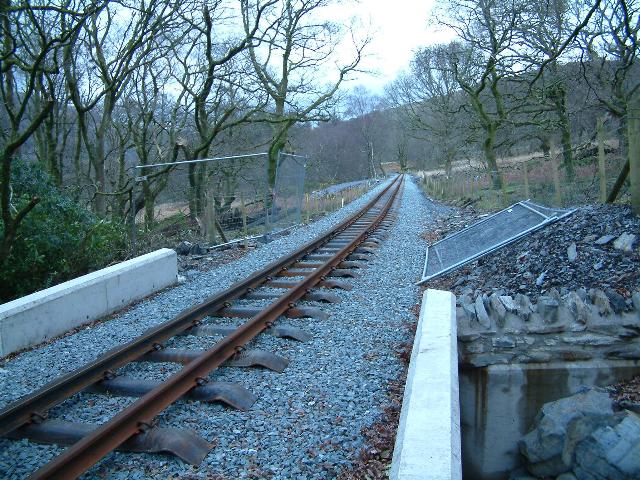
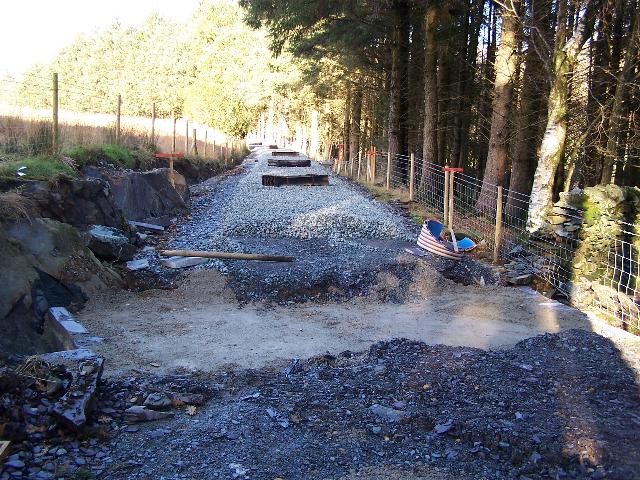
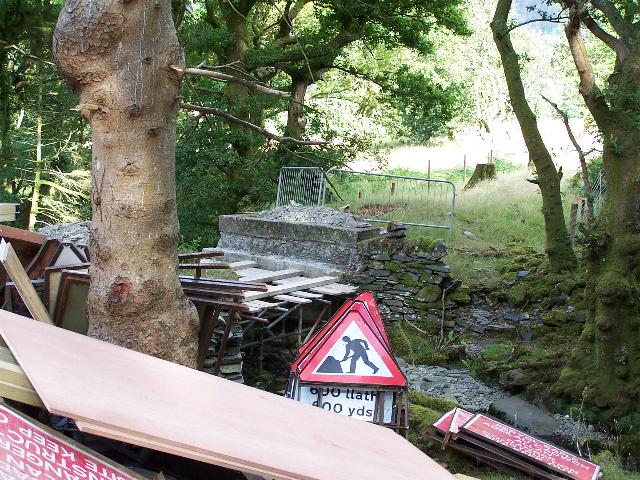
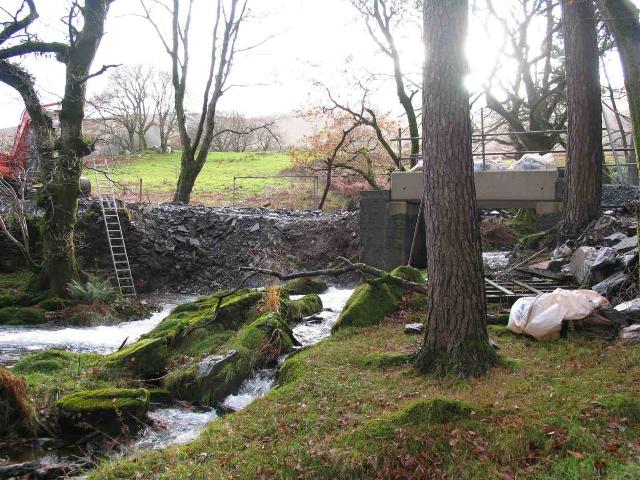
These southerly views (3/6/05, 10/9/06, 14/10/06, 18/11/06 and 28/1/07) at Ch.20570 show the wooden sleepered bridge UB156 over the Afon Glochig and the pastures beyond. The second view shows the bridge deck removed from UB156. Beyond, the trackbed is cleared and James Cyf.'s work is underway on culverts. William Hughes started rebuilding the bridge. The fourth view shows the completed UB156 with ballast and packs of sleepers laid out south towards Nant Cwmcloch. The fifth view shows track laid over the bridge. Click on the images to enlarge. The first two images are copyright B.W.Hughes and were taken on a Kodak DX6490 digital camera. The third image and fifth images are copyright Tim Evans and the fourth copyright Stephen Walker and were taken on a digital camera. Image post processed using iPhoto Plus4 and displayed at 96dpi.
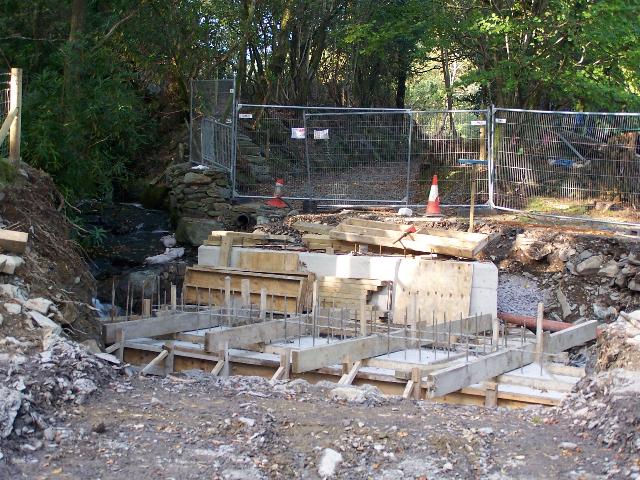
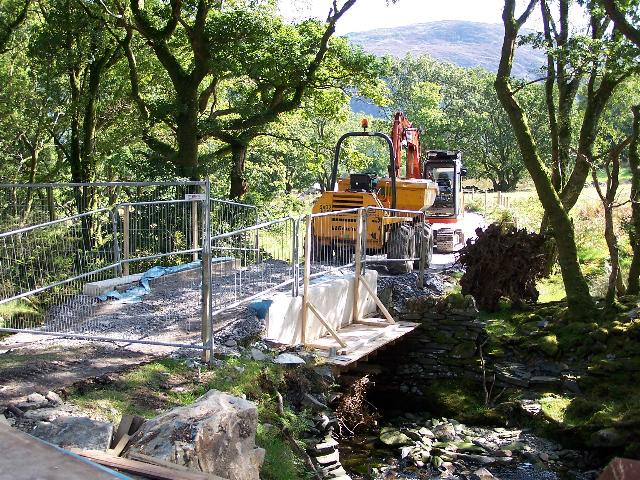
These northerly views (15/10/06, 26/11/06, 28/1/07 and 28/1/07) of UB156 at Ty'n-y-coed shows the bridge under construction. The southern abutment needs to be cast before the deck can be made. The second view shows the completed bridge ballasted. The third view shows track laid and Dolgarrog crossing the bridge. The fourth view shows the abutment and wing wall. Click on the images to enlarge. The first two images are copyright B.W.Hughes and were taken on a Kodak DX6490 digital camera. The third image is copyright Tim Evans and was taken on a digital camera. The fourth image is copyright Kim Winter and was taken on a Olympus Camedia C-1400XL digital camera. Images post processed using iPhoto Plus4 and displayed at 96dpi.

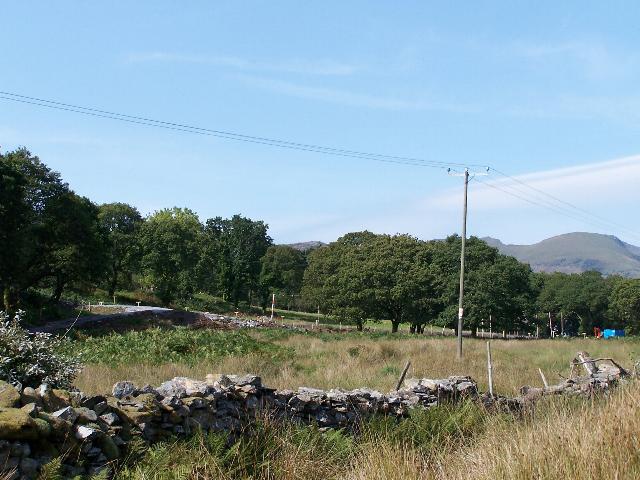
These southerly views (30/7/00, 15/10/06 and 28/1/07) show the WHR at Ch. 20,600 just south of UB156 on a long straight with the PBSSR just starting to the left (east). A wood tramway crossed the trackbed and disappeared into the woods uphill to the west (right). The second view shows the trackbed fenced and completed and rolled with slate fines. The blue containers are on LC81. The third view shows the track laid. Click on the images to enlarge. The first two images are copyright B.W.Hughes. The first image is from a slide, scan technology utilised is Olympus ES10 & iPhoto Plus4. Slide scanned at 200dpi. The second image taken on a Kodak DX6490 digital camera. The third image is copyright Tim Evans and was taken on a digital camera. Images post processed using iPhoto Plus4 and displayed at 96dpi.
The section south of Ty'n-y-coed required seven new culverts (UB156A-G) as the provision of cross drainage had been very poor in this area. Each was completed with a new slate slab headwall by late October.
These northerly views (3/6/05, 26/11/06 and 28/1/07)) at LC81 (Ch.20670 approx.) shows the WHR crossing open pasture. The second view shows LC81 and the trackbed ballasted with piles of sleepers deposited ready for tracklaying. The third view shows track laid. Click on the images to enlarge. The first two images are copyright B.W.Hughes and were taken on a Kodak DX6490 digital camera. The third image is copyright Tim Evans and was taken on a digital camera. Images post processed using iPhoto Plus4 and displayed at 96dpi.


These southerly views (30/7/00 and 28/1/07) near Ch.20650 show the permitted forestry track on the WHR trackbed south of Ty'n-y-coed (now closed!). The PBSSR formation is to the left in a cutting. The second view shows track laid and the Head of Steel on that day. Click on the images to enlarge. The first images is copyright B.W.Hughes. Slide scan technology utilised is Olympus ES10 & iPhoto Plus4. Slide scanned at 200dpi. The second image is courtesy/copyright Tim Evans and was taken on a digital camera. Image post processed using iPhoto Plus4 and displayed at 96dpi.

This northerly view (26/11/06) at Ch.207500 shows the trackbed ballasted with piles of sleepers laid out. The PBSSR alignment is catching up with the levels with its steeper gradient to the right. Click on the image to enlarge. This image is copyright B.W.Hughes and was taken on a Kodak DX6490 digital camera. Image post processed using iPhoto Plus4. Image displayed at 96dpi.

These southerly views (3/6/05, 15/10/06 and 26/11/06) near Ch.20750 show the deep PBSSR rock cutting to the left as the WHR crosses open pasture. The permitted forestry track on the WHR trackbed south of Ty'n-y-coed is now closed. The second view shows the trackbed fenced and nearing completion with rolled slate fines. The headwalls of several extra culverts are visible on this section. The third view shows the trackbed ballasted and piles of sleepers ready for tracklaying. Click on the images to enlarge. These images are copyright B.W.Hughes and were taken on a Kodak DX6490 digital camera. Images post processed using iPhoto Plus4 and displayed at 96dpi.

This northerly view (15/10/06) at Ch.20800 shows the headwalls of some of the seven new culverts on this section. Click on the image to enlarge. This image is copyright B.W.Hughes and was taken on a Kodak DX6490 digital camera. Image post processed using iPhoto Plus4. Image displayed at 96dpi.

These northerly views (3/6/05, 15/10/06 and 26/11/06) near Ch.20900 show the fir trees hiding the PBSSR cutting to the right have all been trimmed to about 6m above the trackbed. The land here has been recently fenced by the adjacent landowner and leaves enough space west of the trackbed for a cyclepath. The second view shows the trackbed fenced and complete with rolled slate fines and new cross drainage. The third view shows the trackbed ballasted and packs of sleepers ready for laying. The fourth view shows track laid and Dolgarrog in the distance collecting rails. Click on the images to enlarge. The first three images are copyright B.W.Hughes and were taken on a Kodak DX6490 digital camera. The fourth image is copyright Paul Wood. Images post processed using iPhoto Plus4 and displayed at 96dpi.

These southerly view (3/6/05, 15/10/06 and 26/11/06) near Ch.20900 show the final curve into the Nant Cwmcloch side valley. The second view shows the trackbed fenced and finished with rolled slate fines. The third view shows the trackbed ballasted and packs of sleepers ready for laying. Click on the images to enlarge. These images are copyright B.W.Hughes and were taken on a Kodak DX6490 digital camera. Images post processed using iPhoto Plus4 and displayed at 96dpi.

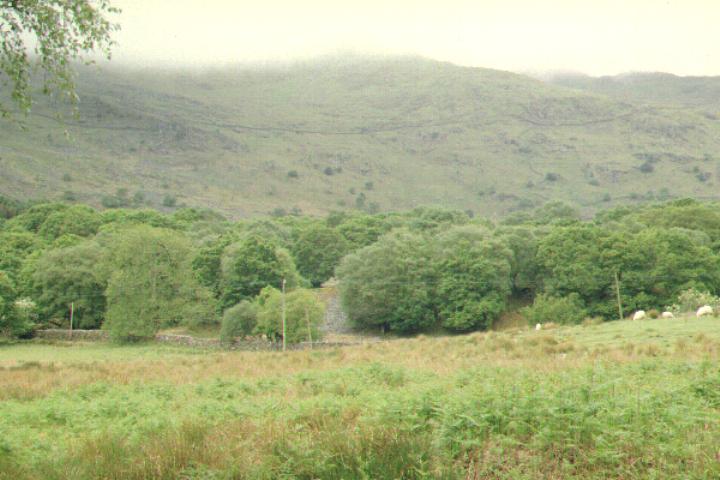
This northerly view (10/8/06) shows the railway alignment crossing open pastures approaching the Nant Cwmcloch valley. The trackbed runs along the line of pines and the PBSSR alignment is the other side of the narrow strip of pine trees in deep cutting at a lower level. Click on the image to enlarge. This image is copyright B.W.Hughes and was taken on a Kodak DX6490 digital camera. Image post processed using iPhoto Plus4 and displayed at 96dpi.
UB158/LC82
The alignment curves into the Nant Cwmcloch side valley and crosses the stream at a missing bridge which will be rebuilt at UB158. This is the start of the second S curve which terminates at Beddgelert station. The curve is necessary to lose height at 1 in 40 compared to the shorter, steeper PBSSR alignment to the east.

These northerly views (26/11/06 and 11/2/07) show the trackbed completed. The second view shows laid near UB157 but a shortage of sleepers of the appropriate type! Click on the images to enlarge. The first image is copyright B.W.Hughes and was taken on a Kodak DX6490 digital camera. The second image is copyright Paul Wood and was taken on a digital camera. Image post processed using iPhoto Plus4 and displayed at 96dpi.


These northerly views (3/6/05, 15/10/06, 26/11/06 and 11/2/07) at Ch.21100 shows the gate at the end of the pasture. The PBSSR is close by in the forest to the right below the trackbed. The second view shows the trackbed finished with rolled slate chips. The third view shows UB157 having additional work done before ballast could be completed over this section. The fourth view shows track laid but a shortage of sleepers of an appropriate type. Click on the images to enlarge. The first three images are copyright B.W.Hughes and were taken on a Kodak DX6490 digital camera. The fourth image is copyright Paul Wood and was taken on a digital camera. Images post processed using iPhoto Plus4 and displayed at 96dpi.
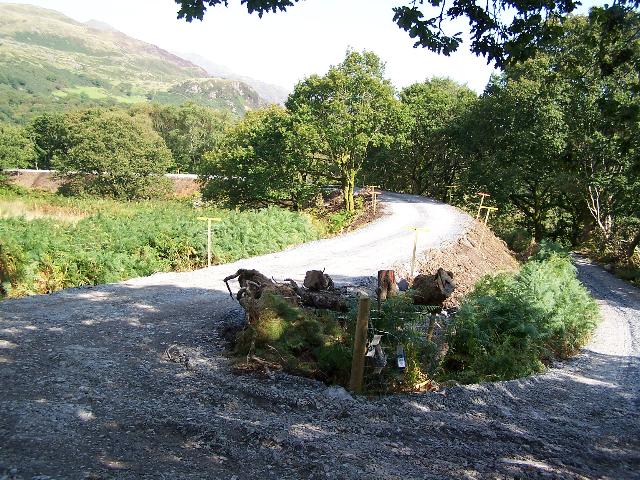
These southerly views (3/6/05, 15/7/06, 15/10/06 and 11/2/07) at Ch.21050 shows the curve approaching the public bridleway crossing LC82 and bridge UB158 over the Afon Cwmcloch. The second view shows the start of reconstruction with the construction base to the right. The third view shows the formation complete and the fourth view Dolgarrog at the Head of Steel. Click on the images to enlarge. These images are copyright B.W.Hughes and were taken on a Kodak DX6490 digital camera. Images post processed using iPhoto Plus4 and displayed at 96dpi.
This northerly view (11/2/07) shows tracklaying across UB157 approaching the Nant Cwmcloch valley. Gauge widening for the sharp curve is underway. Click on the image to enlarge. This image is copyright B.W.Hughes and was taken on a Kodak DX6490 digital camera. Image post processed using iPhoto Plus4 and displayed at 96dpi.
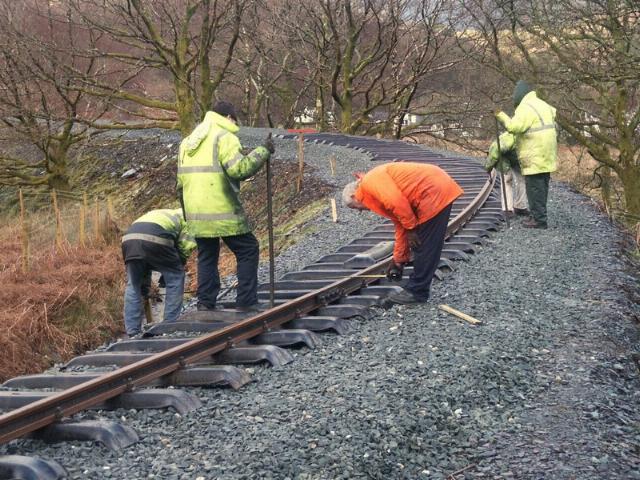
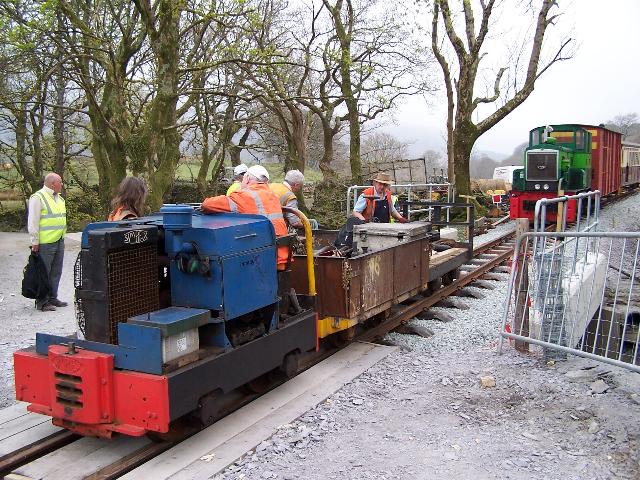
These northerly views (21/1/07, 11/2/07, 18/2/07 and 11/4/07) show ballast approaching LC82, the first crossing of the Nant Cwmcloch bridleway and the tracklaying gang laying pre-curved staggered rails at the Head of Steel just north of LC82 at the end of the weekend with Dolgarrog in attendance. The third view shows the track finished and the fourth view, Upnor Castle with the pw train. Click on the images to enlarge. These images are copyright B.W.Hughes and were taken on a Kodak DX6490 digital camera. Images post processed using iPhoto Plus4 and displayed at 96dpi.
Despite intermittent (and VERY cold!) rain, plus laying curved track on corners and using SAR sleepers with the bolts instead of the pandrol clips, 5.5 panels of track laid was good progress. The gang also spent time putting in missing sleepers/clips from previous ROTW gang track laying north of UB157, thus allowing a heavier locomotive to move south of UB158 for the first time.


These southerly views (21/1/07, 28/1/07 and 18/2/07) show ballast approaching LC82, with UB158 in the distance. The second view shows the trackbed finished and level crossing ballasted. The third view shows the level crossing completed with track progressing south. Fencing is still to be completed in this area. Click on the images to enlarge. The first image is copyright B.W.Hughes and was taken on a Kodak DX6490 digital camera. The second image is courtesy/copyright Ben Fisher and was taken on a Fuji S9500 digital camera. Images post processed using iPhoto Plus4 and displayed at 96dpi. Image post processed using iPhoto Plus4 and displayed at 96dpi.

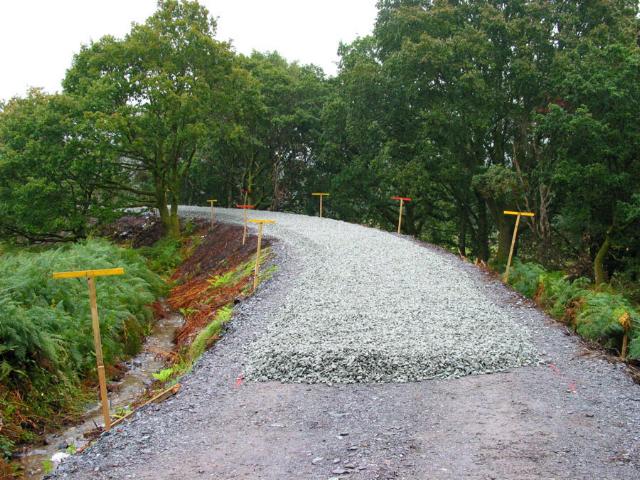
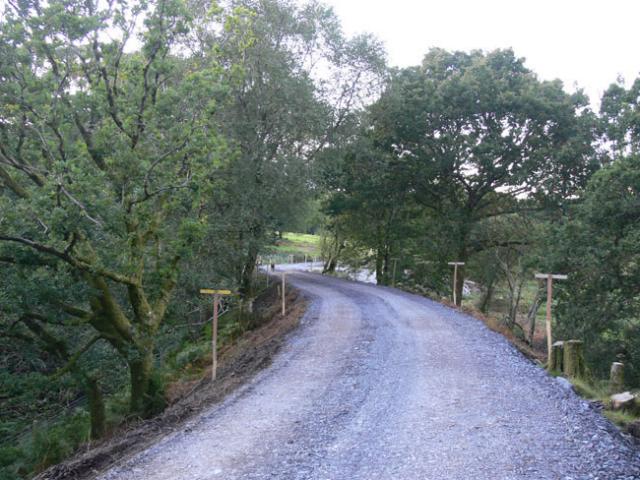
These northerly views (3/6/05, 15/7/06 and 18/4/07) at Ch.21100 show the trackbed curving to the north after crossing the public bridleway LC82. The second view shows the construction base set up to the left. The third view shows Upnor Castle with the new Romanian ballast wagon. Click on the image to enlarge. These images are copyright B.W.Hughes and were taken on a Kodak DX6490 digital camera. Images post processed using iPhoto Plus4 and displayed at 96dpi.
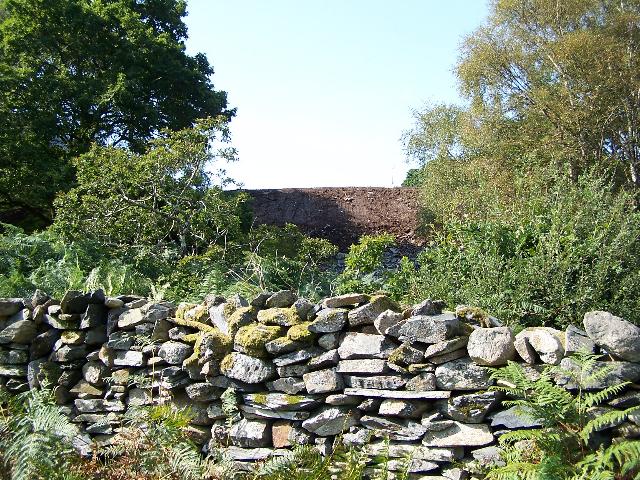
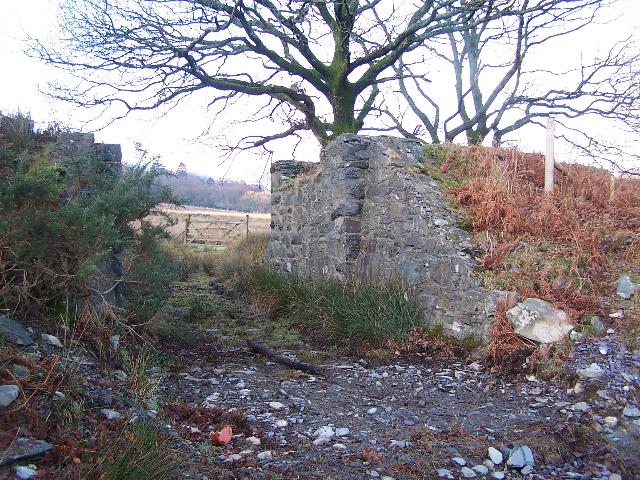
This easterly view (30/7/00) shows the abutments of UB158 where the railway crossed the Afon Cwmcloch. The reinforced concrete abutments are evidence that this section was completed under WHR auspices in 1923. The mature forest in this area could be cut down by the time the railway is opened as was the Pont Cae'r-Gors forest recently. Click on the image to enlarge. This image is copyright B.W.Hughes. Slide scan technology utilised is Olympus ES10 & iPhoto Plus4. Slide scanned at 200dpi.

This easterly view (15/7/06) shows a tree demolished to make temporary access across the bridge UB158 over the Afon Cwmcloch for the tree clearance team in March 2005. The abutment wing walls will need some strengthening. Click on the image to enlarge. This image is copyright B.W.Hughes and was taken on a Kodak DX6490 digital camera. Image post processed using iPhoto Plus4 and displayed at 96dpi.
These southerly views (10/8/06 and 10/9/06) show the formwork for the missing UB158 in place, one of three similar bridges that William Hughes is building. The second view shows the bridge deck complete at UB158. Beyond, the trackbed is cleared and William Hughes contractors are working on the lower S curve ass the track curves to the right. Click on the image to enlarge. This image is copyright B.W.Hughes and was taken on a Kodak DX6490 digital camera. Image post processed using iPhoto Plus4 and displayed at 96dpi.

This westerly view (3/6/05 and 2/12/06) at Ch.21150 shows a tree demolished to make temporary access across the bridge UB158 over the Afon Cwmcloch for the tree clearance team in March 2005. The wing wall is being replaced in the second view. Click on the images to enlarge. The first image is copyright B.W.Hughes and was taken on a Kodak DX6490 digital camera. The second image is copyright Laurence Armstrong. Images post processed using iPhoto Plus4 and displayed at 96dpi.
These southerly views (16/12/06, 23/12/06 and 21/1/07) show the retaining wall of UB158 over the Nant Cwmcloch nearing completion. In the second view work has started on the retraining wall on the southwest side as well. Ballast has been laid and sleepers stockpiled to within 10m of the bridge. Click on the images to enlarge. The first image is courtesy/copyright Ben Fisher and was taken on a digital camera. The second and third images are copyright B.W.Hughes and was taken on a Kodak DX6490 digital camera. Images post processed using iPhoto Plus4 and displayed at 96dpi.
These southerly views (21/1/07 and 11/2/07) show the completed UB158, the first Nant Cwmcloch bridge. The bridge is likely to be clad in local stone. About 10m beyond the bridge the completed ballast bed and sleepers can be seen. Click on the images to enlarge. These images are copyright B.W.Hughes and were taken on a Kodak DX6490 digital camera. Images post processed using iPhoto Plus4 and displayed at 96dpi.
These northerly views (26/11/06 and 15/6/07) show the view across the bridge UB158 over the Afon Cwmcloch with LC82 beyond. The first view shows the trackbed needed some levelling in this sector. The second view shows the completion of fencing of the level crossing at LC82, the uppermost of the Nant Cwmcloch bridleway crossings. Places of refuge have been created for the bridleway. Click on the images to enlarge. The first image is copyright B.W.Hughes and was taken on a Kodak DX6490 digital camera. The second image is courtesy/copyright John Ewing and was taken on a Fuji Finepix 1400 digital camera. Image post processed using iPhoto Plus4 and displayed at 96dpi.
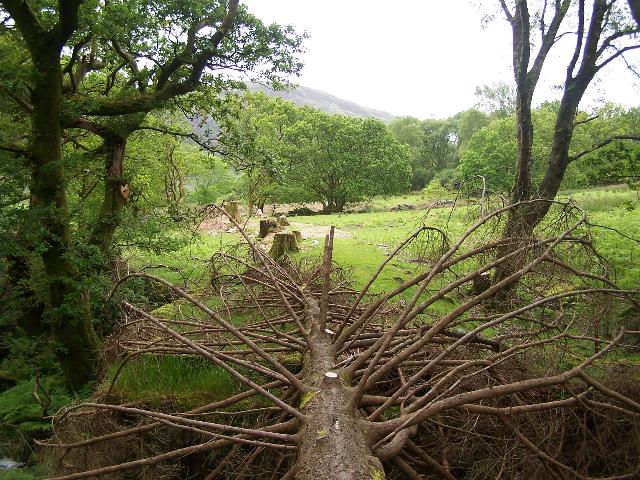
These southerly views (3/6/05, 15/7/06 and 18/2/07) at Ch.21150 shows the trackbed curving into the lower S curve. The tree in the foreground bridges UB158. The second view shows the route fenced and the third view Dolgarrog at the Head of Steel. Click on the images to enlarge. These images are copyright B.W.Hughes and were taken on a Kodak DX6490 digital camera. Images post processed using iPhoto Plus4 and displayed at 96dpi.

These northerly views (26/11/06, 18/2/07 and 25/2/07) shows the limit ballast laid south of UB159 at Ch.21198. The second view shows the Head of Steel some 80m south of LC82 on that date. The third view shows Conway Castle with coach 1001 being used unusually for the track gang. Click on the images to enlarge. The first and second images are copyright B.W.Hughes and was taken on a Kodak DX6490 digital camera. The third image is courtesy/copyright Jonathan Hall and was taken on a digital camera. Images post processed using iPhoto Plus4 and displayed at 96dpi.
These southerly views (26/11/06 and 18/2/07) show the trackbed ballasted and with sleepers spaced out along it at Ch.21200. The second view shows the Head of Steel on that day. Click on the images to enlarge. These images are copyright B.W.Hughes and was taken on a Kodak DX6490 digital camera. Images post processed using iPhoto Plus4 and displayed at 96dpi.

This easterly view (26/11/06) from Ch.21250 shows the two levels of the railway. The railway reverses direction sharply in Cutting Mawr and runs north at a lower level as the middle section of the Lower S curve. Beddgelert Station, where the railway runs south again, is just over the brow of the hill in the field beyond. Click on the image to enlarge. This image is copyright B.W.Hughes and was taken on a Kodak DX6490 digital camera. Image post processed using iPhoto Plus4 and displayed at 96dpi.

These northerly views (26/11/06, 25/2/07 and 17/3/07) show the ballast laid north from the site of LC83, an accommodation crossing at Ch.21300 that has apparently not been required by the farmer. The second view shows the Head of Steel at the end of the weekend approaching the deep cutting at the start of the Lower S Curve. The third view shows Conway Castle and the Phase 4 PW train at UB160, Ch21300, just at the start of Cutting Mawr. Click on the images to enlarge. The first image is copyright B.W.Hughes and was taken on a Kodak DX6490 digital camera. The second image is courtesy/copyright Jonathan Hall and was taken on a digital camera. The third view is courtesy/copyright John Ewing and was taken on a digital camera. Images post processed using iPhoto Plus4 and displayed at 96dpi.
Cutting Mawr
These southerly views (26/11/06 and 25/2/07) from Ch.21300 shows the ballast laid with 'Cutting Mawr' in the distance. The second view shows the Head of Steel approaching the cutting. Click on the images to enlarge. The first image is copyright B.W.Hughes and was taken on a Kodak DX6490 digital camera. The second image is courtesy/copyright Andrew Thomas and was taken on a digital camera. Images post processed using iPhoto Plus4 and displayed at 96dpi.
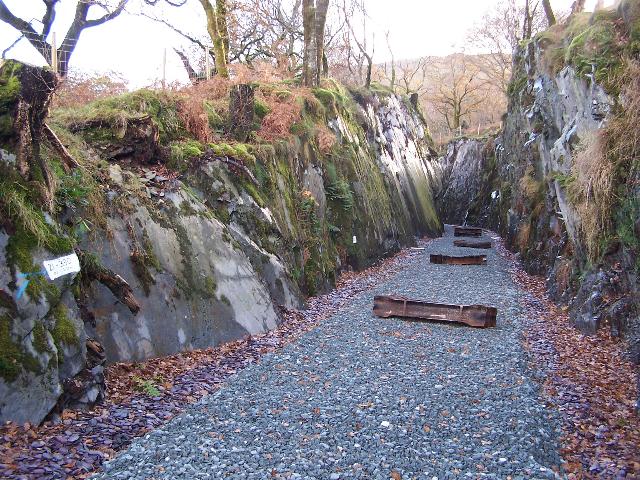
This southerly views (30/7/00, 22/9/06, 26/11/06 and 18/3/07) shows the start of the deep rock cutting at Ch21300. The cutting curves sharply to the left in the distance with sheer rock walls several metres high. The deeper section is filled with 60 years of leaf mulch perhaps deeper than a welly! The second view shows the scaling operation underway from a cherry-picker. The sheer slab visible on the east side of the cutting is unfortunately matched by a jagged surface on the right hand side. The cutting curves sharply to the left at the far end. The third view shows the trackbed ballasted through the cutting. Chainage markers are painted on the rock walls. The third image shows track laid and the Phase 4 Construction train lost in the depths of Cutting Mawr Click on the images to enlarge. The first and third images are copyright B.W.Hughes. The first image is a slide. Scan technology utilised is Olympus ES10 & iPhoto Plus4. Slide scanned at 200dpi. The second image is courtesy/copyright WHRCL's Pete Gray and was taken on a digital camera. The third image was taken on a Kodak DX6490 digital camera. The fourth image is courtesy/copyright Jim Comerford and was taken on a digital camera. Images post processed using iPhoto Plus4 and displayed at 96dpi.
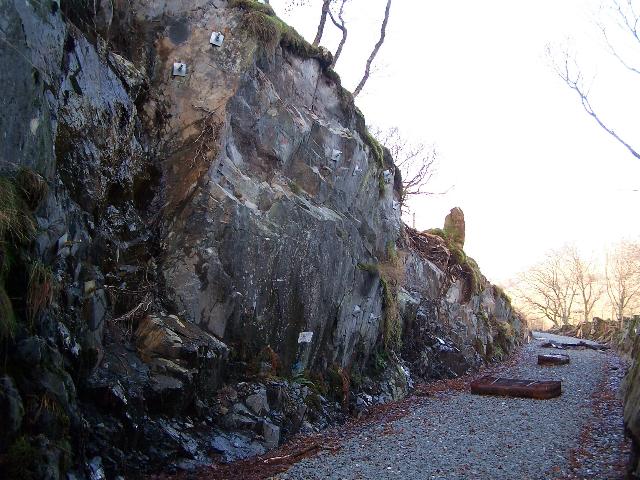
This northerly view (23/12/06) shows the extensive rockbolting at Ch.21400. On this western side of the cutting the grain of the rock undercuts the upper rock. Click on the image to enlarge. This image is copyright B.W.Hughes and was taken on a Kodak DX6490 digital camera. Image post processed using iPhoto Plus4 and displayed at 96dpi.
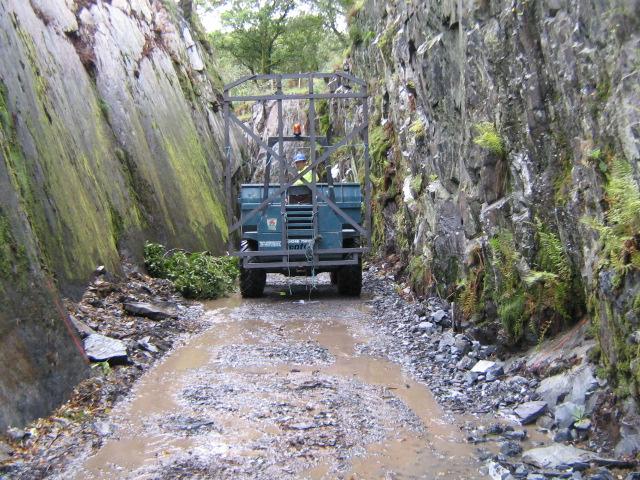
This southerly view (6/10/06) shows gauging underway with a gauge frame mounted on a dumper truck in the deep rock cutting on the Lower S Curve. The slab of rock on the left side is matched by a jagged face on the right hand side due to the cleavage plane of the rock. Click on the image to enlarge. This image is courtesy/copyright WHRCL and was taken on a digital camera. Image post processed using iPhoto Plus4 and displayed at 96dpi.
This southerly view (26/11/06) shows the completed 'Cutting Mawr' at Ch.21350. This may be the deepest cutting on the railway at around 10m deep. Click on the image to enlarge. This image is copyright B.W.Hughes and was taken on a Kodak DX6490 digital camera. Image post processed using iPhoto Plus4 and displayed at 96dpi.

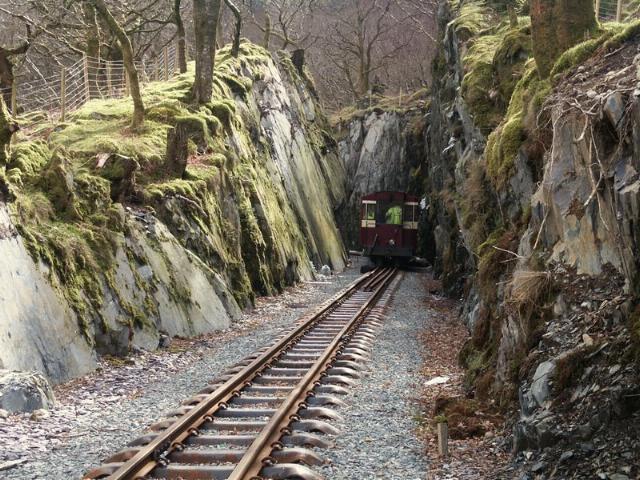
These northerly and southerly views (11/3/07) show rail laid in the straight deep section of Cutting Mawr. The first view shows Dolgarrog in action while the second view shows the length of the cutting from the north end. Click on the images to enlarge. These images are courtesy Tim Evans and were taken on a digital camera. Images post processed using iPhoto Plus4 and displayed at 96dpi.

This southerly view (11/3/07) shows the ROTW Gang laying track in the impressive 10m deep Cutting Mawr. Click on the image to enlarge. This image is courtesy Stuart McNair (WHRCL) and was taken on a digital camera. Image post processed using iPhoto Plus4 and displayed at 96dpi.

These northerly views (26/11/06 and 17/3/07) shows the completed 'Cutting Mawr' at Ch.21400. A concrete drain has been added on the west side to intercept water draining into the cutting from the hillside. The second view shows tracklaying at the start of the curve that reverses the direction from south to north in Cutting Mawr. Dolgarrog is in view with RRMs. Click on the images to enlarge. This image is copyright B.W.Hughes and was taken on a Kodak DX6490 digital camera. The second image is courtesy/copyright John Ewing and was taken on a digital camera. Image post processed using iPhoto Plus4 and displayed at 96dpi.

This southerly view (26/11/06) shows the completed 'Cutting Mawr' at Ch.21400. This is the only section that required reinforced concrete support. Click on the image to enlarge. This image is copyright B.W.Hughes and was taken on a Kodak DX6490 digital camera. Image post processed using iPhoto Plus4 and displayed at 96dpi.

This westerly view (30/7/00) is from the lip of the cutting at its deepest spot. Brown leaf mulch covering the floor of the cutting can be seen between the two trees. Click on the image to enlarge. This image is copyright B.W.Hughes. Slide scan technology utilised is Olympus ES10 & iPhoto Plus4. Slide scanned at 200dpi.

This northerly view (6/10/06) shows surveying underway in the Lower S Curve. Rock overhangs to the right. Click on the image to enlarge. This image is courtesy/ copyright WHRCL and was taken on a digital camera. Image post processed using iPhoto Plus4 and displayed at 96dpi.
This northerly view (6/10/06) shows the alignment being set out in Cutting Mawr, on the Lower S Curve. Click on the image to enlarge. This image is courtesy/ copyright WHRCL and was taken on a digital camera. Image post processed using iPhoto Plus4 and displayed at 96dpi.
This northerly view (7/4/07) shows the first stage of ballasting in Cutting Mawr and reveals the depth of the cutting. Click on the image to enlarge. This image is courtesy/copyright John Ewing and was taken on a digital camera. Image post processed using iPhoto Plus4 and displayed at 96dpi.

This northerly view (8/9/06) at Ch.21450 shows the cherry-picker at work during the scaling and bolting of the cutting. Click on the image to enlarge. This image is copyright Mike Jenkins and was taken on a digital camera. Image post processed using iPhoto Plus4 and displayed at 96dpi.
This northerly view (26/11/06) at Ch.21450 shows the completed 'Cutting Mawr' with netting pegged to the rock to retain any rock that works loose. The head of ballast is also visible. Click on the image to enlarge. This image is copyright B.W.Hughes and was taken on a Kodak DX6490 digital camera. Image post processed using iPhoto Plus4 and displayed at 96dpi.
This northerly view (1/4/07) from the rear of the Phase 4 train shows that Cutting Mawr has recently been ballasted to lock the track in position. Click on the image to enlarge. This image is courtesy Charles Gardner and was taken on a digital camera. Image post processed using iPhoto Plus4 and displayed at 96dpi.
The local farmer had been using the water supply for his herds and as a mitigation measure this was piped to ensure it did not mix with trackside drainage. Ballasting left a gap around LC84 in order to complete this work. LC84 itself was not required as an access track was constructed alongside the railway for the farmer's use.
These southerly views (26/11/06 and 23/12/06) show the completed 'Cutting Mawr' at Ch.21450. At the end of the cutting a stream has been piped to provide an ongoing water supply at the farmer's request. In the second view, a retaining wall has been added and the ballast completed. Click on the images to enlarge. These images are copyright B.W.Hughes and were taken on a Kodak DX6490 digital camera. Images post processed using iPhoto Plus4 and displayed at 96dpi.

This southerly view (6/10/06) shows gauging underway with a gauge frame mounted on a dumper truck in the recently cleared Cutting Mawr at Ch.21400, on the Lower S Curve. Click on the image to enlarge. This image is courtesy/ copyright WHRCL and was taken on a digital camera. Image post processed using iPhoto Plus4 and displayed at 96dpi.

These northerly views (26/11/06 and 26/12/06) show the work in hand to pipe the farmer's water supply at the south end of Cutting Mawr. Concrete drainage troughs have also been provided on the uphill side of the cutting. The ballast can just be seen in the distance and netting pinned to the rock face to retain any loose material. In the second view, a retaining wall has been built and the ballast completed. Click on the images to enlarge. These images are copyright B.W.Hughes and were taken on a Kodak DX6490 digital camera. Images post processed using iPhoto Plus4 and displayed at 96dpi.

These westerly views (10/9/06, 23/12/06 and 22/3/07) at LC84 (Ch.21500) show the years of debris in the deep rock cutting has now been excavated. The cutting will require new drainage channels. The second view shows the ballasting and drainage complete. The third view shows a test train for the Supporters' Special with Upnor Castle reaching the same location. Click on the images to enlarge. The first two images are copyright B.W.Hughes and were taken on a Kodak DX6490 digital camera. The third image is copyright John Ewing. Images post processed using iPhoto Plus4 and displayed at 96dpi.
This northerly view (18/3/07) shows track emerging from Cutting Mawr near the Head of Steel. Click on the image to enlarge. This image is courtesy/copyright Jim Comerford and was taken on a digital camera. Image post processed using iPhoto Plus4 and displayed at 96dpi.
This easterly view (18/3/07) shows the Head of Steel track curving onto the high embankment that returns the railway to a northerly direction in the middle of the Lower S curve. Click on the image to enlarge. This image is courtesy/copyright Jim Comerford and was taken on a digital camera. Image post processed using iPhoto Plus4 and displayed at 96dpi.
These easterly views (10/9/06, 17/9/06, 23/12/06 and 20/3/07) at LC84 (Ch.21500) show the formation complete as the trackbed curves around to the north. An alternative farm access road (right) has been provided from the Bryn Alyn bridleway along the east side of the foot of the embankment to LC84. The second view shows the trackbed ballasted. The third view shows the ballasting complete. Click on the images to enlarge. The first and third images are copyright B.W.Hughes and were taken on a Kodak DX6490 digital camera. The second image is courtesy/copyright Dave Waldren and was taken on a Canon G2 digital camera. The fourth image is courtesy/copyright John Ewing (WHRCL) and was taken on a digital camera. Images post processed using iPhoto Plus4 and displayed at 96dpi.

These easterly views (1923, 1934? and 7/4/07) show Russell on a three coach working first northbound, then southbound at Ch.21500, emerging from Cutting Mawr. The white building visible to the right of the loco in the first view is the Goat Hotel. It is noticeable how tree growth has obscured views from the railway in the last 80 years. The third view shows the track completed around the curve. Click on the images to enlarge. The first two images are copyright WHHG, courtesy David Allan and were taken on a film camera. The first image is attributed to Prendergast. The third view is courtesy John Ewing (WHRCL) and was taken on a digital camera. Images post processed using iPhoto Plus4 and displayed at 96dpi.
This westerly views (20/3/07) show the Head of Steel just east of UB161. Moel Hebog is covered in snow. Staggered rails are being used again because of the sharp 60m radius curve, where the railway turns from south to north. Click on the image to enlarge. This image is courtesy/copyright John Ewing (WHRCL) and was taken on a digital camera. Image post processed using iPhoto Plus4 and displayed at 96dpi.
This easterly view (26/11/06) shows the completed trackbed at Ch.21550. At this point the trackbed is curving sharply from south to north on a high embankment. Click on the image to enlarge. This image is copyright B.W.Hughes and was taken on a Kodak DX6490 digital camera. Image post processed using iPhoto Plus4 and displayed at 96dpi.

This westerly view (30/7/00) just east of LC84 shows the embankment made from the deep cutting previous. The tight curve reverses the direction of the railway from south to north. The curve is roughly 60 metres radius. Click on the image to enlarge. This image is copyright B.W.Hughes. Slide scan technology utilised is Olympus ES10 & iPhoto Plus4. Slide scanned at 200dpi.
This westerly view (10/9/06) from the public footpath shows the formation on high embankment at Ch.21600 as the trackbed curves around to the north. Click on the image to enlarge. This image is copyright B.W.Hughes and was taken on a Kodak DX6490 digital camera. Image post processed using iPhoto Plus4 and displayed at 96dpi.
These northerly views (8/9/06 and 25/3/07) at Ch.21600 show the trackbed complete at the end of the first part of the lower S curve, which is on a high embankment at this location and track laid with the Head of Steel for that weekend in view. Click on the images to enlarge. The first image is copyright Mike Jenkins and was taken on a digital camera. The second image is copyright B.W.Hughes and was taken on a Kodak DX690 digital camera. Images post processed using iPhoto Plus4 and displayed at 96dpi.
These southerly views (26/11/06 and 25/3/07) show the completed and ballasted trackbed at Ch.21600. This embankment was constructed from the rock produced by the 10m deep Cutting Mawr. Click on the images to enlarge. These images are copyright B.W.Hughes and were taken on a Kodak DX6490 digital camera. Images post processed using iPhoto Plus4 and displayed at 96dpi.
This southerly view (14/4/07) shows Upnor Castle descending at 1 in 40 towards UB164 in the middle section of the lower S curve at LC85. Click on the image to enlarge. This image is copyright B.W.Hughes and was taken on a Kodak DX6490 digital camera. Image post processed using iPhoto Plus4 and displayed at 96dpi.

These northerly views (26/11/06 and 1/4/07) show the completed and ballasted trackbed at Ch.21700 with a new accommodation crossing LC85. Sleepers have been placed along the ballast. The top level of the Lower S curve can be seen in the central upper part of this view. In the second view the Head of Steel has just crossed LC85. Click on the image to enlarge. The first image is copyright B.W.Hughes and was taken on a Kodak DX6490 digital camera. The second image is courtesy Charles Gardner and was taken on a digital camera. Image post processed using iPhoto Plus4 and displayed at 96dpi.

This northerly view (1/4/07) shows the Head of Steel north of LC85. The railway crosses the Nant Cwmcloch stream by the line of trees in the distance at UB164. Since this image was taken, the Tuesday Gang has laid another length reaching the straight section just beyond the Head of Steel. Click on the image to enlarge. This image is courtesy Charles Gardner and was taken on a digital camera. Image post processed using iPhoto Plus4 and displayed at 96dpi.

This northerly view (7/4/07) shows the Head of Steel as left by the Tuesday Gang on straight No.36 with the curve onto UB164 and LC86 visible in the distance. New ballast can be seen to have closed the gap over the Nant Cwmcloch bridleway leaving the trackbed free to extend rails next weekend into the section of the Lower S Curve where the railway reverses direction from north to south on the approaches Beddgelert station. Click on the image to enlarge. This image is courtesy/copyright John Ewing and was taken on a digital camera. Image post processed using iPhoto Plus4 and displayed at 96dpi.
This westerly view (10/9/06) from the public footpath shows the formation descending at 1 in 40 towards UB164 in the middle section of the lower S curve. Click on the image to enlarge. This image is copyright B.W.Hughes and was taken on a Kodak DX6490 digital camera. Image post processed using iPhoto Plus4 and displayed at 96dpi.
This westerly view (29/5/01) shows the WHR embankment in the woods west of Beddgelert station as viewed from the footpath near the Goat Hotel reservoir. Trains going to Caernarfon would actually be pointing south at this location as they rounded the sharp S curve. The original NWNGR Beddgelert station of 1901 was planned to terminate in this flat area. Click on the image to enlarge. This image is copyright B.W.Hughes. Slide scan technology utilised is Olympus ES10 & iPhoto Plus4. Slide scanned at 200dpi.

This northerly view (29/3/07) at Ch.21600 shows the track laid on a high embankment at this location. Click on the image to enlarge. This image is copyright Mike Jenkins and was taken on a digital camera. Image post processed using iPhoto Plus4 and displayed at 96dpi.
UB164
The middle bridge crossing the Nant Cwmcloch stream UB164 needed reconstructing as it had inadequate foundations. Here the railway is travelling north in the middle of the Lower S curve.
These southerly views (3/6/05, 15/7/06 and 1/10/06) at Ch.21850 show the bridge over the Afon Cwmcloch (UB164) and the farmer's track on the trackbed beyond. The trackbed rises at 1 in 40 onto an embankment 250m from here and swings very sharply in a semicircle in deep cutting to regain its northerly trend. The second view shows the route fenced and the third view, the trackbed finished with ballast in record time with a parallel farm track built to the east! Click on the images to enlarge. These images are copyright B.W.Hughes and were taken on a Kodak DX6490 digital camera. Images post processed using iPhoto Plus4 and displayed at 96dpi.
These northerly views (23/12/06 and 7/4/07) show the completed UB164. Some work is necessary to get the levels correct on LC86 immediately beyond into Farmyard Cutting. This had been done in late March and the trackbed was ballasted across UB164 and LC86. Click on the images to enlarge. The first image is copyright B.W.Hughes and was taken on a Kodak DX6490 digital camera. The second image is courtesy/copyright John Ewing and was taken on a digital camera. Images post processed using iPhoto Plus4 and displayed at 96dpi.
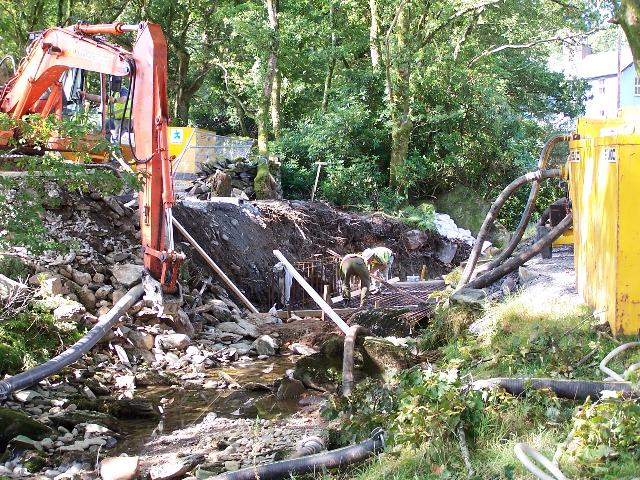

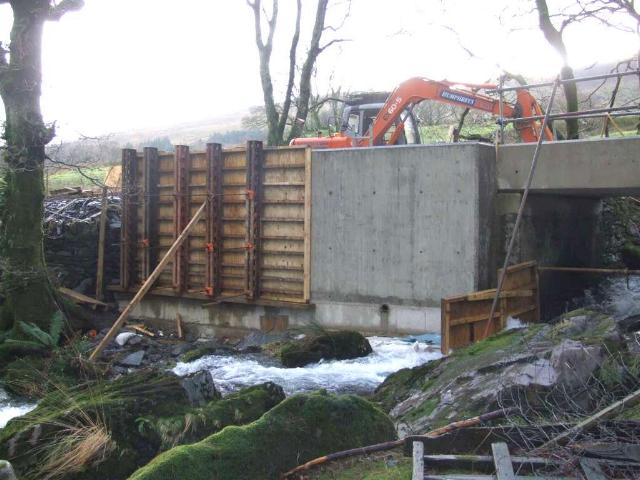
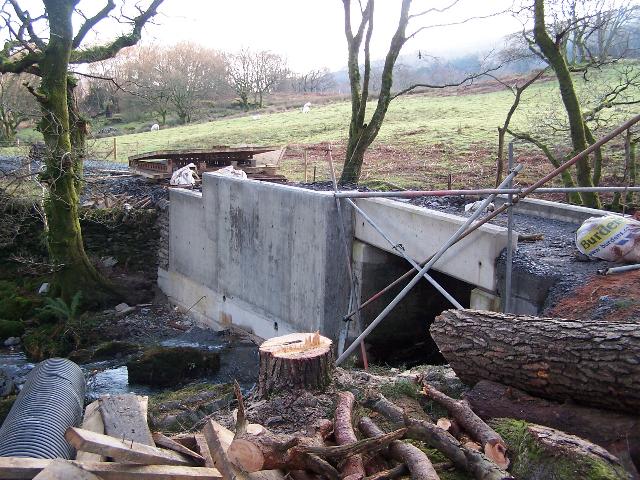
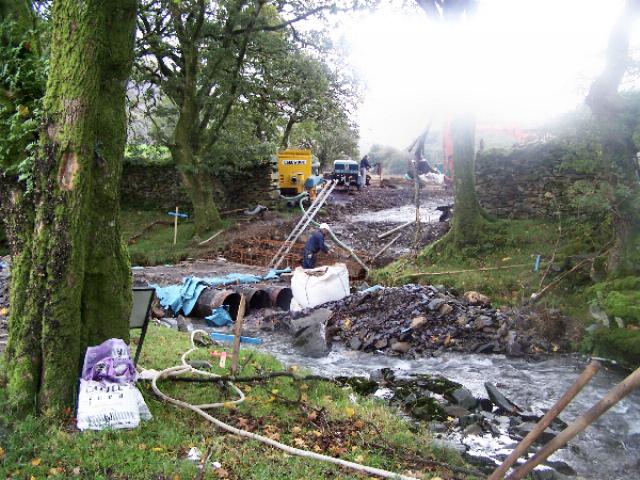
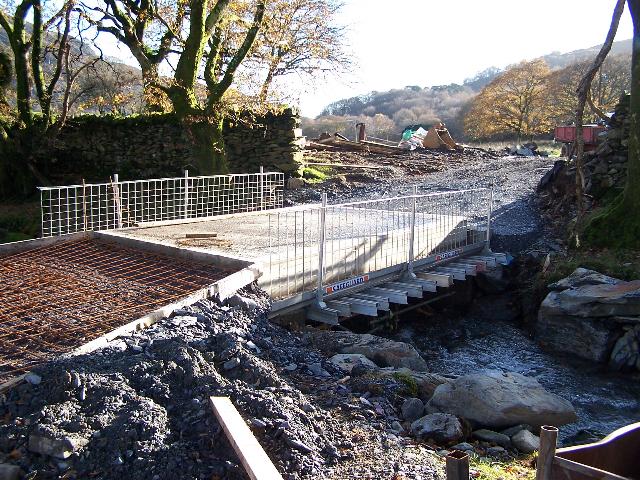
These westerly and easterly views (10/9/06, 16/9/06, 1/10/06 and 15/10/06) at UB164 (Ch.21850) show stages in reconstruction of UB164, the middle of the three Nant Cwmcloch bridges, now completed. The first view shows the construction (on a Sunday!) of the base slab reinforcing mesh of the middle bridge of the three Nant Cwmcloch bridges. The stream was being pumped around the site. The second view shows the completion of the abutments and the third view the ballast retaining upstands. The fourth view shows the completed deck. Click on the images to enlarge. These images are copyright B.W.Hughes and were taken on a Kodak DX6490 digital camera and a snapshot on a JVC camcorder. Images post processed using iPhoto Plus4 and displayed at 96dpi.
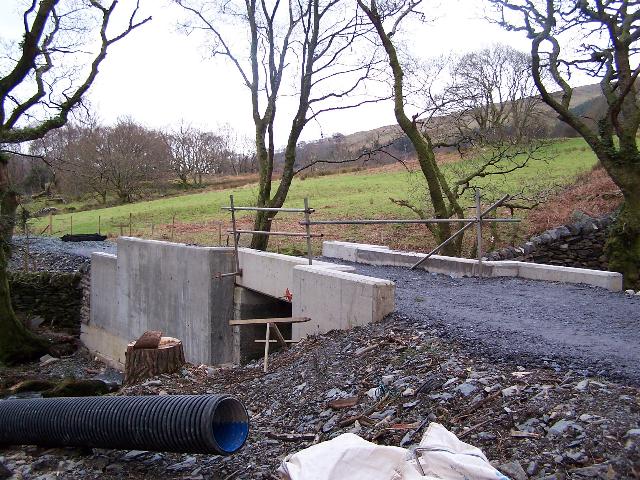
This westerly view (15/10/06) at Ch.20800 shows the completed UB164. Click on the image to enlarge. This image is copyright B.W.Hughes and was taken on a Kodak DX6490 digital camera. Image post processed using iPhoto Plus4. Image displayed at 96dpi.
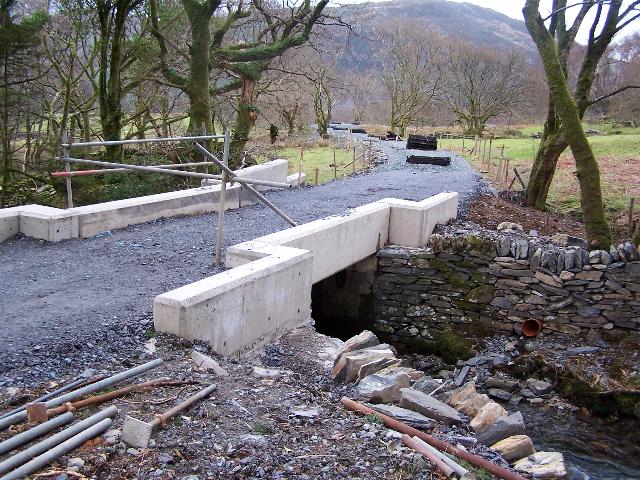
This southerly views (11/2/07 and 15/4/07) show the completed UB164, the middle Nant Cwmcloch bridge. Ballasting awaited regrading of the adjacent LC86. In the second view, the construction trains cross LC86 and UB164 at the end of the weekend's tracklaying. On the left can be seen the accommodation bridge across the same stream. Click on the image to enlarge. These images are copyright B.W.Hughes and were taken on a Kodak DX6490 digital camera. Images post processed using iPhoto Plus4 and displayed at 96dpi.
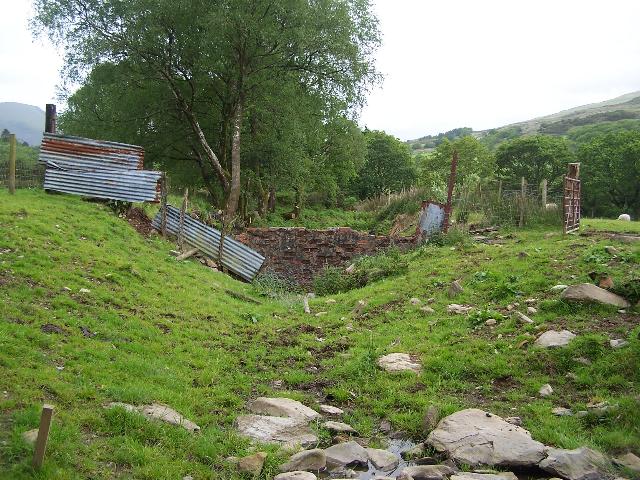
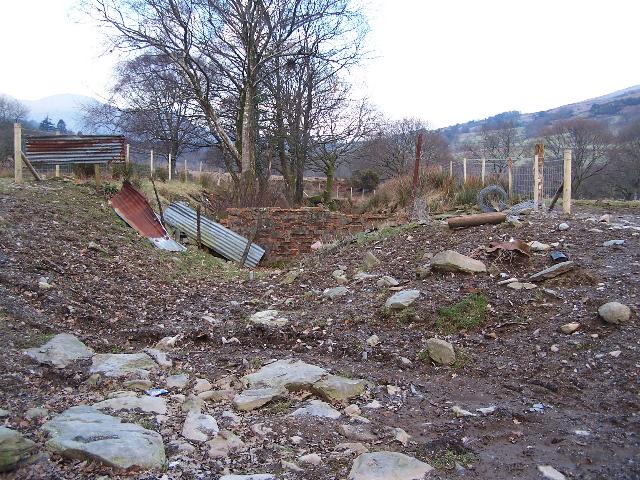
These northerly views (3/6/05 and 22/2/06) at Ch.21850 from LC86 on the public bridleway show the trackbed blocked by a farmer's wall construction. The alignment swings sharply to the east (right) and reverses direction after this point, joining with the original PBSSR alignment to enter Beddgelert station from the northwest. The second image shows the new fencing. Click on the image to enlarge. This image is copyright B.W.Hughes and was taken on a Kodak DX6490 digital camera. Image post processed using iPhoto Plus4. Image displayed at 96dpi.


These northerly views (10/8/06, 10/9/06, 15/10/06 and 2/4/07) show the excavated Farm Cutting at LC86. The second view shows the cutting has now been excavated and surveyed and the third view the cutting finished with side drains and rolled slate fines. There is a significant drop in the formation from UB164 over the LC86 and into this cutting, which is graded at the ruling grade of 1 in 40 that will no doubt be filled with ballast. The final view shows the regrading of LC86 in preparation for tracklaying in mid-April. Click on the image to enlarge. The first three images are copyright B.W.Hughes and were taken on a Kodak DX6490 digital camera. The fourth image is courtesy Alasdair Stewart (WHRCL) and was taken on a digital camera. Image post processed using iPhoto Plus4 and displayed at 96dpi.
These northerly views (3/4/07 and 15/4/07) show the completion of the ballast bed north of LC86, the middle Pont Alun bridleway crossing. In the distance the railway turns back from north to south having completed the middle leg of the Lower S curve. In the first view, a little more ballasting remained to be done on this date south of LC86 over UB164 to link up with the ballast bed close to the Head of Steel, to allow tracklaying in mid-April. The second view shows the Head of Steel on that day with Dolgarrog. Click on the image to enlarge. The first image is courtesy Ben Fisher and was taken on a digital camera. The second image is copyright B.W.Hughes and was taken on a Kodak DX6490 digital camera. Images post processed using iPhoto Plus4 and displayed at 96dpi.

This northerly view (15/4/07) shows the Head of Steel just north of LC86 at the end of the weekend's trackwork. Click on the image to enlarge. This image is copyright B.W.Hughes and was taken on a Kodak DX6490 digital camera. Image post processed using iPhoto Plus4 and displayed at 96dpi.
Farm stream bridge
A mitigation farm stream bridge has been constructed just east of UB164 as the farmer was previously using UB164. Initially a pipe bridge was provided, later replaced by a cast reinforced concrete structure.
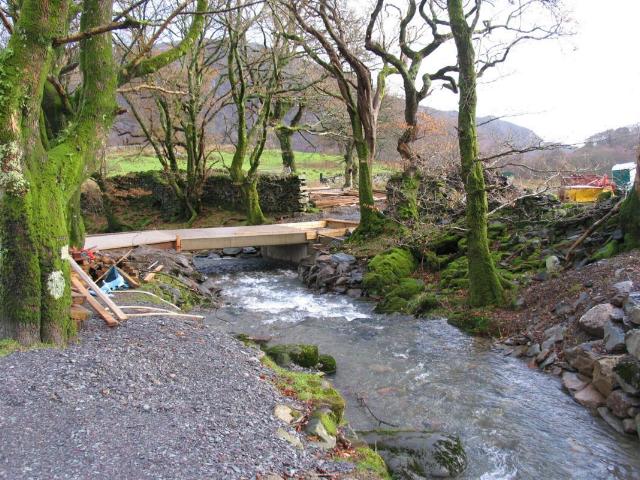

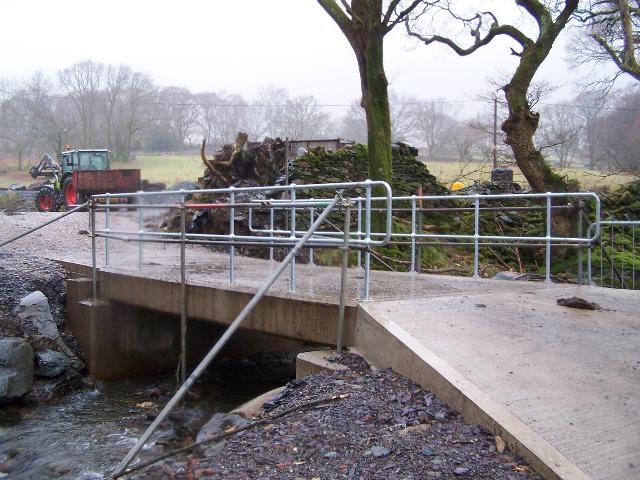
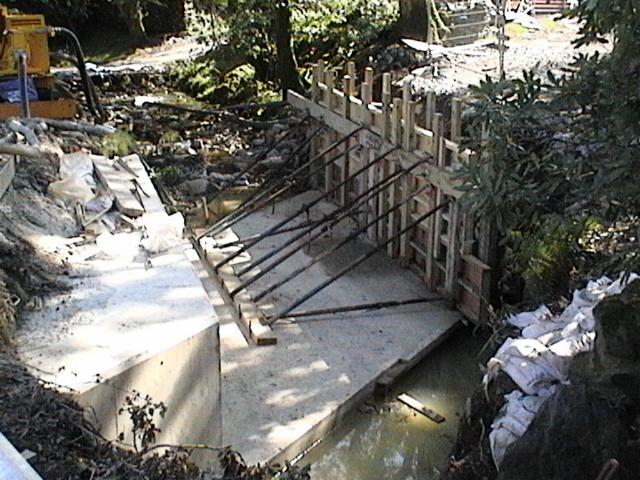
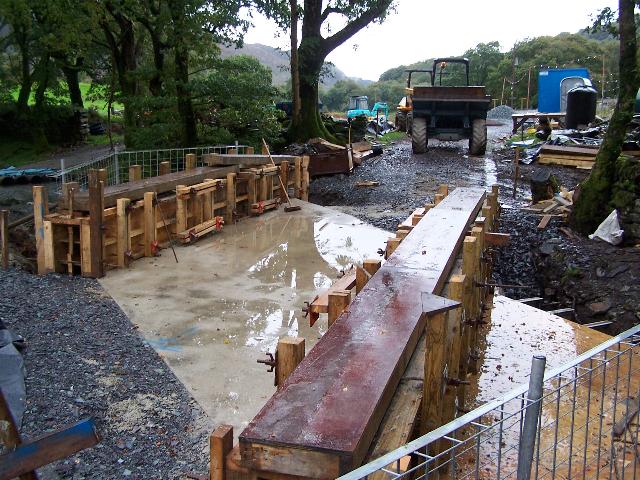
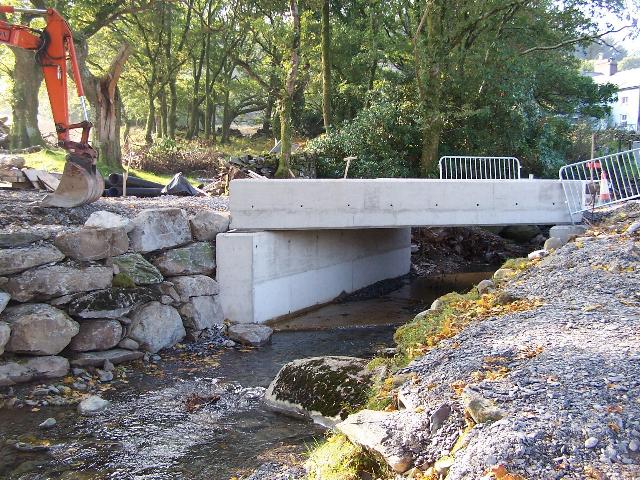
These southerly views (27/10/06, 26/11/06, 2/12/06, 10/12/06 and 11/2/07) show the contractor making the formwork and reinforcement for the south abutment of the farmer's replacement bridge across the Nant Cwmcloch. The temporary pipe bridge is being replaced. The approach ramps are also being replaced. A reinforced concrete pan is being provided both sides of the stream. The fifth image shows the completed bridge. Click on the images to enlarge. The first image is courtesy/copyright Chris Price and was taken on a digital camera. The second, fourth and fifth images are copyright B.W.Hughes and were taken on a Kodak DX6490 digital camera. The third image is copyright Laurence Armstrong and was taken on a digital camera. Images post processed using iPhoto Plus4 and displayed at 96dpi.
Beddgelert station approaches
The alignment now completes the Lower S Curve by turning from north to south in an easier bend, partly alongside the PBSSR. It sweeps around the Cwm Cloch Isaf farm in a semicircle. The alignment joins the PBSSR alignment just north of the farm and curves onto the approach embankment to the station, running parallel now with the Afon Colwyn and the main road approaching Beddgelert from the north. The trackbed was completed during Autumn 2006 but was left clear of ballast to allow access to help finish UB165 in 2007. Ballast was completed in the first week of April.
These southerly views (23/12/06 and 15/4/07) show the completed trackbed at Ch.21900 (Farmyard Cutting). In the first view LC86 requiring lowering adjacent to UB164. In the second view the trackbed is ballasted and the Head of Steel that weekend is visible. Click on the images to enlarge. These images are copyright B.W.Hughes and were taken on a Kodak DX6490 digital camera. Images post processed using iPhoto Plus4 and displayed at 96dpi.
This northerly view (23/12/06) shows the completed and ballasted trackbed at Ch.21900 (Farmyard Cutting) with the route curving to join the alignment of the PBSSR, visible in the distance. Click on the image to enlarge. This image is copyright B.W.Hughes and was taken on a Kodak DX6490 digital camera. Image post processed using iPhoto Plus4 and displayed at 96dpi.
This northerly view (23/12/06) shows the PBSSR bridge abutments adjacent to LC87 at Ch.21940. This level crossing has not been required by the farmer. Click on the image to enlarge. This image is copyright B.W.Hughes and was taken on a Kodak DX6490 digital camera. Image post processed using iPhoto Plus4 and displayed at 96dpi.

This easterly views (23/12/06 and 21/4/07) show the completed and ballasted trackbed at Ch.22000 with the PBSSR alignment dropping steeply at 1 in 23 to join the 1 in 40 WHR alignment. The second image shows ballast laid and the Head of Steel on that day. Concrete catch-pits have been cast for LC87. Click on the images to enlarge. The first images is copyright B.W.Hughes and was taken on a Kodak DX6490 digital camera. The second image is copyright John Ewing and was taken on a digital camera. Images post processed using iPhoto Plus4 and displayed at 96dpi.
These westerly views (23/12/06) show Cwmcloch Farm curve on the final part of the Lower S curve at LC87, where the track reverses direction from north to south again. The contractors found a trackside water main that probably fed the Beddgelert stabling point water tank. In the second view concrete catch-pits were cast either side of LC87 as this is a crossing that will be used by herds of cows. The trackbed has been ballasted and sleepers laid out ready for the tracklaying in April. Click on the image to enlarge. This image is copyright B.W.Hughes and was taken on a Kodak DX6490 digital camera. Image post processed using iPhoto Plus4 and displayed at 96dpi.
This northerly view (23/5/07) shows the completion of the catch-pits with grids at LC87 as livestock will cross the railway here from Cwmcloch farm. In the background is the former PBSSR formation and bridge. Click on the image to enlarge. This image is courtesy Alasdair Stewart (WHRCL) and was taken on a digital camera. Image post processed using iPhoto Plus4 and displayed at 96dpi.
This easterly view (5/5/07) shows Upnor Castle at Ch.22000 with Cwmcloch Farm in the background and the steeper PBSSR formation to the right. The difference in profile between coach No.1000 and the ex-SAR van can be clearly seen. At this point the railway is reversing direction again in the second half of the Lower S curve from north to south to enter Beddgelert Station. Click on the image to enlarge. This image is courtesy/copyright Andrew Thomas and was taken on a digital camera. Image post processed using iPhoto Plus4 and displayed at 96dpi.
This easterly view (21/4/07) shows the Head of Steel just east of LC87. Staggered rails are being used again because of the sharp 60m radius curve, where the railway turns from north to south. This view was taken from the PBSSR formation and shows the PBSSR's 1 in 23 formation dropping more steeply than the 1 in 43 WHR section until they both join at the same level just north of UB165. Click on the image to enlarge. This image is courtesy/copyright John Ewing and was taken on a digital camera. Image post processed using iPhoto Plus4 and displayed at 96dpi.
This westerly view (23/12/06) shows the final part of the Lower S curve at Ch.22000. The PBSSR formation (right) is dropping steeply to join the WHR formation. Click on the image to enlarge. This image is copyright B.W.Hughes and was taken on a Kodak DX6490 digital camera. Image post processed using iPhoto Plus4 and displayed at 96dpi.
These northerly views (23/12/06 and 4/4/07) show the final part of the Lower S Curve at Ch.22100. Spare material has been used to strengthen the embankment on the west side. The second view shows the trackbed ballasted and sleepers laid out ready for tracklaying in April. Click on the images to enlarge. The first image is copyright B.W.Hughes and was taken on a Kodak DX6490 digital camera. The second image is courtesy Alasdair Stewart (WHRCL) and was taken on a digital camera. Images post processed using iPhoto Plus4 and displayed at 96dpi.
This southerly view (23/12/06 and 7/4/07) shows the final part of the Lower S curve at Ch.22100 just north of the fenced off gap at where UB165 will be constructed over the Pont Alun bridleway. The early stages of Beddgelert Station clearance works are visible beyond the bridge. The second view shows the bridge completed and trackbed ballasted up to the bridge. Click on the image to enlarge. The first image is copyright B.W.Hughes and was taken on a Kodak DX6490 digital camera. The second image is courtesy/copyright John Ewing (WHRCL) and was taken on a digital camera. Image post processed using iPhoto Plus4 and displayed at 96dpi.
This southerly Easter roadside view shows the railway embankment covered with trees approaching Beddgelert from the north on the far side of the Afon Colwyn. A cattle feeder trough is visible denoting track level about 1/4 in from the right of the view just above the middle. Click on the image to enlarge. This image is copyright B.W.Hughes. Slide scan technology utilised is Olympus ES10 & iPhoto Plus4. Slide scanned at 96dpi.
The railway alignment crosses over a bridleway (UB165) and Afon Cwmcloch (UB166) in quick succession as it reverses direction at the end of the S curve and heads south-east into the station.

This westerly Easter view at UB165 shows the railway embankment covered with trees approaching Beddgelert from the north. A circular cattle feeder is visible at track level just above the wooden gatepost. Click on the image to enlarge. This image is copyright B.W.Hughes. Slide scan technology utilised is Olympus ES10 & iPhoto Plus4. Slide scanned at 96dpi.
Click here to visit Beddgelert Station Area page
Click here to return to the Stop Press Page
Site Development
If you have suggestions for development of this site, please contact me by email at the address on the Stop Press page.
Comments
Please add comments in my Guestbook on the Stop Press page.
Page Version 4.14 Dated 1/7/07